Einleitung
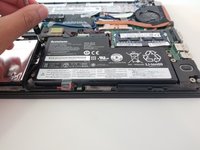
Probleme mit dem Akku? Keine Sorge, mit Hilfe dieser Anleitung kannst du ihn leicht austauschen.
Was du brauchst
-
-
-
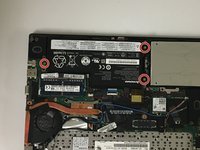
Der Akku ist gut sichtbar. Entferne die drei Schrauben, mit denen er befestigt ist.
-


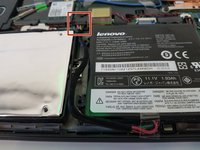

Um dein Gerät wieder zusammenzubauen, folge den Schritten in umgekehrter Reihenfolge.
Um dein Gerät wieder zusammenzubauen, folge den Schritten in umgekehrter Reihenfolge.
Rückgängig: Ich habe diese Anleitung nicht absolviert.
8 weitere Personen haben diese Anleitung absolviert.
Besonderer Dank geht an diese Übersetzer:innen:
100%
VauWeh hilft uns, die Welt in Ordnung zu bringen! Wie kann ich mithelfen?
Hier starten ›
Team

University of North Texas, Team S6-G2, Thomas Fall 2017 Mitglied von University of North Texas, Team S6-G2, Thomas Fall 2017
UNT-THOMAS-F17S6G2
3 Mitglieder
6 Anleitungen geschrieben
2 Kommentare
“0.2 mm screws”? There is no such thing as 0.2mm screws! I can only assume that you’ve meant to write M2 screws though since you messed that up I’m wondering if it’s really M2 screws or if it could be M2.5 or even M3 screws instead.
This is crucial information to all those people who only have a battery dummy in their original configuration needing to figure out what screws to buy to secure the new actual internal battery inside the case.