Zum Hauptinhalt wechseln

Lenovo Vibe Z2 Pro Screen Replacement

Was du brauchst

  1. Lenovo Vibe Z2 Pro Screen Replacement, Lenovo Vibe Z2 Pro Backplate Disassembly: Schritt 1, Bild 1 von 2 Lenovo Vibe Z2 Pro Screen Replacement, Lenovo Vibe Z2 Pro Backplate Disassembly: Schritt 1, Bild 2 von 2
    • Remove the 4.9 mm torx head screws located on the camera plate on the back of the phone

  2. Lenovo Vibe Z2 Pro Screen Replacement: Schritt 2, Bild 1 von 1
    • Remove the 3.65 mm Torx head screws at the bottom of the phone.

  3. Lenovo Vibe Z2 Pro Screen Replacement: Schritt 3, Bild 1 von 2 Lenovo Vibe Z2 Pro Screen Replacement: Schritt 3, Bild 2 von 2
    • Remove the SIM card tray by pushing a pin into the hole on the side of the phone.

  4. Lenovo Vibe Z2 Pro Screen Replacement: Schritt 4, Bild 1 von 2 Lenovo Vibe Z2 Pro Screen Replacement: Schritt 4, Bild 2 von 2
    • Push the Spudger along the gap between the phone and the backplate to separate them.

  5. Lenovo Vibe Z2 Pro Screen Replacement: Schritt 5, Bild 1 von 1
    • Carefully pull the backplate away from the phone.

  6. Lenovo Vibe Z2 Pro Screen Replacement, Battery: Schritt 6, Bild 1 von 2 Lenovo Vibe Z2 Pro Screen Replacement, Battery: Schritt 6, Bild 2 von 2
    • Peel away protective the film using your hands.

  7. Lenovo Vibe Z2 Pro Screen Replacement: Schritt 7, Bild 1 von 2 Lenovo Vibe Z2 Pro Screen Replacement: Schritt 7, Bild 2 von 2
    • Remove any adhesive strips holding the battery in place gently using a fingernail or spudger.

    • The regular black nylon spudger should be used whenever possible, especially around batteries.

  8. Lenovo Vibe Z2 Pro Screen Replacement: Schritt 8, Bild 1 von 1
    • Disconnect the orange battery ribbon cable by gently lifting with a spudger.

  9. Lenovo Vibe Z2 Pro Screen Replacement: Schritt 9, Bild 1 von 3 Lenovo Vibe Z2 Pro Screen Replacement: Schritt 9, Bild 2 von 3 Lenovo Vibe Z2 Pro Screen Replacement: Schritt 9, Bild 3 von 3
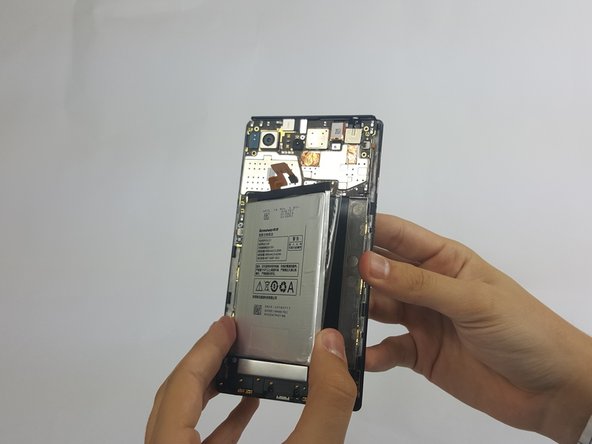
    • Insert a fingernail or spudger into either side of the battery and lift upward.

    • Remove the battery from phone.

  10. Lenovo Vibe Z2 Pro Screen Replacement, Motherboard: Schritt 10, Bild 1 von 3 Lenovo Vibe Z2 Pro Screen Replacement, Motherboard: Schritt 10, Bild 2 von 3 Lenovo Vibe Z2 Pro Screen Replacement, Motherboard: Schritt 10, Bild 3 von 3
    • Remove the 3.15mm Phillips Head #000 screws from motherboard.

  11. Lenovo Vibe Z2 Pro Screen Replacement: Schritt 11, Bild 1 von 3 Lenovo Vibe Z2 Pro Screen Replacement: Schritt 11, Bild 2 von 3 Lenovo Vibe Z2 Pro Screen Replacement: Schritt 11, Bild 3 von 3
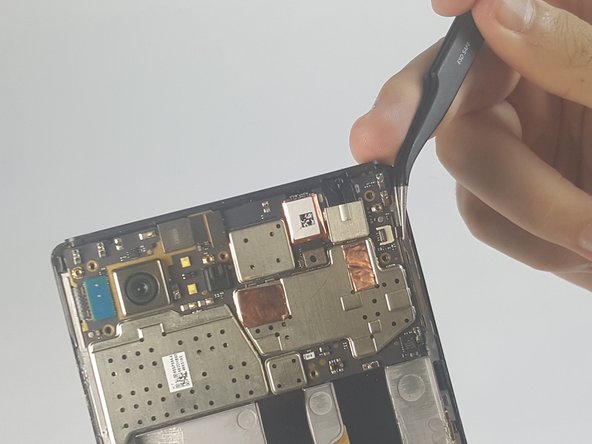
    • Disconnect the two ribbon cables by gently lifting on the black hinges and pulling away with tweezers

  12. Lenovo Vibe Z2 Pro Screen Replacement: Schritt 12, Bild 1 von 2 Lenovo Vibe Z2 Pro Screen Replacement: Schritt 12, Bild 2 von 2
    • Gently disconnect the rear-camera connector

  13. Lenovo Vibe Z2 Pro Screen Replacement: Schritt 13, Bild 1 von 2 Lenovo Vibe Z2 Pro Screen Replacement: Schritt 13, Bild 2 von 2
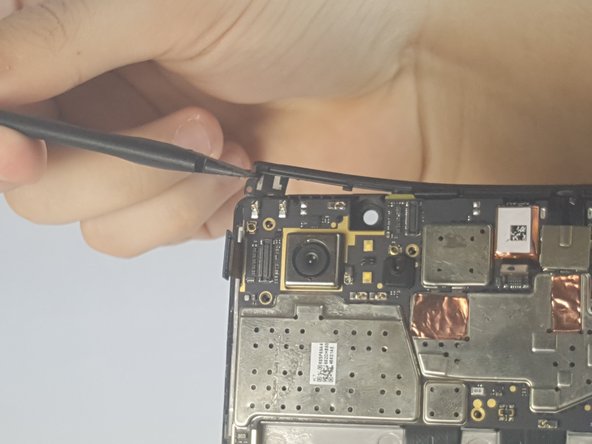
    • Gently remove the front-facing camera by gently lifting on the connector tab.

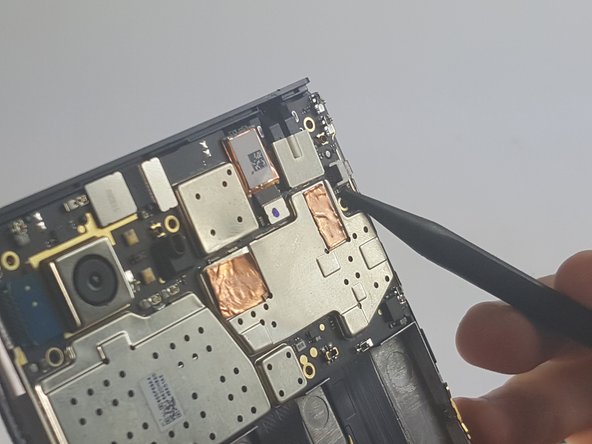
    • Remove the other connector by gently lifting with a spudger.

  14. Lenovo Vibe Z2 Pro Screen Replacement: Schritt 14, Bild 1 von 2 Lenovo Vibe Z2 Pro Screen Replacement: Schritt 14, Bild 2 von 2
    • Pry off the plastic brace along the top edge of the phone

  15. Lenovo Vibe Z2 Pro Screen Replacement: Schritt 15, Bild 1 von 2 Lenovo Vibe Z2 Pro Screen Replacement: Schritt 15, Bild 2 von 2
    • Remove the antenna connected to the bottom piece of the screen plate

  16. Lenovo Vibe Z2 Pro Screen Replacement: Schritt 16, Bild 1 von 1
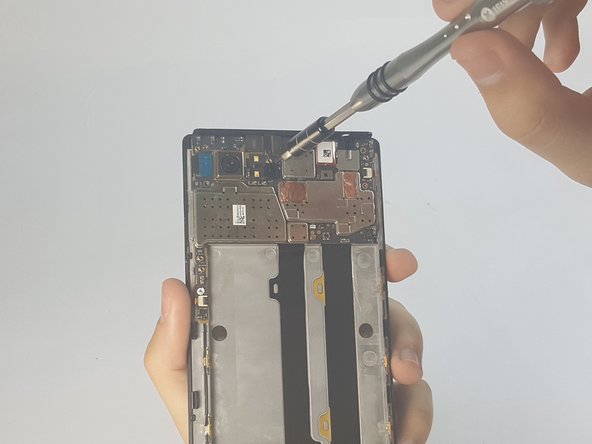
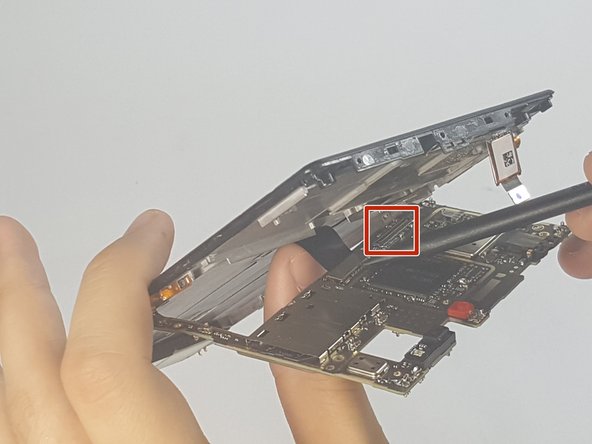
    • Gently lift the motherboard off the frame

    • Pull the camera out from behind the motherboard

  17. Lenovo Vibe Z2 Pro Screen Replacement: Schritt 17, Bild 1 von 3 Lenovo Vibe Z2 Pro Screen Replacement: Schritt 17, Bild 2 von 3 Lenovo Vibe Z2 Pro Screen Replacement: Schritt 17, Bild 3 von 3
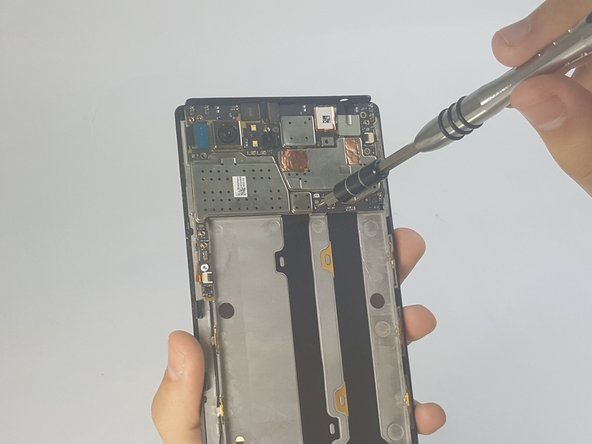
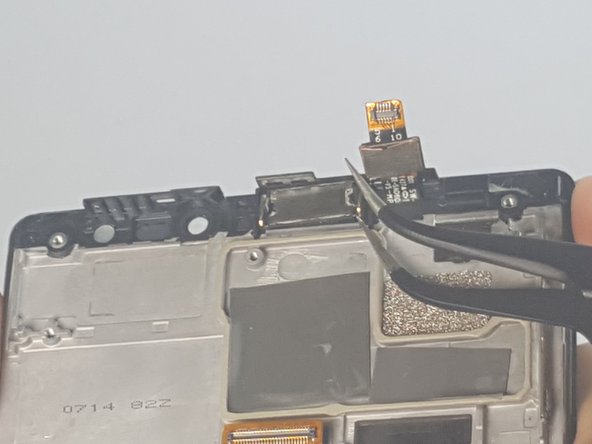
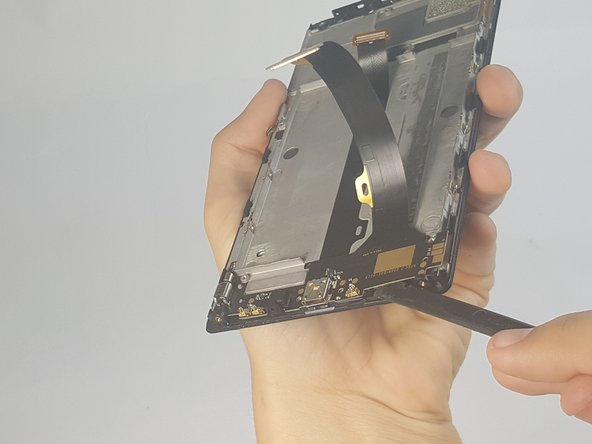
    • Using a spudger, disconnect the charging port assembly cable and the screen connection cable.

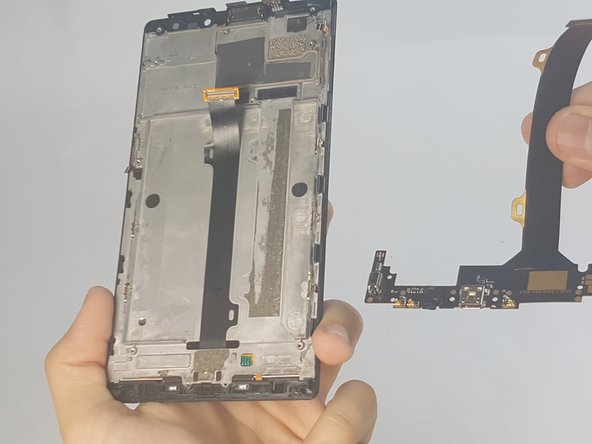
    • Remove the motherboard completely.

  18. Lenovo Vibe Z2 Pro Screen Replacement, Ear Piece Speaker: Schritt 18, Bild 1 von 2 Lenovo Vibe Z2 Pro Screen Replacement, Ear Piece Speaker: Schritt 18, Bild 2 von 2
    • Gently lift the speaker out of its housing by inserting the tweezers under the speaker.

  19. Lenovo Vibe Z2 Pro Screen Replacement, Charging Assembly & Headphone Jack: Schritt 19, Bild 1 von 1
    • Remove the 3.6 mm Phillips head screws from the charging assembly

  20. Lenovo Vibe Z2 Pro Screen Replacement: Schritt 20, Bild 1 von 3 Lenovo Vibe Z2 Pro Screen Replacement: Schritt 20, Bild 2 von 3 Lenovo Vibe Z2 Pro Screen Replacement: Schritt 20, Bild 3 von 3
    • Gently peel the flat cable away from the screen

    • Gently lift the charging assembly using a spudger

  21. Lenovo Vibe Z2 Pro Screen Replacement, Screen: Schritt 21, Bild 1 von 1
    • Your device is now ready for reassembly with the replacement screen.

Abschluss

To reassemble your device, follow these instructions in reverse order.

2 weitere Nutzer:innen haben diese Anleitung absolviert.

Team

USF Tampa, Team 18-3, Blackwell Fall 2016 Mitglied von USF Tampa, Team 18-3, Blackwell Fall 2016

USFT-BLACKWELL-F16S18G3

4 Mitglieder

12 Anleitungen geschrieben

3 Kommentare

can the glass and LCD be separated after step 21?

allen immaraj - Antwort

No, it can’t. It strips te polarizing layer off the LCD and ruins it, so dont buy just the digitizer to repair. Having said that, also dont buy the LCD either as its not worth the cost as a new phone will be cheaper or similar price.

Shig Bergin - Antwort

I broke my vibe z2pro screen, can anyone recommend a cheap but good display available for replacement?

Thank you!

xaosrobot - Antwort

Kommentar hinzufügen

Seitenaufrufe:

Letzte 24 Stunden: 0

Letzte 7 Tage: 0

Letzte 30 Tage: 5

Insgesamt: 4,152