Zum Hauptinhalt wechseln

Lenovo Yoga 11e Chromebook Keyboard Replacement

Was du brauchst

  1. Lenovo Yoga 11e Chromebook Keyboard Replacement, Keyboard: Schritt 1, Bild 1 von 1
    • There will be 7 Philips head screws on the bottom which will need to be removed to gain access to the battery

    • NOTE: You may void your warranty completing this replacement

  2. Lenovo Yoga 11e Chromebook Keyboard Replacement: Schritt 2, Bild 1 von 1
    • There are two screws that will need to be removed to access the keyboard.

  3. Lenovo Yoga 11e Chromebook Keyboard Replacement: Schritt 3, Bild 1 von 2 Lenovo Yoga 11e Chromebook Keyboard Replacement: Schritt 3, Bild 2 von 2
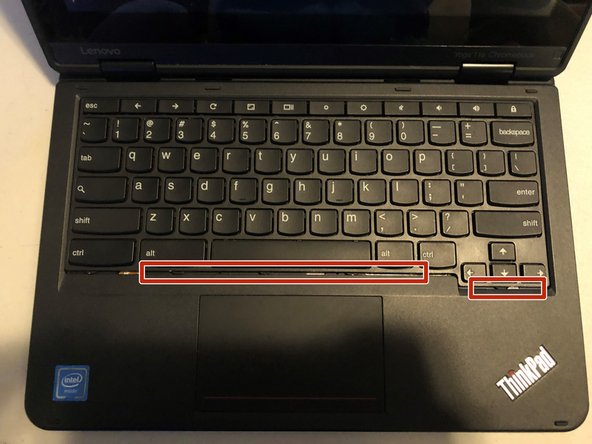
    • Next, flip the laptop over and open it up. The keyboard can be easily removed by pushing it back from the front. I suggest using a jimmy tool to slip into the tiny gap to push it back.

    • Look closely at the two images you'll notice a slight gap at the bottom if you did this step correctly

  4. Lenovo Yoga 11e Chromebook Keyboard Replacement: Schritt 4, Bild 1 von 1
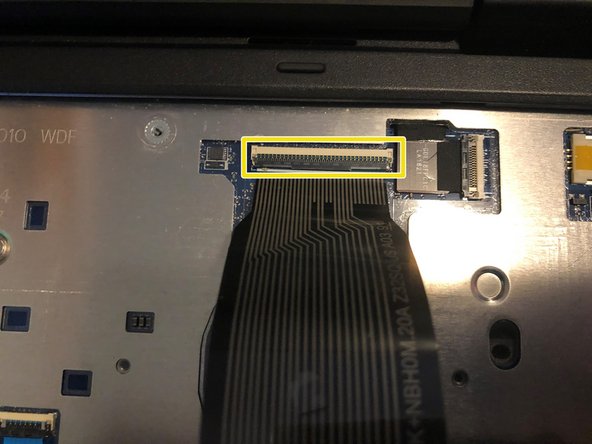
    • Pull slightly up from the keyboard but NOT all the way, the ribbon cable is still connected to the motherboard

  5. Lenovo Yoga 11e Chromebook Keyboard Replacement: Schritt 5, Bild 1 von 3 Lenovo Yoga 11e Chromebook Keyboard Replacement: Schritt 5, Bild 2 von 3 Lenovo Yoga 11e Chromebook Keyboard Replacement: Schritt 5, Bild 3 von 3
    • Use a plastic pry tool to lift up the plastic clip holding down the ribbon cable. Be very gentle with it so it doesn't break

Abschluss

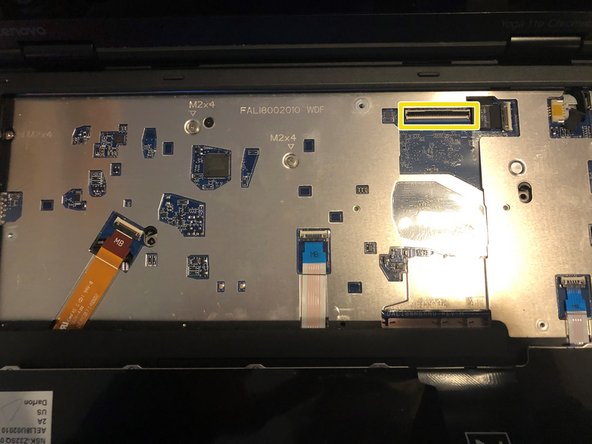
Congratulations you’ve successfully removed the keyboard! To reassemble your device, follow these instructions in reverse order.

3 weitere Nutzer:innen haben diese Anleitung absolviert.

Corey Meyer

Mitglied seit: 05/01/17

2.265 Reputation

2 Anleitungen geschrieben

Team

Kid fixers Mitglied von Kid fixers

Community

154 Mitglieder

291 Anleitungen geschrieben

0 Kommentare

Kommentar hinzufügen

Seitenaufrufe:

Letzte 24 Stunden: 0

Letzte 7 Tage: 7

Letzte 30 Tage: 19

Insgesamt: 1,841