Zum Hauptinhalt wechseln

Lenovo Yoga 2 11" 20428 Motherboard Replacement

Was du brauchst

  1. Lenovo Yoga 2 11" 20428 Motherboard Replacement, Back Panel: Schritt 1, Bild 1 von 3 Lenovo Yoga 2 11" 20428 Motherboard Replacement, Back Panel: Schritt 1, Bild 2 von 3 Lenovo Yoga 2 11" 20428 Motherboard Replacement, Back Panel: Schritt 1, Bild 3 von 3
    • Flip the computer over so the bottom is facing up.

    • Remove the ten 6mm screws with a T5 Torx security screwdriver.

  2. Lenovo Yoga 2 11" 20428 Motherboard Replacement: Schritt 2, Bild 1 von 1
    • Carefully remove the back panel by gently separating the panel from front to back.

    • Take care not to pull any wires or crack the outer shell.

  3. Lenovo Yoga 2 11" 20428 Motherboard Replacement, Battery: Schritt 3, Bild 1 von 3 Lenovo Yoga 2 11" 20428 Motherboard Replacement, Battery: Schritt 3, Bild 2 von 3 Lenovo Yoga 2 11" 20428 Motherboard Replacement, Battery: Schritt 3, Bild 3 von 3
    • Use the Phillips #000 screwdriver to remove the six 3.3 mm screws around the perimeter of the battery.

    • Use the Phillips #000 screwdriver to remove the single 6.75 mm screw from the center of the battery.

  4. Lenovo Yoga 2 11" 20428 Motherboard Replacement: Schritt 4, Bild 1 von 1
    • Gently remove the three pieces of tape securing the Bluetooth/Wi-Fi antenna.

  5. Lenovo Yoga 2 11" 20428 Motherboard Replacement: Schritt 5, Bild 1 von 2 Lenovo Yoga 2 11" 20428 Motherboard Replacement: Schritt 5, Bild 2 von 2
    • Grip the base of the connector with your fingers or pliers, and gently pull the connector straight back towards you to remove it.

    • If possible, do not to pull the connector out by the wires, as this can damage the connector.

  6. Lenovo Yoga 2 11" 20428 Motherboard Replacement: Schritt 6, Bild 1 von 2 Lenovo Yoga 2 11" 20428 Motherboard Replacement: Schritt 6, Bild 2 von 2
    • Carefully remove the battery from the laptop.

    • Take care not to pull out the Bluetooth antenna while removing the battery.

  7. Lenovo Yoga 2 11" 20428 Motherboard Replacement, Hard Drive: Schritt 7, Bild 1 von 1
    • Use the Phillips #000 screwdriver to remove the four 3.3 mm screws securing the hard drive to the panel.

  8. Lenovo Yoga 2 11" 20428 Motherboard Replacement: Schritt 8, Bild 1 von 2 Lenovo Yoga 2 11" 20428 Motherboard Replacement: Schritt 8, Bild 2 von 2
    • Lift the hard drive up, turn it over, and remove the connection.

  9. Lenovo Yoga 2 11" 20428 Motherboard Replacement, Speaker: Schritt 9, Bild 1 von 1
    • Use the Phillips #000 screwdriver to unscrew the four 1.7 mm screws.

  10. Lenovo Yoga 2 11" 20428 Motherboard Replacement: Schritt 10, Bild 1 von 2 Lenovo Yoga 2 11" 20428 Motherboard Replacement: Schritt 10, Bild 2 von 2
    • Carefully detach the speaker wire and remove the speaker.

  11. Lenovo Yoga 2 11" 20428 Motherboard Replacement, Bluetooth Module: Schritt 11, Bild 1 von 1
    • Use the Phillips #000 screwdriver to remove the two 3.3 mm screws.

  12. Lenovo Yoga 2 11" 20428 Motherboard Replacement: Schritt 12, Bild 1 von 2 Lenovo Yoga 2 11" 20428 Motherboard Replacement: Schritt 12, Bild 2 von 2
    • Gently grab and remove the Bluetooth module.

  13. Lenovo Yoga 2 11" 20428 Motherboard Replacement, Motherboard: Schritt 13, Bild 1 von 1
    • Using your finger nail or a thin pry tool, unlock and remove the three cables.

    • Lift the two pieces of tape. Carefully pull the cable connector back to remove it from the motherboard.

    • Use the Phillips #000 screwdriver to remove the eight 3.8mm screws.

  14. Lenovo Yoga 2 11" 20428 Motherboard Replacement: Schritt 14, Bild 1 von 2 Lenovo Yoga 2 11" 20428 Motherboard Replacement: Schritt 14, Bild 2 von 2
    • Gently pull the cable out of the connector.

  15. Lenovo Yoga 2 11" 20428 Motherboard Replacement: Schritt 15, Bild 1 von 2 Lenovo Yoga 2 11" 20428 Motherboard Replacement: Schritt 15, Bild 2 von 2
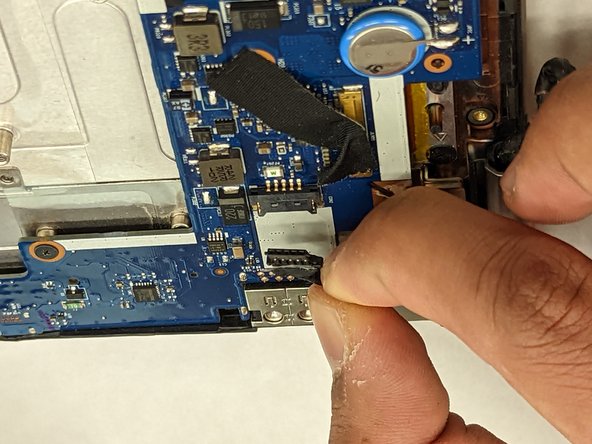
    • Lift the wide cable in the center to reveal the port for the small cable underneath.

    • Using a fingernail or a thin pry tool, lift the white bar to release the cable.

    • Remove the cable from the connector.

  16. Lenovo Yoga 2 11" 20428 Motherboard Replacement: Schritt 16, Bild 1 von 1
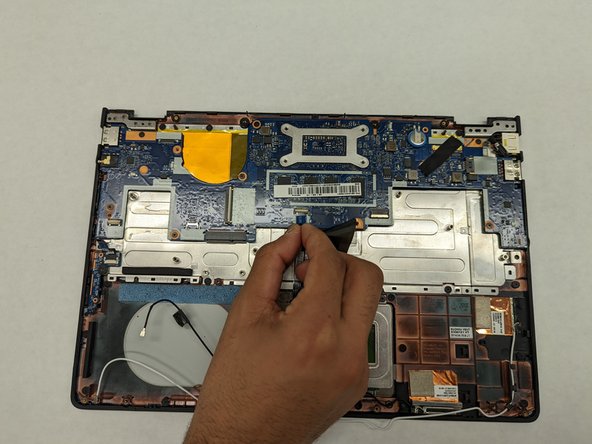
    • Lift the tape up to separate it from the motherboard.

    • Using a fingernail or a thin pry tool, lift the connector upwards to separate from the motherboard.

  17. Lenovo Yoga 2 11" 20428 Motherboard Replacement: Schritt 17, Bild 1 von 2 Lenovo Yoga 2 11" 20428 Motherboard Replacement: Schritt 17, Bild 2 von 2
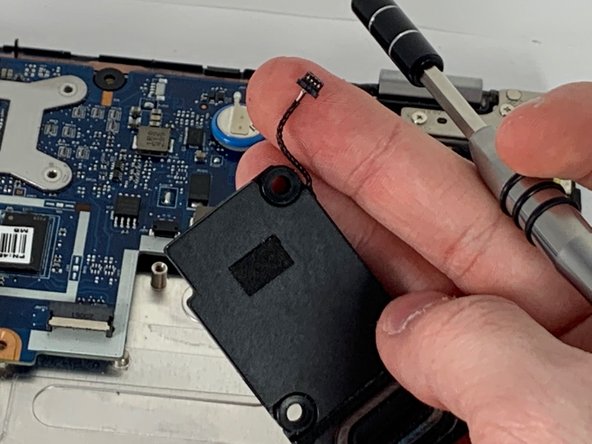
    • Remove the black tape covering the connector.

    • Pull straight backwards to remove the connector from the motherboard.

  18. Lenovo Yoga 2 11" 20428 Motherboard Replacement: Schritt 18, Bild 1 von 1
    • Pull the cable straight backwards to remove it.

  19. Lenovo Yoga 2 11" 20428 Motherboard Replacement: Schritt 19, Bild 1 von 2 Lenovo Yoga 2 11" 20428 Motherboard Replacement: Schritt 19, Bild 2 von 2
    • Pull the cable straight backwards to remove it.

  20. Lenovo Yoga 2 11" 20428 Motherboard Replacement: Schritt 20, Bild 1 von 2 Lenovo Yoga 2 11" 20428 Motherboard Replacement: Schritt 20, Bild 2 von 2
    • Use the Phillips #000 screwdriver to remove the seven 3.6mm screws.

  21. Lenovo Yoga 2 11" 20428 Motherboard Replacement: Schritt 21, Bild 1 von 1
    • Lift and pull backwards to remove the motherboard.

Abschluss

To reassemble your device, follow these instructions in reverse order.

Bavly Shehata

Mitglied seit: 03/30/22

181 Reputation

1 Anleitung geschrieben

Team

IUPUI, Team 1-3, Harley Spring 2022 Mitglied von IUPUI, Team 1-3, Harley Spring 2022

IUPUI-HARLEY-S22S1G3

3 Mitglieder

3 Anleitungen geschrieben

0 Kommentare

Kommentar hinzufügen

Seitenaufrufe:

Letzte 24 Stunden: 2

Letzte 7 Tage: 7

Letzte 30 Tage: 20

Insgesamt: 473