Diese Version enthält möglicherweise inkorrekte Änderungen. Wechsle zur letzten geprüften Version.
Was du brauchst
-
Dieser Schritt ist noch nicht übersetzt. Hilf mit, ihn zu übersetzen!
-
Flip your device so that the bottom panel is facing up.
-
Remove the eleven 5mm Torx T5 screws from the back panel.
-
-
Dieser Schritt ist noch nicht übersetzt. Hilf mit, ihn zu übersetzen!
-
Use a spudger to unclip clips on the front and near the USB ports on each side
-
Lift the back panel off
-
-
Dieser Schritt ist noch nicht übersetzt. Hilf mit, ihn zu übersetzen!
-
Remove the two 3mm Phillips #1 screws holding the battery to the laptop chassis.
-
Disconnect the battery from the IO board by holding the connector by the sides and gently pulling the connector out.
-
-
Dieser Schritt ist noch nicht übersetzt. Hilf mit, ihn zu übersetzen!
-
Carefully remove the battery from the laptop.
-
-
-
Dieser Schritt ist noch nicht übersetzt. Hilf mit, ihn zu übersetzen!
-
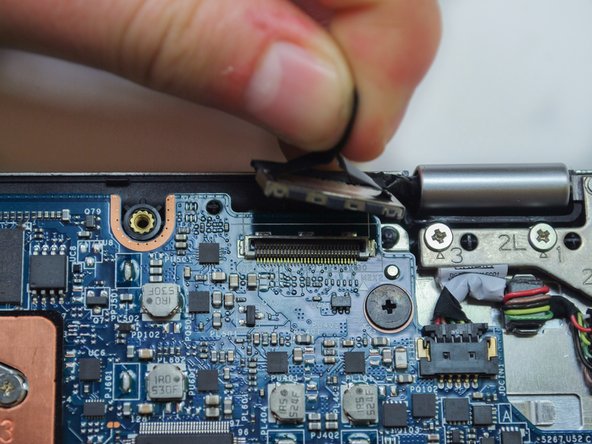
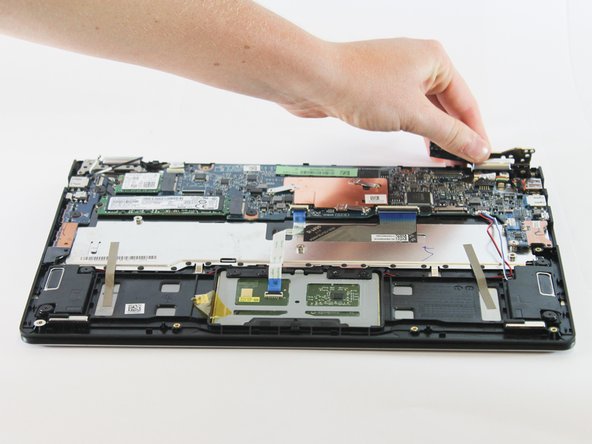
Disconnect the following cables attaching the LCD to the laptop:
-
Touchscreen cable
-
EDP cable
-
-
Dieser Schritt ist noch nicht übersetzt. Hilf mit, ihn zu übersetzen!
-
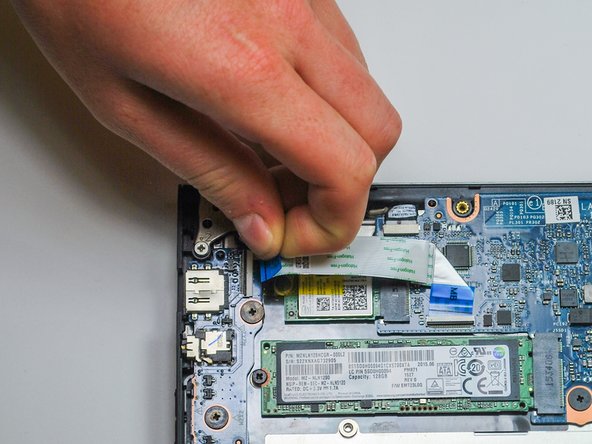
Place the laptop with the LCD facing down so that the hinges face opposite you.
-
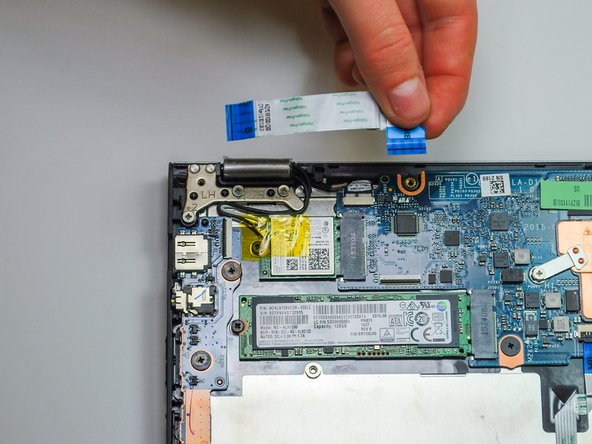
Disconnect both ends of the two blue ZIF (zero insertion force) connectors in the upper left corner by gently flipping the black tabs on the connector and pulling up and away from both ends of the connectors.
-
-
Dieser Schritt ist noch nicht übersetzt. Hilf mit, ihn zu übersetzen!
-
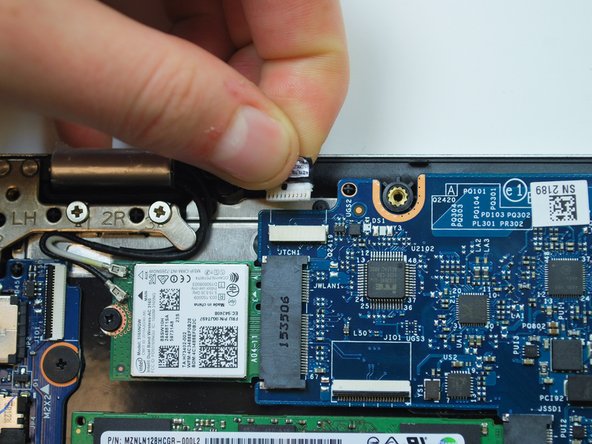
Unplug the black and white wireless LAN cables in the upper left corner by gently pulling upwards.
-
-
Dieser Schritt ist noch nicht übersetzt. Hilf mit, ihn zu übersetzen!
-
Remove the six 5mm Phillips #1 screws located in the top left and right corners to free the hinges.
-
Fully extend the hinges by prying upwards.
-
-
Dieser Schritt ist noch nicht übersetzt. Hilf mit, ihn zu übersetzen!
-
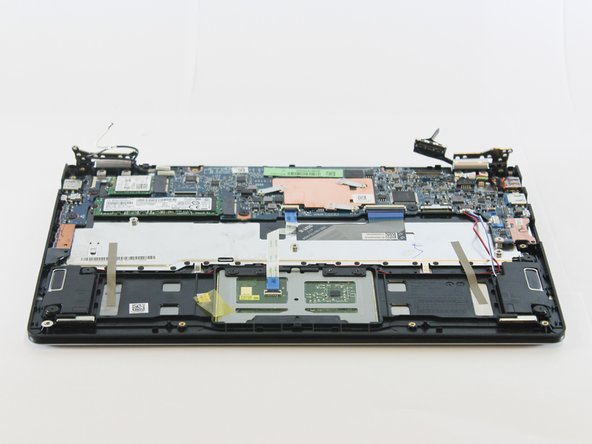
Remove the base from the LCD by lifting it upwards.
-
Flip the LCD so that the hinges face you and the screen faces upwards.
-
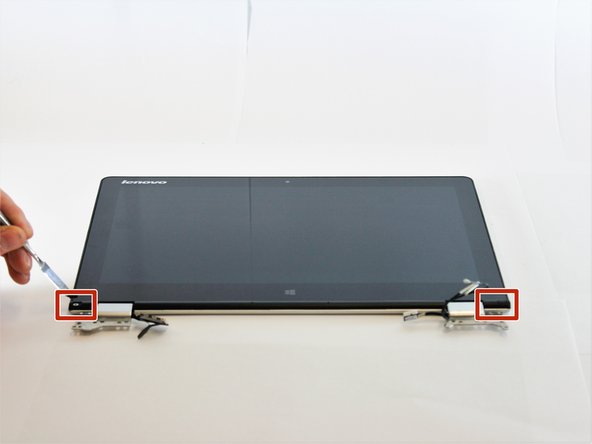
Remove the two LCD bezel screw pads located in the bottom left and right outer corners by pulling them up and out.
-
Remove the two 4.4 mm Phillips #1 screws located under the screw pads.
-
Pry the two side hinge covers with a plastic spudger and pull them up and away from the LCD.
-
-
Dieser Schritt ist noch nicht übersetzt. Hilf mit, ihn zu übersetzen!
-
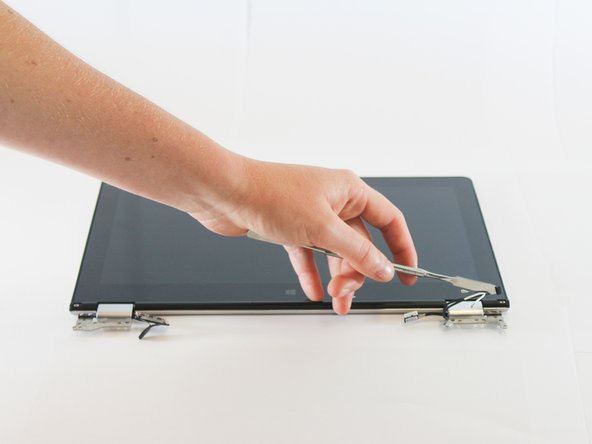
Remove the LCD hinge cover by gently prying the pieces with a plastic spudger and lifting the hinge cover up and out.
-
-
Dieser Schritt ist noch nicht übersetzt. Hilf mit, ihn zu übersetzen!
-
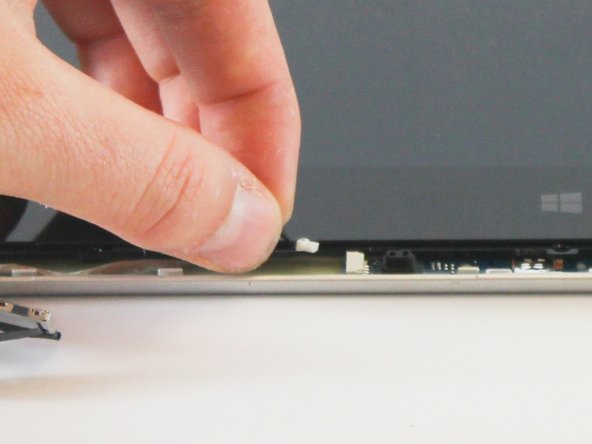
Disconnect the white MIC board connecter located near the center of the LCD bezel by pulling it out to the left.
-
Flip the hinges up and remove the hinge rubbers by pulling the wires out and away from the hinges.
-
-
Dieser Schritt ist noch nicht übersetzt. Hilf mit, ihn zu übersetzen!
-
Remove the LCD by carefully pulling away from the hinges and upwards.
-


Rückgängig: Ich habe diese Anleitung nicht absolviert.
7 weitere Nutzer:innen haben diese Anleitung absolviert.
Team

Cal Poly, Team 15-6, Livingston Fall 2016 Mitglied von Cal Poly, Team 15-6, Livingston Fall 2016
CPSU-LIVINGSTON-F16S15G6
4 Mitglieder
7 Anleitungen geschrieben