Einleitung
The Lenovo Yoga 710-11ISK’s speakers are what allows sound to come from the computer. This guide shows how to disassemble the computer in order to access the speakers and replace them.
Was du brauchst
-
-
Remove the 11 screws located on the back panel using a T5 Torx screwdriver.
-
-
-
Insert an opening tool between the bottom panel and chassis, then pry around the entire perimeter until the five clips detach, releasing the bottom panel.
-
-
-
-
Use a Phillips #000 screwdriver to remove the four screws securing the battery.
-
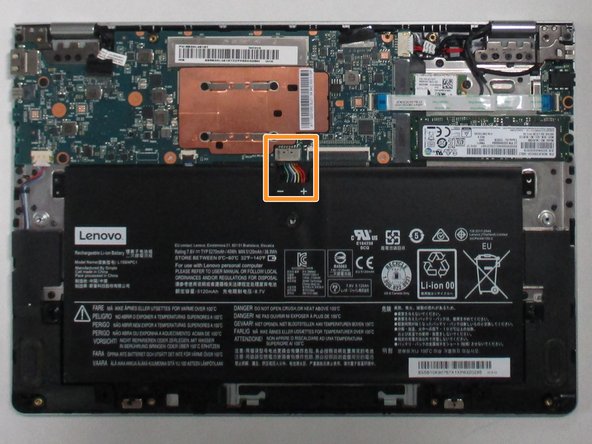
Grip the battery cable connector on both sides of the plug and gently pull it directly from its port.
-
Lift the battery up and out.
-
-
-
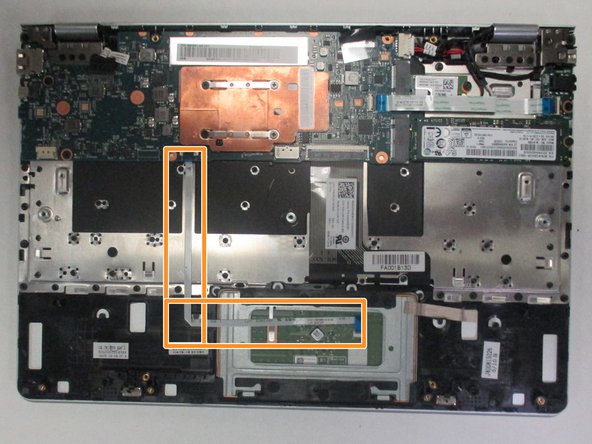
Unplug the wire harness on the left side of the computer to disconnect the speakers from the motherboard
-
Remove the white and blue wires from the plastic brackets holding them in place.
-
-
-
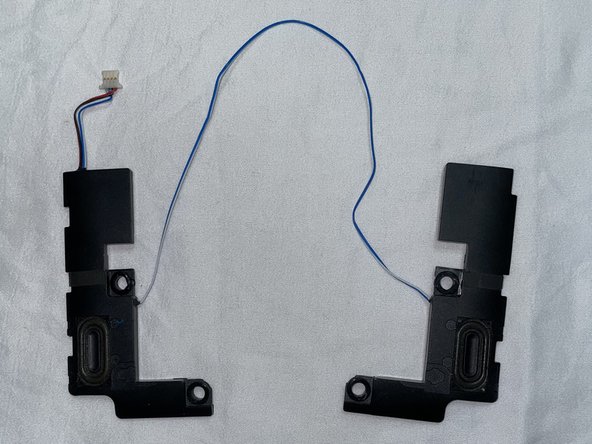
Carefully remove both speakers and rubber grommets from their mounts.
-
Slide the right speaker underneath the white ribbon wire.
-
Lift the speakers up and out.
-


To reassemble your device, follow these instructions in reverse order.
To reassemble your device, follow these instructions in reverse order.

Team

The Citadel Military College of South Carolina, Team 1-6, Eggleston Spring 2022 Mitglied von The Citadel Military College of South Carolina, Team 1-6, Eggleston Spring 2022
CMCSC-EGGLESTON-S22S1G6
3 Mitglieder
3 Anleitungen geschrieben