Einleitung
If you are following this guide, that means your camera is not responding on your Lenovo Yoga Tab 3 8. Before starting to work on your device, it is advised to back up any important files just in case something happens. You will want to make sure you have the device powered off to prevent harming yourself or damaging your hardware, especially because you will have to remove the battery to remove the camera. To make reassembly easier, be sure to avoid misplacing the small screws by keeping track of them as you go.
Was du brauchst
-
In diesem Schritt verwendetes Werkzeug:Tweezers$4.99
-
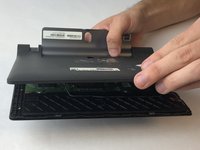
Open the kickstand by pressing the release button in the center.
-
Remove the identification sticker with a pair of tweezers to allow access to the two 2mm screws underneath.
-
-
-
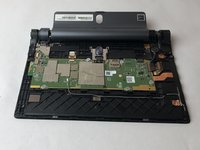
Starting along the edge opposite of the hinge, insert a plastic opening tool between the screen and the backing to begin separating the small clips holding the backing on.
-
Work along the edge and then up the sides, separating the clips with the plastic opening tool.
-
-
-
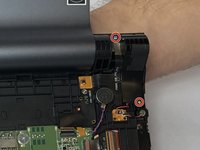
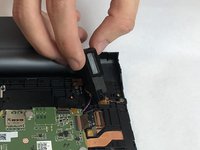
With the tablet oriented screen side down and hinge opposite of you, locate the black plastic piece on the top right.
-
Remove the upper 4mm and lower 3mm screws with a PH00 screwdriver.
-
-
-
-
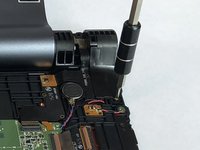
Position the kickstand to an almost closed position. Carefully move the plastic block aside and pry the metal lock out with a metal spudger.
-
-
In diesem Schritt verwendetes Werkzeug:Tweezers$4.99
-
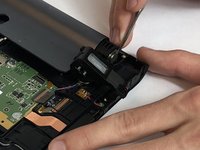
At the opposite end of the hinge, locate the silver metal bracket over the wires coming from the end of the hinge. Remove the two 3mm screws with a PH00 screwdriver. Lift the bracket off with your fingers.
-
Removing the bracket will expose two silver connectors at the ends of the wires coming from the end of the hinge. Use tweezers to carefully lift off the two silver connectors.
-
Locate the smaller metal wire bracket guiding the wires coming from the end of the hinge. Remove the single black 2mm screw with a PH00 screwdriver. Lift the bracket off with your fingers.
-
-
-
Begin removing the entire hinge assembly by lifting it out, starting at the end where the lock is located. Carefully feed the wires through the hinge mount with your fingers as you pull the hinge assembly free.
-
-
-
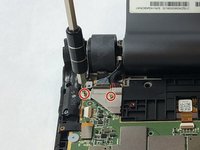
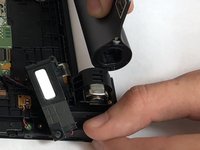
Locate the silver camera mounting bracket between the power button and the camera housing. Remove the two 3mm screws on the camera mounting bracket using a PH00 screwdriver.
-
-
-
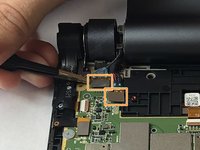
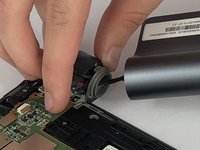
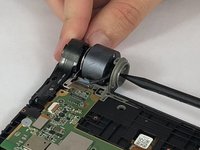
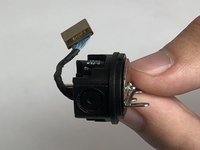
The camera housing is held in place by a pin in the center of the grey hinge mount. Push and hold in the pin with the pointy end of a spudger while you lift the camera assembly out.
-
-
-
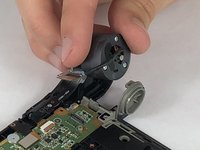
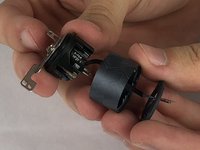
Remove the three 5mm screws holding together the camera housing using a PH00 screwdriver.
-


To reassemble your device, follow these instructions in reverse order.
To reassemble your device, follow these instructions in reverse order.
Team

USF Tampa, Team S16-G2, Eyestone Fall 2017 Mitglied von USF Tampa, Team S16-G2, Eyestone Fall 2017
USFT-EYESTONE-F17S16G2
4 Mitglieder
16 Anleitungen geschrieben