Zum Hauptinhalt wechseln

Lenovo Yoga Tablet 2 830-F Motherboard Replacement

Was du brauchst

  1. Lenovo Yoga Tablet 2 830-F Motherboard Replacement, Motherboard: Schritt 1, Bild 1 von 2 Lenovo Yoga Tablet 2 830-F Motherboard Replacement, Motherboard: Schritt 1, Bild 2 von 2
    • Remove the two 3mm screws on the back of the device with the Phillips Screwdriver #00 bit.

    • Remove the 2mm screw on the back fo the device with a Phillips #00 bit.

    • Using the blue opening tools or spudger, gently remove the back cover to expose the interior of the tablet.

  2. Lenovo Yoga Tablet 2 830-F Motherboard Replacement: Schritt 2, Bild 1 von 2 Lenovo Yoga Tablet 2 830-F Motherboard Replacement: Schritt 2, Bild 2 von 2
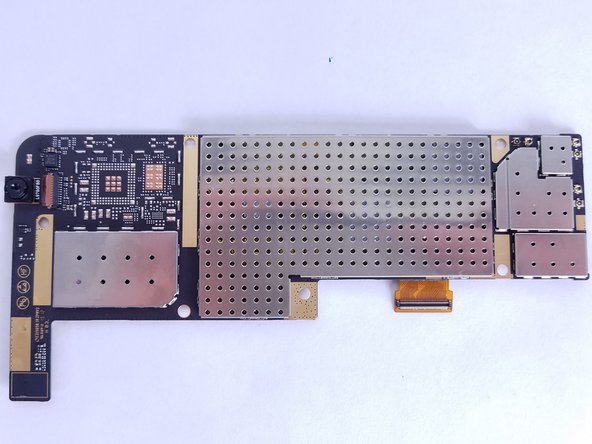
    • Remove the six 3mm screws on the back of the motherboard with the Phillips Screwdriver #00 bit.

    • Remove the ribbon cables connecting the boards to the other electrical components

    • Remove ZIF connectors connecting the boards to the electrical components.

    • Some of the ribbon cables are secured with clips, simply pry up the clips before sliding them out of the pin connectors.

  3. Lenovo Yoga Tablet 2 830-F Motherboard Replacement: Schritt 3, Bild 1 von 2 Lenovo Yoga Tablet 2 830-F Motherboard Replacement: Schritt 3, Bild 2 von 2
    • Replace the motherboard with the new motherboard.

    • Be careful not to damage the ribbon cables when reassembling the device.

Abschluss

To reassemble your device, follow these instructions in reverse order.

Team

USF Tampa, Team S2-G4, Nance Fall 2017 Mitglied von USF Tampa, Team S2-G4, Nance Fall 2017

USFT-NANCE-F17S2G4

3 Mitglieder

12 Anleitungen geschrieben

0 Kommentare

Kommentar hinzufügen

Seitenaufrufe:

Letzte 24 Stunden: 0

Letzte 7 Tage: 5

Letzte 30 Tage: 21

Insgesamt: 1,958