Diese Version enthält möglicherweise inkorrekte Änderungen. Wechsle zur letzten geprüften Version.
Was du brauchst
-
-
Entferne mit einem T10 Torx Schraubendreher die 11 Schrauben, die die Rückseite des Korpus sichern. Jede Schraube ist 1cm lang.
-
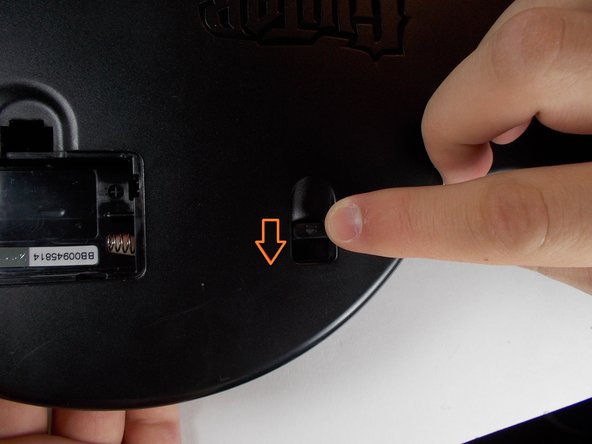
Hebel drücken. Das löst die Rückseite der Gitarre von der Vorderseite.
-
Entferne vorsichtig die Rückseite des Korpus.
-
Das Kabel des Batteriefachs ist an beiden Seiten der Gitarre befestigt. Sei vorsichtig, um es nicht zu zerreißen.
-
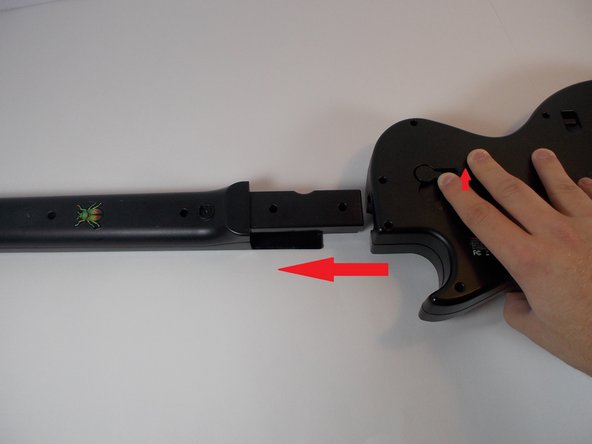
Der Hals-Anschluss kann im Rückenteil stecken, also stelle sicher dass er entfernt wurde, bevor Du die Gitarre zerlegst.
-
-
-
Dieser Schritt ist noch nicht übersetzt. Hilf mit, ihn zu übersetzen!
-
Remove the 10 screws (each are 1 cm long) on the back of the neck using a T-10 Torx security screwdriver.
-
Remove the back of the neck.
-
-
Dieser Schritt ist noch nicht übersetzt. Hilf mit, ihn zu übersetzen!
-
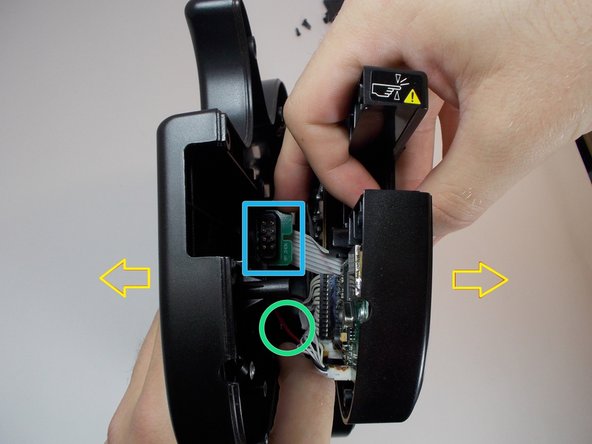
First check to see if the button motherboard is not damaged.
-
Next, make sure the wire is not damaged.
-
Then make sure that the connection motherboard is also not damaged.
-
If any of these parts are damaged, then it will need to be replaced.
-
-
Dieser Schritt ist noch nicht übersetzt. Hilf mit, ihn zu übersetzen!
-
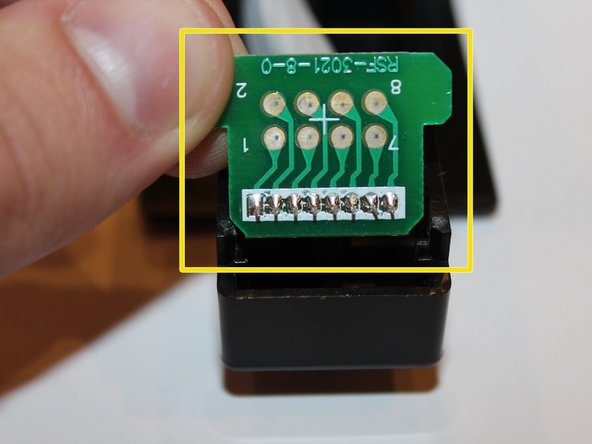
Check to see if the neck connection chip is not damaged inside of the guitar.
-
Make sure that all 8 prongs of the chip are not damaged or broken.
-
If the neck chip is damaged then it will need to be replaced.
-
-
Dieser Schritt ist noch nicht übersetzt. Hilf mit, ihn zu übersetzen!
-
The lock mechanism may be another reason for trouble in your neck connection.
-
Use the guitar tear down to open the guitar to this point.
-
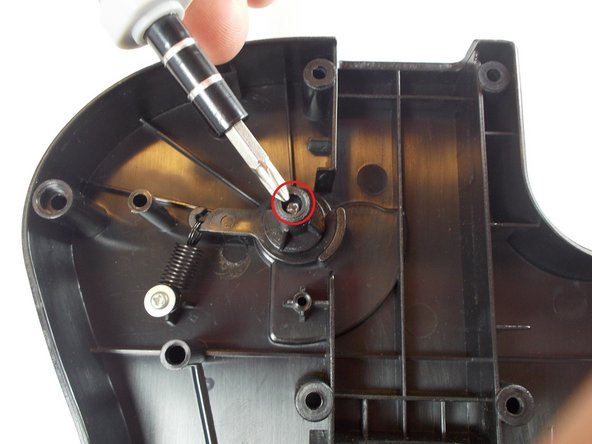
Start by unscrewing the two screws holding down the main connection parts. The first screw is 1 cm and the second screw is 0.8 cm.
-
-
Dieser Schritt ist noch nicht übersetzt. Hilf mit, ihn zu übersetzen!
-
Take the spring off the main connection mechanism. It should come off pretty easily.
-
If this spring is broken or snapped, then it will need to be replaced.
-
-
Dieser Schritt ist noch nicht übersetzt. Hilf mit, ihn zu übersetzen!
-
Pull out the main connection mechanism.
-
Make sure that it is not broken or it will need to be replaced.
-
This can be put back together by inserting the mechanism again, attaching the spring and screwing the two screws back in place.
-


Rückgängig: Ich habe diese Anleitung nicht absolviert.
2 weitere Nutzer:innen haben diese Anleitung absolviert.