Zum Hauptinhalt wechseln

Lifetime 4-Foot Adjustable Table Leg Replacement

Was du brauchst

  1. Lifetime 4-Foot Adjustable Table Leg Replacement, Leg: Schritt 1, Bild 1 von 3 Lifetime 4-Foot Adjustable Table Leg Replacement, Leg: Schritt 1, Bild 2 von 3 Lifetime 4-Foot Adjustable Table Leg Replacement, Leg: Schritt 1, Bild 3 von 3
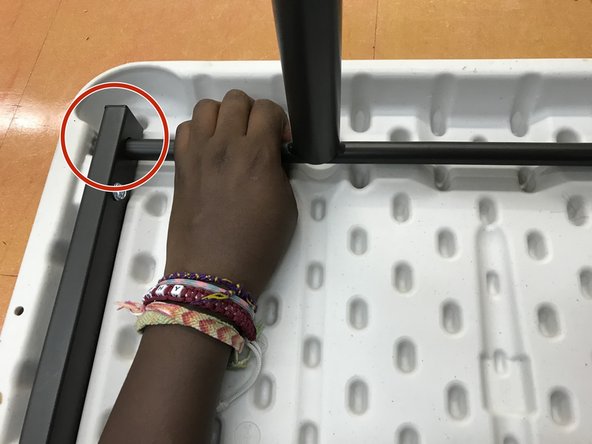
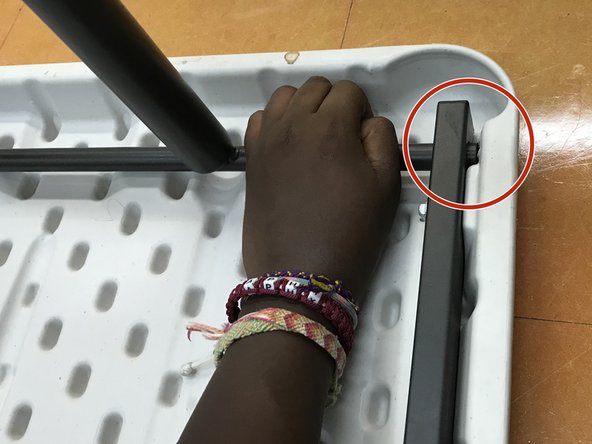
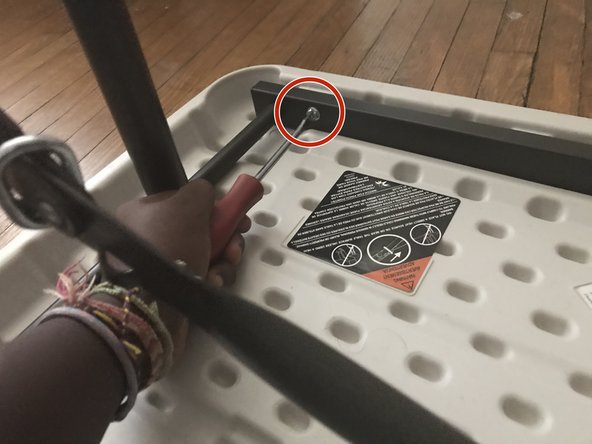
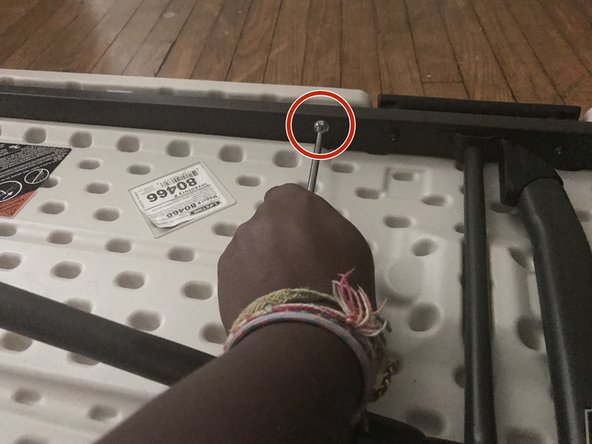
    • Use the 6 mm Flathead screwdriver to remove the four aluminum slotted screws located on the edges of the table.

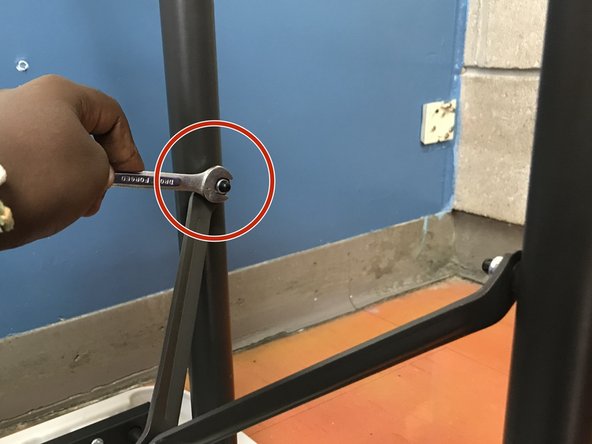
    • Use a 5/32" Allen Wrench or 19 mm wrench to remove the two stainless 8-18 steel hex screws from the braces of the table.

  2. Lifetime 4-Foot Adjustable Table Leg Replacement: Schritt 2, Bild 1 von 3 Lifetime 4-Foot Adjustable Table Leg Replacement: Schritt 2, Bild 2 von 3 Lifetime 4-Foot Adjustable Table Leg Replacement: Schritt 2, Bild 3 von 3
    • Clean any glue or adhesive from the braces and hinges before putting it into place.

    • It’s important to clear the screw holes of any material, so that the screws can fit without obstruction.

  3. Lifetime 4-Foot Adjustable Table Leg Replacement: Schritt 3, Bild 1 von 3 Lifetime 4-Foot Adjustable Table Leg Replacement: Schritt 3, Bild 2 von 3 Lifetime 4-Foot Adjustable Table Leg Replacement: Schritt 3, Bild 3 von 3
    • Align the screw holes of the braces with the new leg by inserting it into the frame.

    • While aligning, make sure the new leg fits into the frame slots.

  4. Lifetime 4-Foot Adjustable Table Leg Replacement: Schritt 4, Bild 1 von 3 Lifetime 4-Foot Adjustable Table Leg Replacement: Schritt 4, Bild 2 von 3 Lifetime 4-Foot Adjustable Table Leg Replacement: Schritt 4, Bild 3 von 3
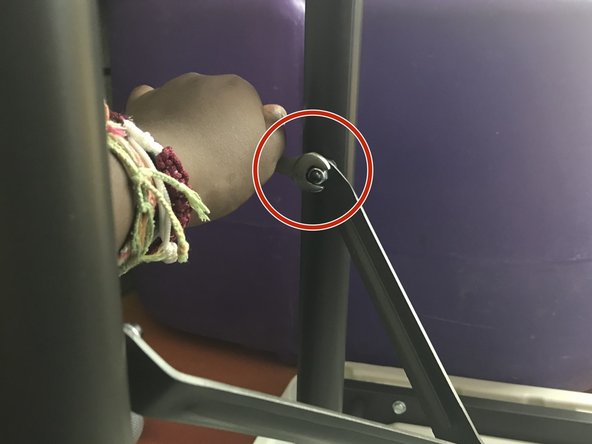
    • Place the two stainless steel hex screws inside of the screw holes located on the leg, and secure each screw with your Allen key or wrench.

  5. Lifetime 4-Foot Adjustable Table Leg Replacement: Schritt 5, Bild 1 von 3 Lifetime 4-Foot Adjustable Table Leg Replacement: Schritt 5, Bild 2 von 3 Lifetime 4-Foot Adjustable Table Leg Replacement: Schritt 5, Bild 3 von 3
    • Screw the four slotted screws back into the frame using a 6 mm flathead screwdriver. Ensure that the entire side where the new leg is being inserted is securely connected to the table once again.

  6. Lifetime 4-Foot Adjustable Table Leg Replacement: Schritt 6, Bild 1 von 1
    • Test out the table by unfolding it, and setting it up in a standing position.

    • If the leg is not aligned properly, has loose screws, or missing some screws, make the proper adjustments before using it.

Abschluss

To reassemble your device, follow these instructions in reverse order.

Aphason Aberham

Mitglied seit: 09/11/23

133 Reputation

1 Anleitung geschrieben

Team

York University, Team 1-1, O'Regan Fall 2023 Mitglied von York University, Team 1-1, O'Regan Fall 2023

YORK-O'REGAN-F23S1G1

1 Mitglied

1 Anleitung geschrieben

0 Kommentare

Kommentar hinzufügen

Seitenaufrufe:

Letzte 24 Stunden: 3

Letzte 7 Tage: 10

Letzte 30 Tage: 49

Insgesamt: 188