Zum Hauptinhalt wechseln

Lite-On iHAS324 Disc Tray Belt Replacement

Was du brauchst

  1. Lite-On iHAS324 Disc Tray Belt Replacement, Chassis: Schritt 1, Bild 1 von 2 Lite-On iHAS324 Disc Tray Belt Replacement, Chassis: Schritt 1, Bild 2 von 2
    • Insert a paper clip into a small hole on the right side of the faceplate bellow the disc tray.

    • There may be resistance, do not be afraid to use force.

    • The tray should then pop open.

    • Pull out the tray so that it is fully extended.

  2. Lite-On iHAS324 Disc Tray Belt Replacement: Schritt 2, Bild 1 von 3 Lite-On iHAS324 Disc Tray Belt Replacement: Schritt 2, Bild 2 von 3 Lite-On iHAS324 Disc Tray Belt Replacement: Schritt 2, Bild 3 von 3
    • Use a plastic opening tool to push the three tabs located on the right, left, and bottom side of the outer chassis to loosen the faceplate off.

  3. Lite-On iHAS324 Disc Tray Belt Replacement: Schritt 3, Bild 1 von 1
    • Pull the faceplate off the chassis.

    • Do NOT pull the faceplate all the way off the disc tray, because doing so can cause damage to the faceplate.

    • There may be resistance, do not be afraid to use force.

  4. Lite-On iHAS324 Disc Tray Belt Replacement: Schritt 4, Bild 1 von 1
    • Using the Phillips Head #2 screwdriver, unscrew the two 8.5 mm screws located on the bottom back of the chassis.

  5. Lite-On iHAS324 Disc Tray Belt Replacement: Schritt 5, Bild 1 von 1
    • Remove the bottom plate by lifting it off the device.

  6. Lite-On iHAS324 Disc Tray Belt Replacement: Schritt 6, Bild 1 von 1
    • Turn the device over.

    • Remove the top plate by pulling the sides and lifting the plate off.

  7. Lite-On iHAS324 Disc Tray Belt Replacement, Disc Tray: Schritt 7, Bild 1 von 2 Lite-On iHAS324 Disc Tray Belt Replacement, Disc Tray: Schritt 7, Bild 2 von 2
    • Push the left tab in and slide the tray out on the left side.

    • Pull the gray plastic casing on the right side away from the tray.

    • Slide the right side of the tray out.

  8. Lite-On iHAS324 Disc Tray Belt Replacement, Disc Tray Belt: Schritt 8, Bild 1 von 1
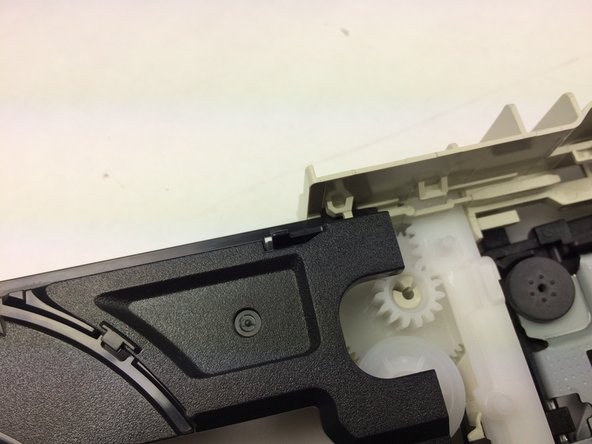
    • Take tweezers and remove the black tray belt from the gears carefully.

Abschluss

To reassemble your device, follow these instructions in reverse order.

3 weitere Nutzer:innen haben diese Anleitung absolviert.

Team

Baylor, Team 5-9, Williams Spring 2015 Mitglied von Baylor, Team 5-9, Williams Spring 2015

BU-WILLIAMS-S15S5G9

3 Mitglieder

10 Anleitungen geschrieben

0 Kommentare

Kommentar hinzufügen

Seitenaufrufe:

Letzte 24 Stunden: 0

Letzte 7 Tage: 11

Letzte 30 Tage: 48

Insgesamt: 1,437