Einleitung
This is a guide used if a switch replacement is needed or in my case if a keycap breaks off inside of your switch, rendering the switch inoperable. I will be using colors to refer to different sets of screws.
Was du brauchst
-
-
Remove all of the screws (red set) on this keyboard using a PH1 size Philips bit.
-
You can remove all the keycaps or just remove the necessary keycaps surrounding the screw heads.
-
-
-
Continue removing (red set) screws, looking at the picture, remember to open up the left foot in order to gain access the screw underneath.
-
-
-
Now using the hair dryer heat up the rubber pad (green set) and gently remove the rubber pad using tweezers starting from one side. Make sure to get under the white fabric layer and lift slowly giving time for the adhesive to loosen. Remove the single screw (green set) from each pad.
-
-
-
-
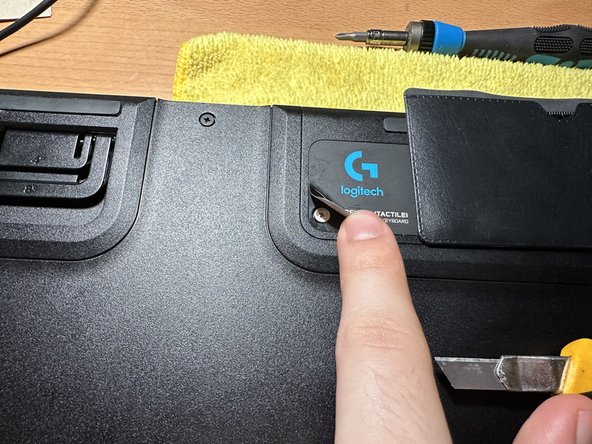
Using this same technique, heat the corners of the rear sticker (green set) and starting from the corner use the knife to get under the edge while not to crease or fold the sticker too much. Remove the two screws (green set) from under the label.
-
-
-
After removing all of the screws you are able to remove the back plastic and gain access to the rear of the circuit board.
-
-
-
Now you need to find the key you want to replace (Which in my case was the number 3 key).
-
Locate the correct key and their corresponding contacts. Using the soldering iron, heat up the solder and remove it using a desoldering pump.
-
Once both contacts have their solder removed, you can flip the keyboard around and remove the key switch from the front of the keyboard.
-
-
-
Now if you're replacing a switch you need a new one. Or you can disassemble and clean/re-lubricate the switch.
-
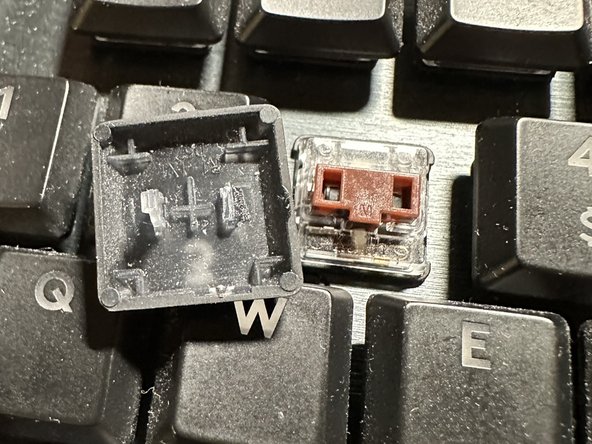
Or in my case you can disassemble the switch by releasing the 2 tabs on each side (purple set). Retrieve the broken keycap piece from inside and reassemble the switch.
-
Now with the switch ready to be soldered back onto the board you can take your solder, flux and soldering iron, insert the switch back through the front of the keyboard and re-solder the two contacts to the board.
-


To reassemble your device, follow these instructions in reverse order.
To reassemble your device, follow these instructions in reverse order.
Rückgängig: Ich habe diese Anleitung nicht absolviert.
4 weitere Nutzer:innen haben diese Anleitung absolviert.
