Einleitung
This guide will show you how to fully deep clean a Logitech K360 keyboard, with individual key removal process!
Was du brauchst
-
-
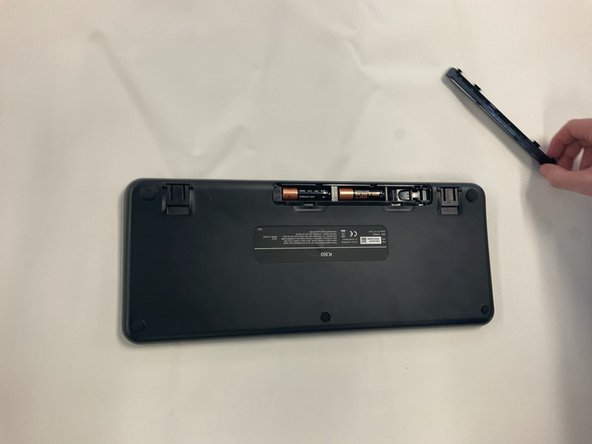
Flip the keyboard face down, so that the keys are not visible. On this side, a detachable battery compartment cover will be visible. Once identified, ensure that the batteries are removed from the keyboard to ensure safety for yourself.
-
-
-
Locate the key that needs replacing.
-
Insert the flathead screwdriver at an angle underneath the key and begin to pry the key up with the desired tool. Pry from different angles/corners till the key pops off. Doing this will expose the underside of the keyboard.
-
-
-
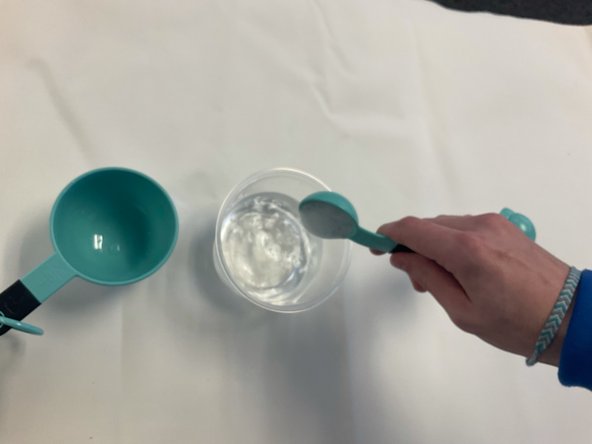
To properly clean the keys, soapy water will be made by using one cup of water, one tablespoon of baking soda, and one tablespoon of soap. Add together in a desired bowl and stir until uniform.
-
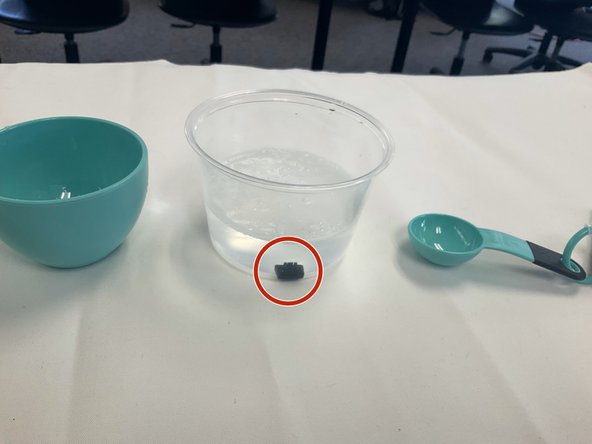
Once the soapy water is homogenous, add the individual keys and let them sit in the mixture for 30 minutes.
-
-
-
-
While waiting for the key to soak for the specified time, use a compressed air can to remove any dust particles under the keys. Do this by aiming the can's nozzle into any area that has dust build-up and begin to spray.
-
-
-
Use a small bristle brush to remove any dust present on the keyboard, especially in areas that are not visible when keys are connected. In this step, a make-up brush is used.
-
-
-
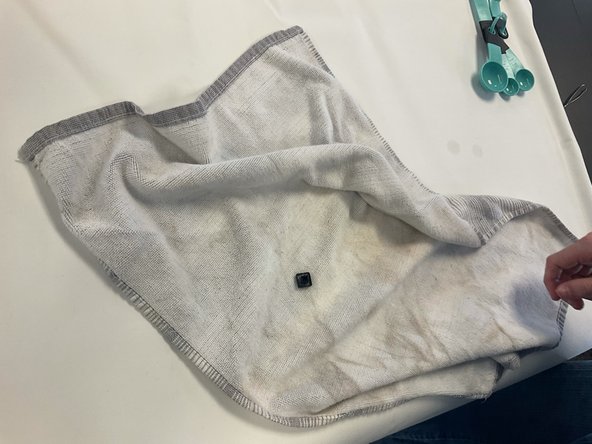
Once the 30-minute timer is up, remove the keys from the soapy water and use a rag or paper to dry them. Dry by padding down keys until there is no visible or physical dampness on the keys.
-
-
-
Place keys back in the correct spot and find a google image that shows the correct order of the keys to ensure that the key placements are correct.
-
-
-
Reconnect the batteries in the battery compartment located on the backside of the keyboard, in the correct positive to negative position, and turn on the keyboard.
-
-
-
Turn on the computer and attempt to use the keyboard to make sure the keyboard is fully functional.
-


To reassemble your device, follow these instructions in reverse order.
To reassemble your device, follow these instructions in reverse order.
Rückgängig: Ich habe diese Anleitung nicht absolviert.
5 weitere Nutzer:innen haben diese Anleitung absolviert.
Ein Kommentar
Have you happened to open up and see what is the switch issue? I've read on other sites some have received what sounds like not functioning keyboard that I'm guessing is due to the switch, since in my situation the switch seems to be not moving as freely as my other logitech keyboards and mice with the similar looking switch. Albeit mine is white and there doesn't appears to be an LED. Looks like there are what reads as Apple looking green color side of the switch for on and a redish-orange color side for off.