Diese Version enthält möglicherweise inkorrekte Änderungen. Wechsle zur letzten geprüften Version.
Was du brauchst
-
Dieser Schritt ist noch nicht übersetzt. Hilf mit, ihn zu übersetzen!
-
Hold the mouse so that the bottom is facing up.
-
Remove the single Phillips #1 screw from the bottom half of the mouse.
-
-
Dieser Schritt ist noch nicht übersetzt. Hilf mit, ihn zu übersetzen!
-
Place the mouse so that the bottom is resting against a hard surface.
-
Lift the top cover of the mouse gently, and remove it.
-
-
-
Dieser Schritt ist noch nicht übersetzt. Hilf mit, ihn zu übersetzen!
-
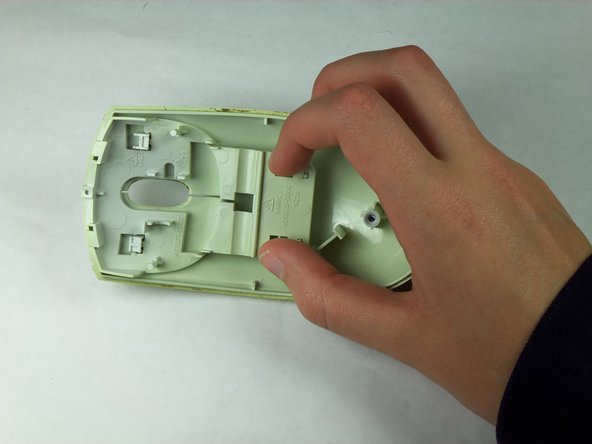
Locate the two tabs that are protruding from the button assembly.
-
Pinch the tabs together to free the buttons.
-
-
Dieser Schritt ist noch nicht übersetzt. Hilf mit, ihn zu übersetzen!
-
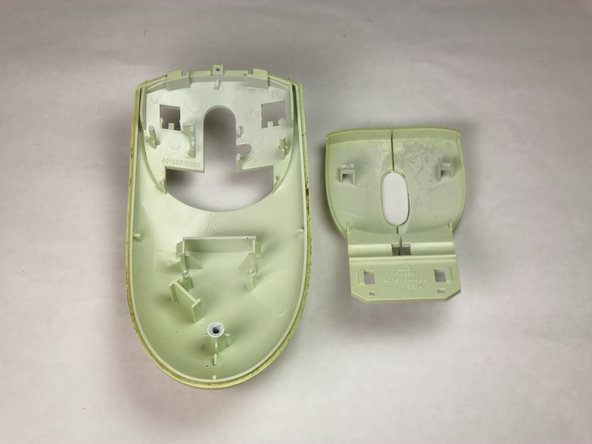
Remove the button assembly from the top cover by flipping the top cover upside down and pulling the button assembly downward and away from the top cover.
-
Slide the button assembly out from the top cover through the opening.
-


Rückgängig: Ich habe diese Anleitung nicht absolviert.
2 weitere Nutzer:innen haben diese Anleitung absolviert.
Team

Cal Poly, Team 5-14, Forte Winter 2013 Mitglied von Cal Poly, Team 5-14, Forte Winter 2013
CPSU-FORTE-W13S5G14
5 Mitglieder
21 Anleitungen geschrieben