Zum Hauptinhalt wechseln

MNT Reform WiFi Card Replacement

Was du brauchst

  1. MNT Reform WiFi Card Replacement, Remove Bottom Plate Screws: Schritt 1, Bild 1 von 1
    • Remove the following screws securing the transparent acrylic bottom plate to the main box:

    • Ten M2×6mm silver Phillips screws

  2. MNT Reform WiFi Card Replacement, Remove Bottom Plate: Schritt 2, Bild 1 von 1
    • Lift the bottom plate and set it aside.

    • Before servicing anything on the inside, make sure to remove all battery cells.

  3. MNT Reform WiFi Card Replacement, Remove Battery Cells: Schritt 3, Bild 1 von 2 MNT Reform WiFi Card Replacement, Remove Battery Cells: Schritt 3, Bild 2 von 2
    • Pull out the eight battery cells one by one, and set them aside safely.

    • Do not use a metal tool to remove the batteries. You may accidentally short-circuit the metal pins of the battery holders.

    • When replacing the batteries, pay attention to the polarity! Inserting a cell the wrong way in will damage your device.

    • The circuit board indicates the + and - orientation for each cell.

  4. MNT Reform WiFi Card Replacement, Unplug the Keyboard and Trackball Cables: Schritt 4, Bild 1 von 1
    • Unplug the UI1 (keyboard) and UI2 (trackball or trackpad) cables from the motherboard.

    • To avoid damaging the cables, pull on the connector, not the wires.

  5. MNT Reform WiFi Card Replacement, Disconnect Antenna Cables: Schritt 5, Bild 1 von 2 MNT Reform WiFi Card Replacement, Disconnect Antenna Cables: Schritt 5, Bild 2 von 2
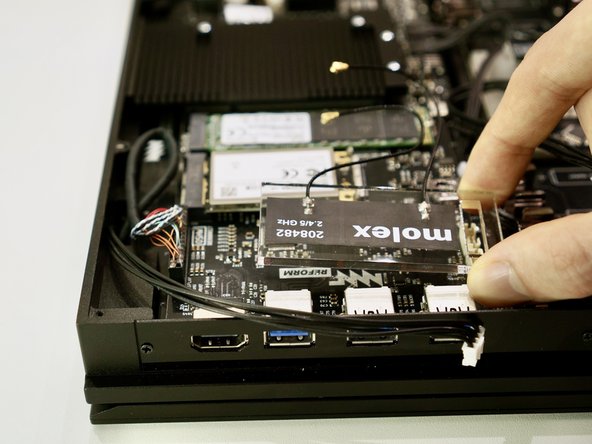
    • Use the flat end of a spudger or a clean fingernail to pry both antenna connectors up from their sockets.

    • When reconnecting the antenna, either cable can be connected to either socket. The order doesn't matter.

    • Antenna cable connectors are fragile. When reconnecting them, ensure they are properly ligned up with the sockets and do not apply excessive pressure.

  6. MNT Reform WiFi Card Replacement, Remove Antenna: Schritt 6, Bild 1 von 2 MNT Reform WiFi Card Replacement, Remove Antenna: Schritt 6, Bild 2 von 2
    • Lift the acrylic holder with the Molex MIMO antenna out and set it aside.

  7. MNT Reform WiFi Card Replacement, Detach WiFi Card: Schritt 7, Bild 1 von 3 MNT Reform WiFi Card Replacement, Detach WiFi Card: Schritt 7, Bild 2 von 3 MNT Reform WiFi Card Replacement, Detach WiFi Card: Schritt 7, Bild 3 von 3
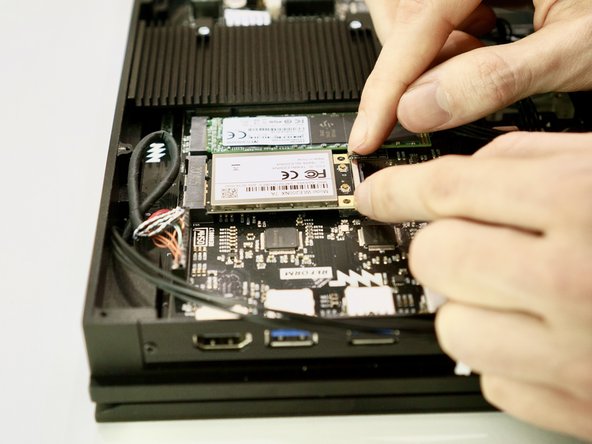
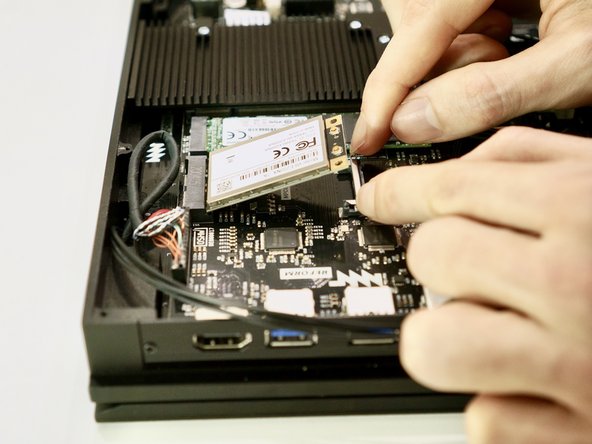
    • Pull the two metal tabs holding the WiFi card away from the mPCIe socket. The WiFi card will spring up on its own.

    • When replacing the WiFi card, simply press it down after inserting it into the mPCIe socket. You will hear a click when it latches.

  8. MNT Reform WiFi Card Replacement, Remove WiFi Card: Schritt 8, Bild 1 von 2 MNT Reform WiFi Card Replacement, Remove WiFi Card: Schritt 8, Bild 2 von 2
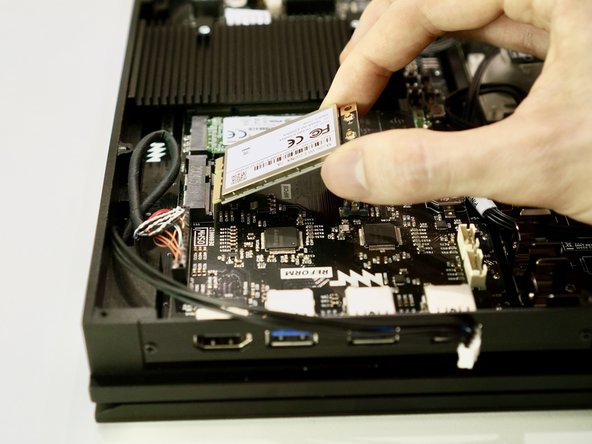
    • Pull the WiFi card out of its mPCIe socket on the motherboard.

    • To avoid damaging its socket on the motherboard, do not excessively lift the free end of the WiFi card.

Abschluss

To reassemble your device, follow these instructions in reverse order. Ensure that no cables are squeezed when replacing the bottom plate. Don’t overtighten screws.

Ein:e weitere:r Nutzer:in hat diese Anleitung absolviert.

Neelfyn

Mitglied seit: 05/13/14

972 Reputation

9 Anleitungen geschrieben

0 Kommentare

Kommentar hinzufügen

Seitenaufrufe:

Letzte 24 Stunden: 0

Letzte 7 Tage: 5

Letzte 30 Tage: 12

Insgesamt: 379