Zum Hauptinhalt wechseln

MSI GE72 6QF Apache Pro SSD Replacement

Was du brauchst

  1. MSI GE72 6QF Apache Pro SSD Replacement, Battery: Schritt 1, Bild 1 von 2 MSI GE72 6QF Apache Pro SSD Replacement, Battery: Schritt 1, Bild 2 von 2
    • Make sure the laptop is off and unplugged (not charging).

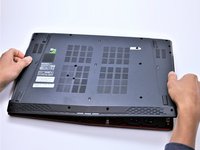
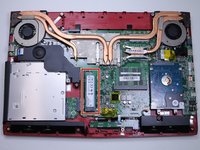
    • With the laptop closed and upside down, unscrew the nineteen 5.5mm Phillips #1 screws that keep the back cover in place.

  2. MSI GE72 6QF Apache Pro SSD Replacement: Schritt 2, Bild 1 von 1
    • Slide the optical drive out of the laptop.

  3. MSI GE72 6QF Apache Pro SSD Replacement: Schritt 3, Bild 1 von 1
    • Use a Phillips screwdriver to remove the three screws along the edge of the optical drive bay.

  4. MSI GE72 6QF Apache Pro SSD Replacement: Schritt 4, Bild 1 von 2 MSI GE72 6QF Apache Pro SSD Replacement: Schritt 4, Bild 2 von 2
    • Using your fingers, gently loosen the edges of all four sides of the back cover.

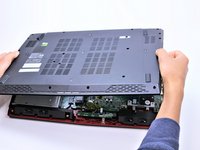
    • Gently pull off the back cover.

  5. MSI GE72 6QF Apache Pro SSD Replacement: Schritt 5, Bild 1 von 2 MSI GE72 6QF Apache Pro SSD Replacement: Schritt 5, Bild 2 von 2
    • Unscrew the single 5.5mm Phillips #1 screw keeping the battery secure.

  6. MSI GE72 6QF Apache Pro SSD Replacement: Schritt 6, Bild 1 von 2 MSI GE72 6QF Apache Pro SSD Replacement: Schritt 6, Bild 2 von 2
    • Grab the battery with your fingers and gently pull it up and away from the rest of the laptop.

  7. MSI GE72 6QF Apache Pro SSD Replacement, SSD: Schritt 7, Bild 1 von 2 MSI GE72 6QF Apache Pro SSD Replacement, SSD: Schritt 7, Bild 2 von 2
    • Remove the single 5.5mm Phillips #1 screw attaching the SSD to the laptop.

  8. MSI GE72 6QF Apache Pro SSD Replacement: Schritt 8, Bild 1 von 2 MSI GE72 6QF Apache Pro SSD Replacement: Schritt 8, Bild 2 von 2
    • Pull out the SSD by gently wiggling it from side to side until it comes out.

    • If the old SSD you removed contains the operating system, then the new SSD must also contain an operating system.

Abschluss

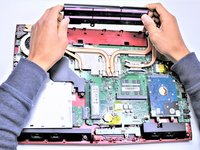
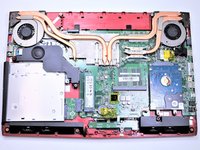
To reassemble your device, follow these instructions in reverse order.

7 weitere Nutzer:innen haben diese Anleitung absolviert.

Tanmay Kumar

Mitglied seit: 04/17/17

458 Reputation

4 Anleitungen geschrieben

Team

Cal Poly, Team S14-G4, Banghart Spring 2017 Mitglied von Cal Poly, Team S14-G4, Banghart Spring 2017

CPSU-BANGHART-S17S14G4

4 Mitglieder

8 Anleitungen geschrieben

0 Kommentare

Kommentar hinzufügen

Seitenaufrufe:

Letzte 24 Stunden: 5

Letzte 7 Tage: 16

Letzte 30 Tage: 54

Insgesamt: 7,656