Einleitung
This replacement guide is difficult only because in order to replace the RAM, the motherboard need to be taken out of the device completely. However, replacing the RAM itself is not hard at all. so basically all the hard work is to unplug the motherboard completely and take it out to reach the RAM.
Was du brauchst
-
-
Remove the eleven 5mm screws with a Phillips #0 bit.
-
Remove the four 2.5mm screws with a Phillips #0 bit.
-
-
-
Unplug the battery connection carefully from the motherboard, and remove the old battery.
-
-
-
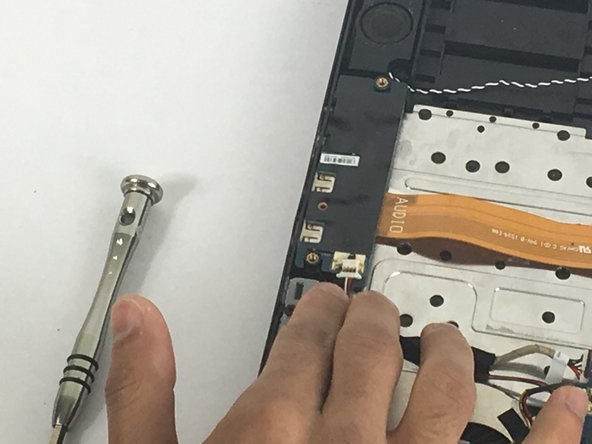
Gently lift the selected black tab that connects the cable onto the board and then slide out the cable.
-
-
-
-
Gently lift the selected black tab that connects the cable onto the board and then slide out the cable.
-
-
-
Gently lift the selected black tab that connects the cable onto the board and then slide out the cable.
-
-
-
Gently lift the selected black tab that connects the cable onto the board and then slide out the cable.
-
-
-
Gently lift the selected black tab that connects the cable onto the board and then slide out the cable.
-
-
-
Gently lift the selected black tab that connects the cable onto the board and then slide out the cable.
-
-
-
Gently remove the electronic component by sliding it out and lifting it up after unscrewing the 2.5 mm screw
-
-
-
After unplugging all of the cables and unscrewing all of the screws, gently remove the motherboard out of the computer chassis
-
This part will take some effort but remember not to apply to much pressure on the motherboard as to not damage any of the small electrical components on the board
-
-
-
After removing the motherboard from the laptop chassis locate the RAM chips indicated by the red rectangle.
-
-
-
Firmly grip the two rectangular Ram components, one at a time, and pull them up from the Motherboard, be gentle. Once this process is complete, you have successfully removed the Ram.
-


To reassemble your device, follow these instructions in reverse order.
To reassemble your device, follow these instructions in reverse order.
Rückgängig: Ich habe diese Anleitung nicht absolviert.
3 weitere Personen haben diese Anleitung absolviert.
Team

USF Tampa, Team S1-G4, Nance Fall 2017 Mitglied von USF Tampa, Team S1-G4, Nance Fall 2017
USFT-NANCE-F17S1G4
3 Mitglieder
5 Anleitungen geschrieben
Ein Kommentar
Thank you very much for this guide. I’ve successfully managed to replace my RAM with 16GB module.