Einleitung
このガイドを使ってMac Mini Late 2012のiFixitのデュアルハードドライブキットをインストールしましょう。
Was du brauchst
-
-
コネクターにアクセスできるようmini本体からファンを持ち上げます。
-
全てのワイヤーを一度に掴み、ファンをロジックボードから外すために慎重にまっすぐ引き上げます。
-
ファンを取り出します。
-
-
-
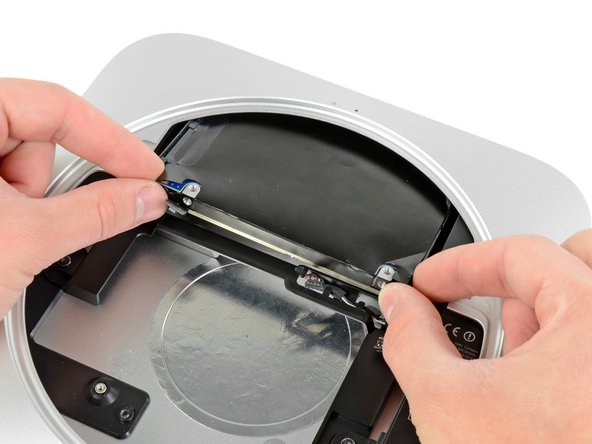
下記のアンテナプレートを固定している次のネジを外します:
-
2本の6.6 mm T8 トルクスネジ
-
2本の5.0 mm T8 トルクスネジ(スクリュードライバーでも可)
-
再組み立ての際には:
-
-
-
-
下記の3つのネジを外します:
-
1つの5.0 mm T8 トルクスまたは2.0 mm 六角ネジ(スクリュードライバーでも可)
-
1つの16.2 mm T6トルクスネジ
-
1つの26 mm T6スタンドオフネジ
-
-
-
Mac Mini Logic Board Removal Tool を赤でハイライトされた穴に挿入してください。工具が基盤の下のアウターケースに到達しているか確認してください。
-
慎重に工具をI/Oボード側に引っ張ります。基板とI/Oボードアセンブリはアウターケース外側にわずかに動きます
-
Mac mini Logic Board Removal toolを取り出します。
-
-
-
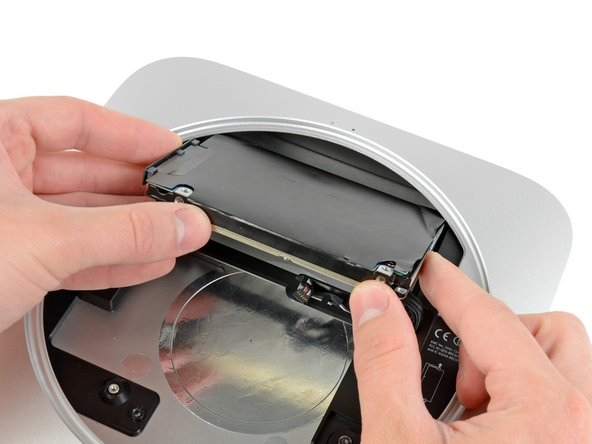
電源コネクターにアクセスできるようにI/Oボード/ロジックボードアセンブリをアウターケースから引き出します。
-
指を使って、DC-In ケーブルをロジックボードから外します。
-
電源ケーブルコネクターを本体の前面に向かって引きます。
-
-
-
グロメットをブラケットの内側から押し込みながら、ブラケットの側面にある穴にはめ込みます。
-
3枚目の写真のように、グロメットがブラケットにしっかりと嵌まっていることを確認してください。
-
残り3つのグロメットについても、ブラケットの両側に対して同じ手順を行います。
-
-
-
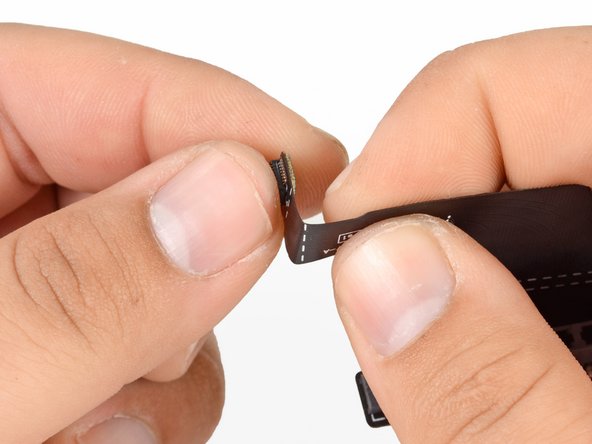
リボンケーブルを点線に沿って折り曲げて、コネクタがソケットから外れにくくします。
-
SSDコネクタのところでリボンケーブルを90°折り曲げて、コネクタと平行になるようにします。
-
-
-
SSDコネクタの端を使用して、最初の大きな点線に沿ってケーブルを下方向に90°折り曲げます。
-
2番目の大きな点線に沿って、リボンケーブルを上方向に90°折り返します。
-
-
-
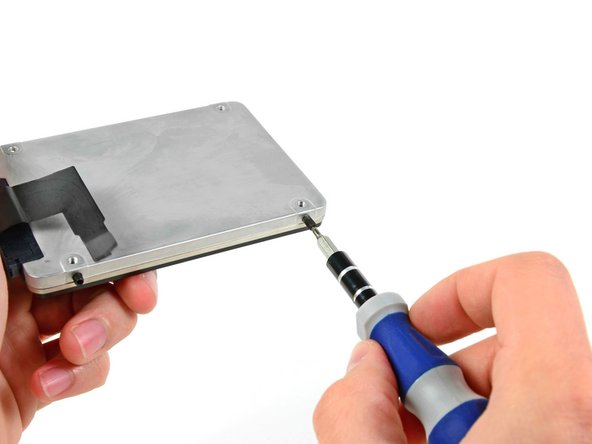
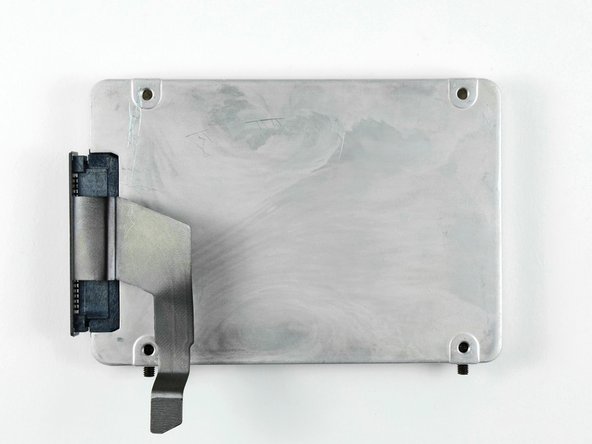
T6トルクスドライバーを使用して、ロジックボードに接続するハードドライブケーブルの端部に最も近い、ハードドライブの側面に2本のネジを取り付けます。
-
ハードドライブ側面のネジ山が切ってある穴に到達するまで、ネジを締め付けます。正しく取り付けると3枚目の写真のようになります。
-
-
-
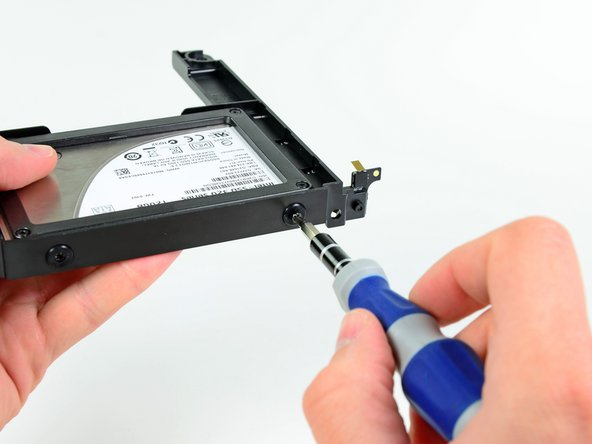
次の2つの手順では、ハードドライブをブラケットに取り付けます。
-
2番目の写真のように、固定ネジをブラケットのグロメットに押し込み、ハードドライブを下から上にブラケットに取り付けます。
-
-
-
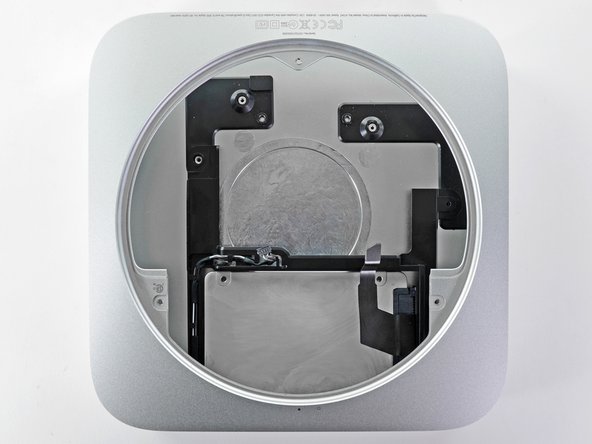
2番目のハードドライブアセンブリをアウターケースに取り付けます。
-
2番目の写真のように、取り付け穴の位置と、アウターケースのねじ山が切られた穴の位置がずれていないことを確認します。
-
ロジックボードを取り付ける際は、単純に2番目のハードドライブケーブルをロジックボードの空きソケットに接続します。
-
-
-
マシンを起動すると、miniに両方のドライブが認識されます。
-
Xbenchスコアで確認すると、上と下のいずれにハードドライブを取り付けても、速度は変わらないことが分かります。
-
元通りに組み立てたら、miniをLion Recoveryモードで起動し、ディスクユーティリティからSSDを消去します。次にLionをSSDにインストールし、再起動後にシステム設定>起動ディスクへと進み、起動ディスクにSSDを選択します。
-


デバイスを組み立て直すには、この手順と逆の順序に従ってください。
デバイスを組み立て直すには、この手順と逆の順序に従ってください。
Rückgängig: Ich habe diese Anleitung nicht absolviert.
728 weitere Nutzer:innen haben diese Anleitung absolviert.
Besonderer Dank geht an diese Übersetzer:innen:
100%


Diese Übersetzer:innen helfen uns, die Welt zu reparieren! Wie kann ich mithelfen?
Hier starten ›

68 Kommentare
In my system the only way to get an SSD drive (OCZ Agility 3 120G) to work was to install it to the first SATA interface and the original HD to the second SATA interface.
I tried first as said in this guide, but the whole system got very unstable, the SSD was basicly unusable with lots of read errors, kernel panics etc...
After switch everything went smoothly. I cloned the original system to the new SSD with Carbon Copy Cloner, selected the SSD to be the startup disk and rebooted, Now the SSD is primary drive (with huge difference in speed, some 340/300 read/write) and the original 1T HD is secondary drive hosting my iTunes, iMovie and iPhoto archives.
I have a late-2012 MacMini which came with 4GB RAM + 1 TB HDD. The RAM has been upgraded to 12GB. I upgraded the MacOSX to Catalina 10.15 but seems I am having some problems with it. I now want to replace the original 1 TH HDD with a 480GB SSD (and use it as system disk) and also add a second 1TB SSD as a storage disk. And finally re-install MacOSX High Sierra or the later OSX and get rid of Catalina. What would be your advice to place which SSD into which bay? Thank you!
MAFAKY -
The iFixit SATA cable does not work with the OCZ Vertex 4 drive using OS X 10.8. I tried both the "upper" and "lower" ports, neither work. Using the Apple supplied SATA cable, the drive works in both ports. Using the iFixit cable with the Apple supplied HDD drive works. Using the iFixit cable, the OCZ drive is detected using the OCZ Mac boot tools. It's just OS X 10.8 that can not see the drive when using the iFixit cable. I've contacted OCZ support.
(Same as Patrick noted above) If you are adding a new SSD to your factory 1TB HD using iFixit's Mac mini HD kit, SWAP the drive positions—so that the SSD is in the original slot connected Apple's SATA cable and the original HD is now in the other bay using iFixit's cable. This issue affects only late-2012 Mac minis that come with a mini-specific build of OS X 10.8.2.