Zum Hauptinhalt wechseln

Mac Mini Mid 2011 Hard Drive Replacement

Grundständige Anleitung
Dies ist eine grundständige Anleitung, die nur als Teil einer anderen Anleitung verwendet werden sollte.
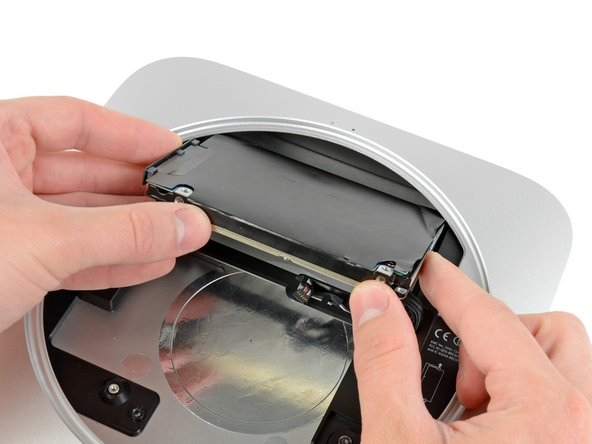
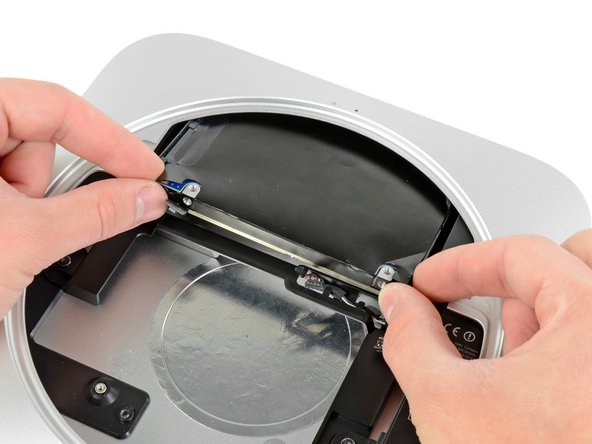
  1. Mac Mini Mid 2011 Hard Drive Replacement, Hard Drive: Schritt 1, Bild 1 von 2 Mac Mini Mid 2011 Hard Drive Replacement, Hard Drive: Schritt 1, Bild 2 von 2
    • Pull the hard drive away from the front edge of the mini and remove it from the outer case.

    • During reassembly, there are two pins on the inside edge of the hard drive that fit into the case. The holes have rubber grommets around them, so it may be difficult to tell when you have seated the hard drive correctly.

    • There are two pairs of holes in the case. Insert the pins into the holes closest to the bottom of the case.

Abschluss

To reassemble your device, follow these instructions in reverse order.
0 Kommentare

Kommentar hinzufügen

Seitenaufrufe:

Letzte 24 Stunden: 0

Letzte 7 Tage: 0

Letzte 30 Tage: 0

Insgesamt: 1,024