Einleitung
Removing a PCIe or GPU from this version of the Mac Pro isn’t as simple as pulling the card out of the PCIe slot.
Was du brauchst
-
-
The screws are spring-mounted and will stay attached to the cover. You can remove them by hand, although a screwdriver may be needed to start.
-
-
-
-
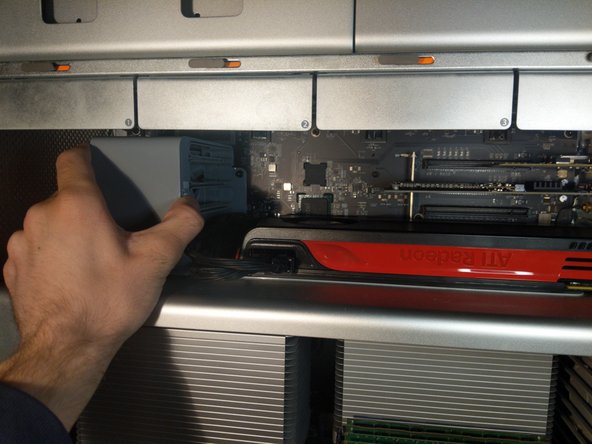
If the card is long enough to reach the slots in the fan casing, or the card is hooked into the lock bar next to the PCI ports, you need to slide the cover on the fan casing over.
-
Press the release button and slide the casing to the left.
-
This also moves the lock bar.
-
-
-
Push down on the clip, Not bending the port. to remove the cables.
-


To reassemble your device, follow these instructions in reverse order.
To reassemble your device, follow these instructions in reverse order.
Rückgängig: Ich habe diese Anleitung nicht absolviert.
10 weitere Nutzer:innen haben diese Anleitung absolviert.
4 Kommentare
I was wondering if anyone knows if Sapphire Radeon video cards are repaired and who can that be
What's wrong with your GPU?
Lines, Fans not turning on, No screen, etc
Great site! However, on the GPU upgrade:
in the most common upgrades, the GPU has an 8 pin requirement vs. the original 6 pin. I ran into this problem yesterday. I bought a Radeon r580 and the included 6 pin power cable is for a PC board, not the 6 pin mini-plug that the Mac requires. In fact, the cMP has TWO mini 6 pin slots, one of which is used by the OEM GPU. They are side-by-side. The issue is - since this is not a "Mac" GPU edition - is getting the correct 2 X 6 mini-plugs with the 8 pin that plugs into the GPU.
As I type, I am waiting for new cable. If the above is not correct, PLEASE let me know.
Thanks!!
Great catch!
I completely forgot this issue.
You don't want to run it off of just one mini 6, or you'll burn the motherboard.
Use 2x mini 6 pin to etc cables. And as usual Enjoy! :-)