Einleitung
In der Anschlusseinheit befinden sich die Kopfhörerbuchse, die USB-Buchse und der Micro-DVI-Anschluss. Bei Problemen kannst du die ganze Einheit tauschen.
Was du brauchst
-
-
Das Gehäuseunterteil ist mit 10 Kreuzschlitzschrauben am Air befestigt. Drehe sie heraus:
-
Sechs 2,8 mm Schrauben
-
Zwei 3,8 mm Schrauben
-
Zwei 5,4 mm Schrauben
-
-
-
Hebe das Gehäuseunterteil in der Nähe der Lüftungsöffnungen leicht an und schiebe es in Richtung hinteres Ende des Computers. Du löst dadurch die Haltezungen.
-
-
-
Entferne folgende neun Kreuzschlitzschrauben, die den Akku befestigen:
-
Vier 2,9 mm Schrauben
-
Vier 3,8 mm Schrauben
-
Eine 7,2 mm Schraube
-
-
-
-
Hebe den Akku aus dem Air heraus.
-
Wenn du einen neuen Akku einbaust, solltest du ihn nach dem Einbau kalibrieren:
-
Lade ihn auf 100% auf und lasse ihn mind. 2 weitere Stunden laden. Benutze das Gerät normal, um den Akku zu leeren. Wenn die Akkuanzeige niedrig ist, speichere deine Arbeit ab und lasse dein Laptop weiter laufen bis es sich wegen eines leeren Akkus von selbst abschaltet. Warte mind. 5 Stunden, lade dann dein Laptop ohne Unterbrechung auf 100% auf.
-
Falls du nach dem Einbau deines neuen Akkus irgendwelche Probleme oder etwas Ungewöhnliches feststellst, musst du unter Umständen den SMC deines MacBooks zurücksetzen.
-
-
-
Entferne die folgenden beiden Schrauben, mit denen die Lautsprechereinheit am oberen Gehäuse befestigt ist:
-
Eine 3 mm Kreuzschlitzschraube
-
Eine 5,8 mm Kreuzschlitzschraube
-
-
-
Löse die Audio-Platine mit einem Spudger aus der Klebeverbindung zur Halterung der Festplatte.
-
Löse den Stecker der Audio-Platine aus seinem Anschluss.
-
-
-
Drehe die Lautsprechereinheit zur Mitte des Air hin.
-
Heble den Stecker am Lautsprecherkabel mit einem Spudger von der Audi-Platine ab.
-
-
-
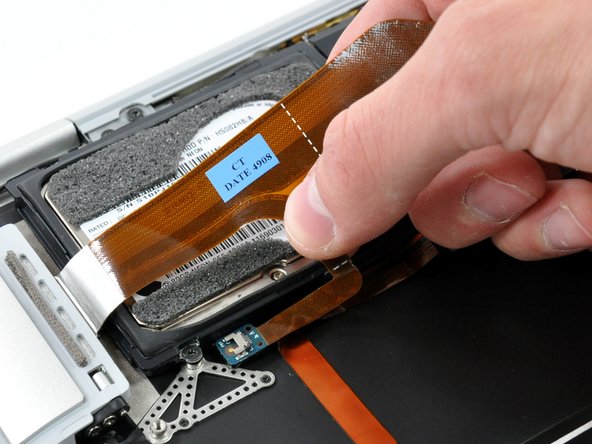
Ziehe das Flachbandkabel zur Anschlusseinheit an der schwarzen Zuglasche senkrecht nach oben und trenne es ab.
-
Löse, falls nötig, das Flachbandkabel zum Audioausgang aus der Klebeverbindung zum oberen Gehäuse.
-
-
-
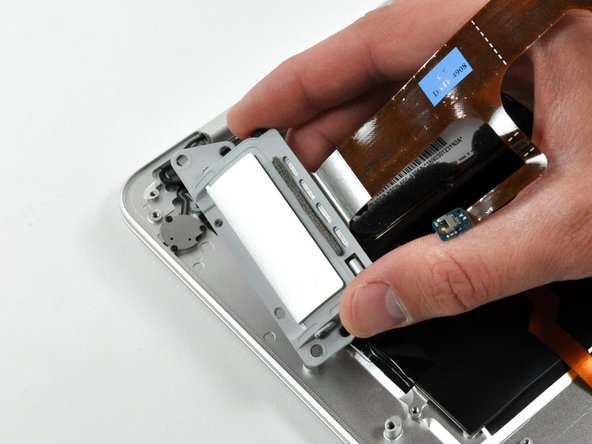
Entferne die vier 3,2 mm Kreuzschlitzschrauben, mit denen die Anschlusseinheit am oberen Gehäuse befestigt ist.
-
Hebe die Anschlusseinheit aus dem oberen Gehäuse heraus.
-


Um dein Gerät wieder zusammenbauen, folge den Schritten in umgekehrter Reihenfolge.
Um dein Gerät wieder zusammenbauen, folge den Schritten in umgekehrter Reihenfolge.
Rückgängig: Ich habe diese Anleitung nicht absolviert.
7 weitere Nutzer:innen haben diese Anleitung absolviert.
Besonderer Dank geht an diese Übersetzer:innen:
100%

Diese Übersetzer:innen helfen uns, die Welt zu reparieren! Wie kann ich mithelfen?
Hier starten ›
