Zum Hauptinhalt wechseln

MacBook Pro 13" Retina Display Late 2012 Trackpad Replacement

Grundständige Anleitung
Dies ist eine grundständige Anleitung, die nur als Teil einer anderen Anleitung verwendet werden sollte.

Was du brauchst

  1. MacBook Pro 13" Retina Display Late 2012 Trackpad Replacement, Trackpad: Schritt 1, Bild 1 von 1
    • Remove the following screws securing the trackpad to the upper case:

    • Four 1.4 mm Phillips #000 screws

  2. MacBook Pro 13" Retina Display Late 2012 Trackpad Replacement: Schritt 2, Bild 1 von 2 MacBook Pro 13" Retina Display Late 2012 Trackpad Replacement: Schritt 2, Bild 2 von 2
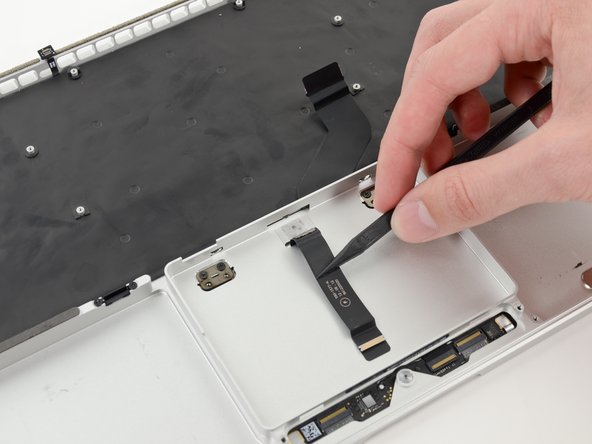
    • Wedge the spudger between the trackpad ribbon cable and the upper case.

    • Run the spudger along the bottom to release the trackpad ribbon cable from the adhesive securing it to the upper case.

  3. MacBook Pro 13" Retina Display Late 2012 Trackpad Replacement: Schritt 3, Bild 1 von 2 MacBook Pro 13" Retina Display Late 2012 Trackpad Replacement: Schritt 3, Bild 2 von 2
    • Insert the tip of a spudger in between the trackpad ribbon cable and the upper case.

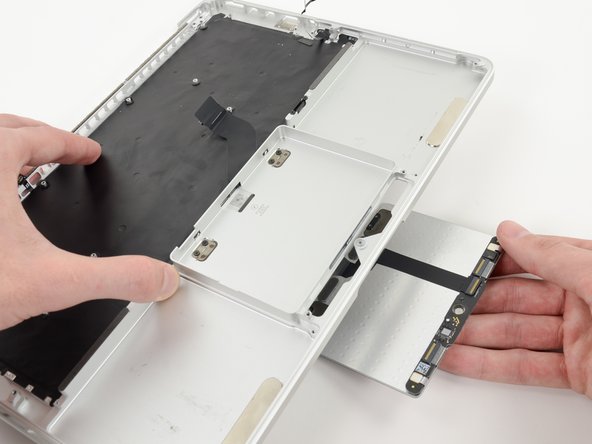
    • Carefully thread the trackpad ribbon cable out of the notch near the top of the SSD assembly cavity.

  4. MacBook Pro 13" Retina Display Late 2012 Trackpad Replacement: Schritt 4, Bild 1 von 2 MacBook Pro 13" Retina Display Late 2012 Trackpad Replacement: Schritt 4, Bild 2 von 2
    • Once the trackpad is free of the upper case, guide the trackpad ribbon cable through the slot cut in the upper case.

    • Remove the trackpad from the upper case.

Abschluss

To reassemble your device, follow these instructions in reverse order.

0 Kommentare

Kommentar hinzufügen

Seitenaufrufe:

Letzte 24 Stunden: 0

Letzte 7 Tage: 0

Letzte 30 Tage: 0

Insgesamt: 98