Einleitung
Tausche einen defekten Lüfter aus, um eine Überhitzung deines MacBooks zu verhindern.
Was du brauchst
-
-
Löse die acht 4 mm Kreuzschlitz Schrauben, die die untere Abdeckung befestigen.
-
-
-
Hebe die untere Abdeckung vorsichtig in der Nähe der Lüftungsöffnung an.
-
Öffne den Spalt weiter mit den Fingern, bis sich die Abdeckung von den verbleibenden Clips löst.
Do the retaining clips have to be re-engaged when replacing the lower case?
Answering my own question, the clips re-engage when the lower case is correctly positioned. You can help them by gently pressing the lower case with your thumbs midway along the two short sides. When everything is correctly aligned the eight screw holes line up.
Rather than running your fingernail down the sides to free up the retaining clips, I found that using an old credit card, inserted about 1/4”, to run along the left and right side popped those end retaining clips right off with no problem. You may need to twist the card slightly when in the middle area to help pop those off.
-
-
-
Hebe den Akkuanschluss mit dem flachen Ende des Spudgers aus seinem Sockel auf dem Logic Board.
you do not need to remove the battery when replacing the hard drive or ram
Be careful of the corner of the battery cable connector when trying to pry it off with the spudge. I knocked the corner of mine. No operational impact but was not very pleasing!
Not necessary, but a good idea, so as to avoid any spurious charges going through the boards...
@Svenaustx - What could happen if not removing this battery? Worst case? Not a geek on this but did change RAM on my Macbook Pro "15. Can't remember disconneting the battery back then. Shouldn't it be sufficient shutting the Mac off and ensure it has been used for an hour or so before replacing RAM?
-
-
-
-
Verwende einen Spudger, um den Stecker des AirPort/Bluetooth-Flachbandkabels nach oben aus dem Logic Board herauszuhebeln.
-
Biege das AirPort/Bluetooth-Flachbandkabel vorsichtig vom Lüfter weg.
-
-
-
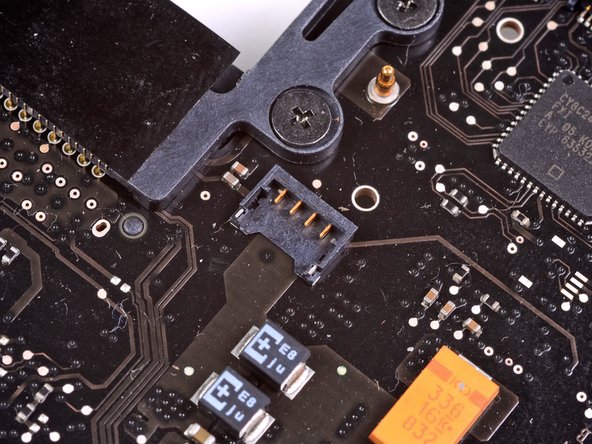
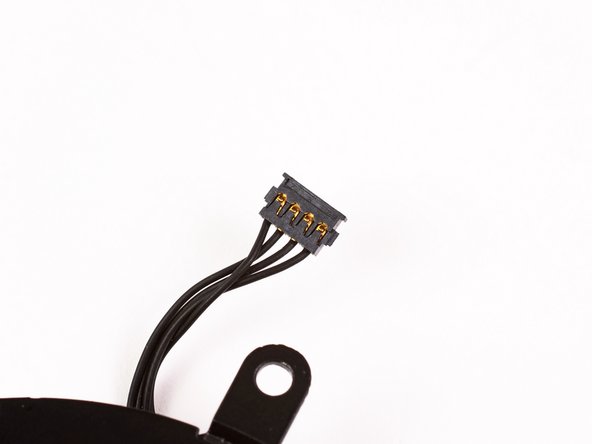
Verwende das flache Ende eines Spudgers, um den Lüfterstecker gerade nach oben aus dem Logic Board zu hebeln.
I think I broke it off the board. Is this fixable?
I broke the socket off the logic board, but it is fixable. I succesfully welded it back but it's a very tricky thing to do, even with the right tools, the socket is plastic made so it melt easily and you need very good eyes because soldering iron and magnifying glass are very annoying to use together. If you are not confident to do the right thing, dont do it ! Check your entourage, maybe you have electronic buffs who could do it right...
-
-
-
Entferne die folgenden drei Schrauben, mit denen der Lüfter am Obergehäuse befestigt ist:
-
Eine 7,1 mm lange Kreuzschlitzschraube
-
Zwei 5,3 mm lange Kreuzschlitzschrauben
The two 5.3 mm Phillips screws are so tight, that I can’t open them. I’ve tried to apply some oil with an Q-Tip. Has someone an other clue?
Take a look at this guide for removing stripped screws, How to Remove a Stripped Screw, and see if any of these options might work for your particular screw.
-
-
-
Hebe den Lüfter aus dem Obergehäuse heraus.
My right screw is not possible to loosen because the part where the bit should fit ist round now. The screw is tigthend so hard. What can I do?
Take a look at this guide for removing stripped screws, Wie man eine rundgedrehte Schraube entfernt, and see if any of these options might work for your particular screw.
-
Um dein Gerät wieder zusammenzubauen, folge den Schritten dieser Anleitung in umgekehrter Reihenfolge.
Um dein Gerät wieder zusammenzubauen, folge den Schritten dieser Anleitung in umgekehrter Reihenfolge.
Rückgängig: Ich habe diese Anleitung nicht absolviert.
79 weitere Nutzer:innen haben diese Anleitung absolviert.
Besonderer Dank geht an diese Übersetzer:innen:
100%
Maria Parker hilft uns, die Welt in Ordnung zu bringen! Wie kann ich mithelfen?
Hier starten ›
3 Kommentare
Wish I had read Maurices comment. I did this fix because my fan had a noisy bearing. But I found the sound of the fan running at full speed after the replacement to be more annoying. So I swapped it back. didn’t think top reset the SMC.


According to this page http://support.apple.com/kb/HT1651?viewl..., the 8 screws are not identical.
Can anybody tell me where each kind of screw is supposed to go?
Gregoire - Antwort
They are all 100% Identical. You were probably looking at a different model, or Apple has entered the wrong information... Hey, It happens...
Owen Davies -
The screws on the Late 2009 are identical. The blue lock compound might make tightening some require a little more effort.
svenaustx - Antwort
Can I replace it with a SATA 3 cable?
nm - Antwort
A1342 macbook does not have the right controller to support sata III
Owen Davies -
hi, i just got back from the apple store and they are really keen for me to upgrade to a new laptop since my battery is old and the screen is cracked, so glad i found ifixit i would love to upgrade this puppy! gonna make it a real sleeper! styler hall wrote about sticking 16 gb of ram in his a 1342 ? is this a simply mather of ordering 3 4gb sticks ?aslo i currently have 4 gb and would like to upgrade to 8 ( or indeed 16) does that mean i need to buy all new sticks or can i continue to use the old one and stick a new one next to it ?
thanks again mick van aar, perth western aus.
michelvanaar - Antwort
The A1342 will take up to 16 GB of RAM, however, there are only two RAM slots, so use two 8-GB RAM modules. Other World Computing (OWC) is a great reference source for info on exactly which RAM to use with which model; prices are usually much better on EBay though. Add an SSD from OWC and your machine will really scream!
I hope that helps!
gdesbrisay -
Gregoire is right. The 8 screws are absolutely NOT identical, I’m looking at them right now, weeowey weeowey.
John Guzman - Antwort
I just wanted to say that, in 2020, i used these instructions to replace the magsafe socket on my A1286, mid-2012, pre-Retina MacBook Pro. The internal layout is not quite the same but close enough for me to do the job. I skipped the steps of fully disconnecting the fans and speakers because of what others had said about breaking the sockets. it just meant I had to be extremely careful when lifting up the main board so that I did not tear and break the connections. I was able to disconnect the old magsafe socket with the board flat and in situ, but there was no where near enough room to be able to aline and press home the new par home. Reluctantly i had to lever up the board. This was difficult as there is a tapped post that holds a screw in the way close to where the USB sockets are, that prevented the board lifting up and out. I had to be quite forceful to manouevre the sockets out from the edge of the case.
Paul Burridge - Antwort