Einleitung
Remove the motherboard from the device for replacement. If the device will not turn on, but the battery is still charged, the motherboard might need to be replaced.
Was du brauchst
-
-
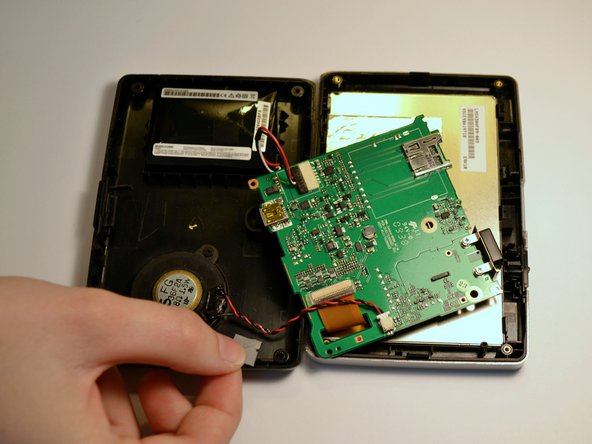
Place the GPS with the screen facing down.
-
-
-
Remove the four 4.2 mm screws on the back cover of the device using a Phillips #0 screwdriver.
-
-
-
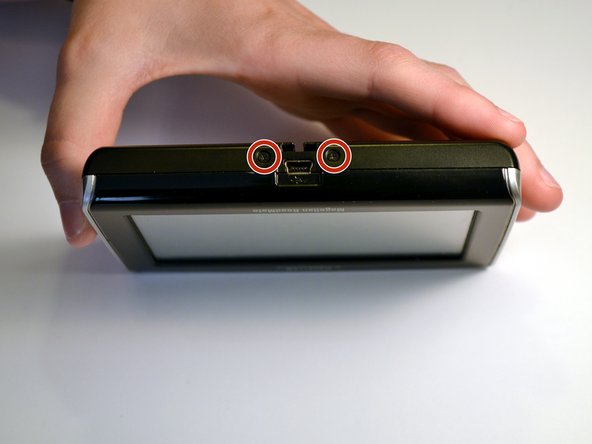
Remove the two 4.2mm screws at the bottom of the device using a Phillips #0 screwdriver.
-
-
-
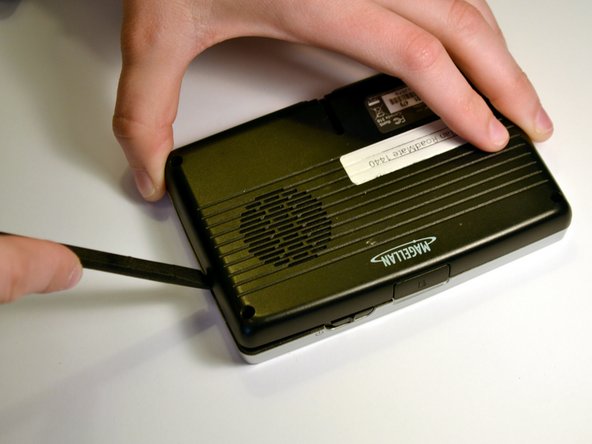
Insert the black spudger into the crease in the side of the GPS.
-
Move the end of the spudger down to break the seal between the two plastic shells.
-
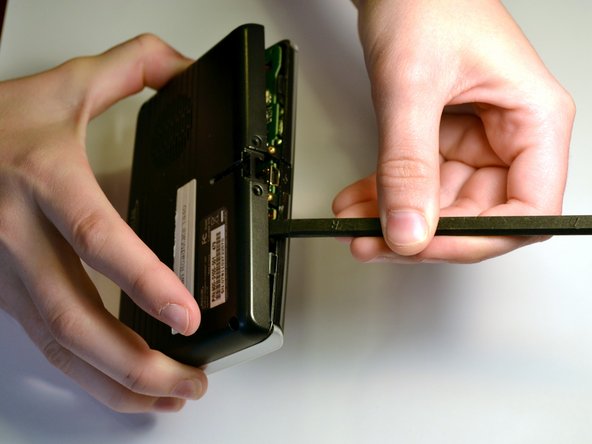
Continue doing this along each side of the GPS to ensure a smooth removal.
-
-
-
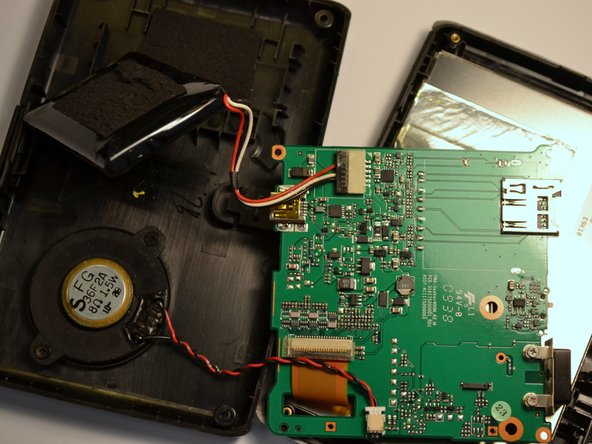
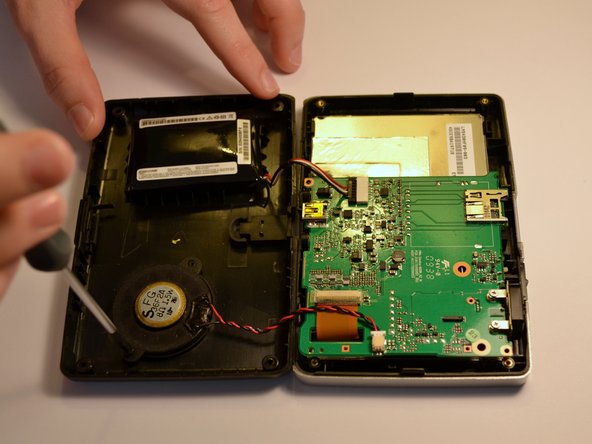
Fully separate the two sides of the case.
-
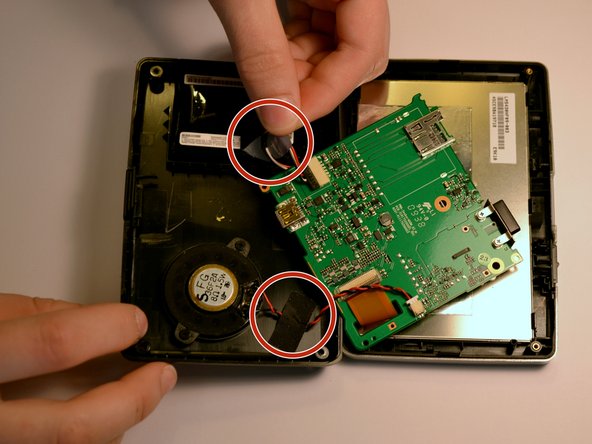
Remove the tape on the battery wires and the tape on the speaker wires.
-
-
-
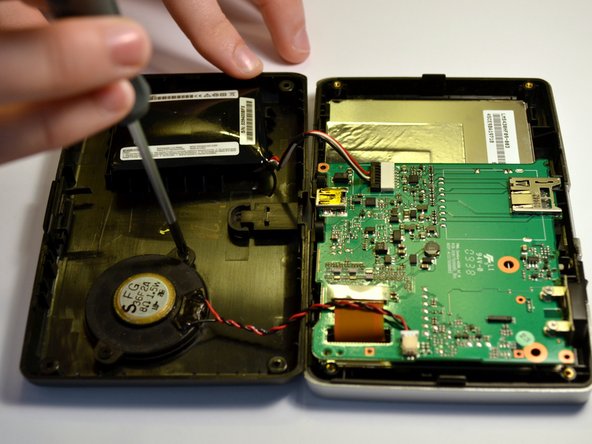
Use the black spudger to break the seal between the adhesive and battery. Use the same spudger to continue to pry the battery from the backing
-
-
-
-
Lift the battery from the device
-
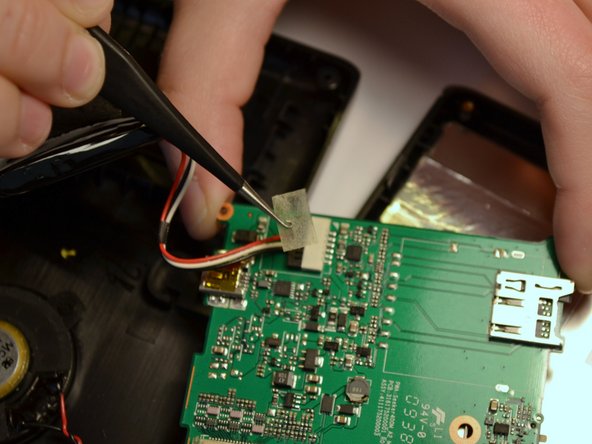
Once the battery is free from the adhesive, remove the piece of tape with a pair of tweezers that is covering the connection of the battery to the motherboard.
-
-
-
Unplug the battery from the mother board by pulling back the clips and pulling the wires away from the motherboards receptacle
-
-
-
After the back has been removed, locate each of the screws securing the speaker to the inside of the back cover.
-
Use a Phillips #0 screwdriver to remove the two 3.8mm Phillips #0 screws.
-
-
-
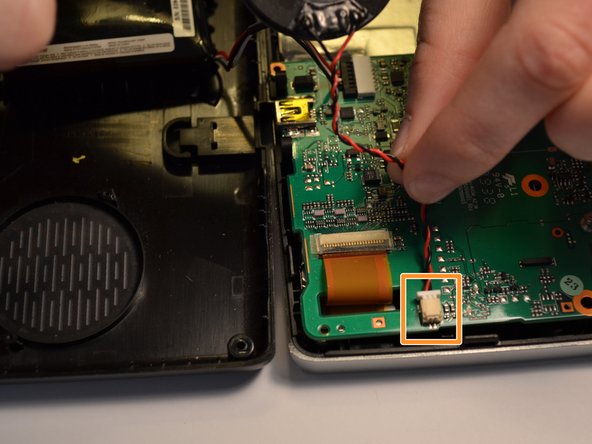
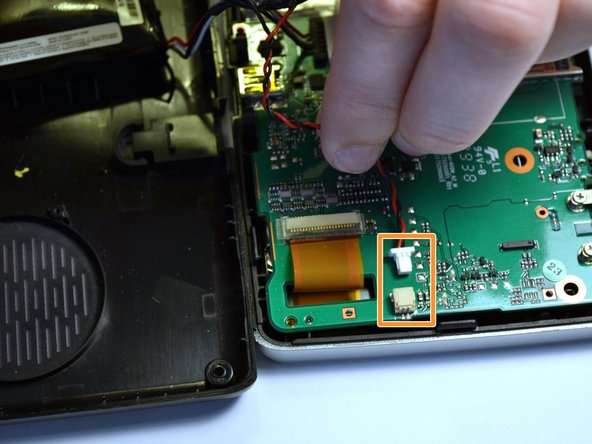
Gently remove the connector from the motherboard to completely remove the speaker.
-
-
-
Once the back cover has been removed, lift the power switch from the device.
-
-
-
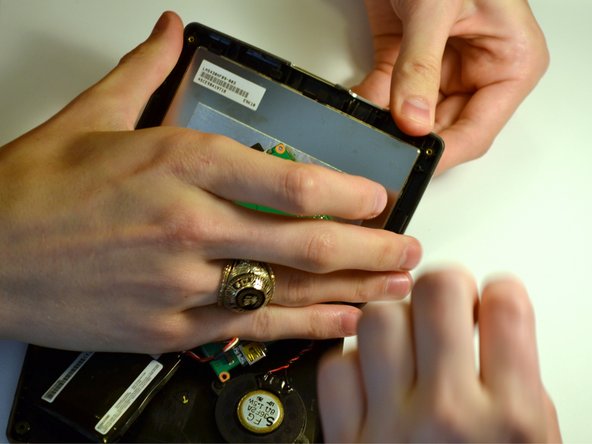
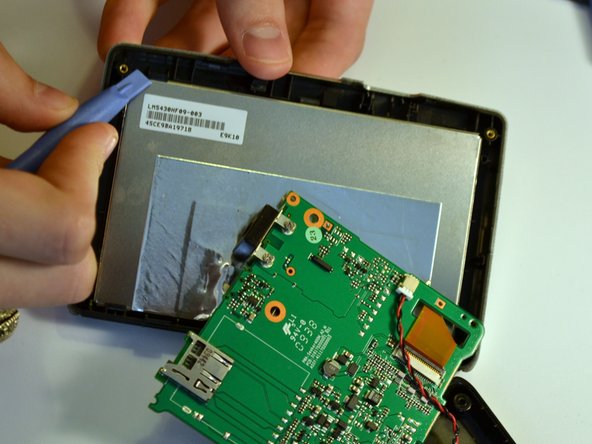
Using two hands, pull back the tabs holding the screen in place.
-
Use a spudger to help use leverage to remove the screen, if necessary
-
-
-
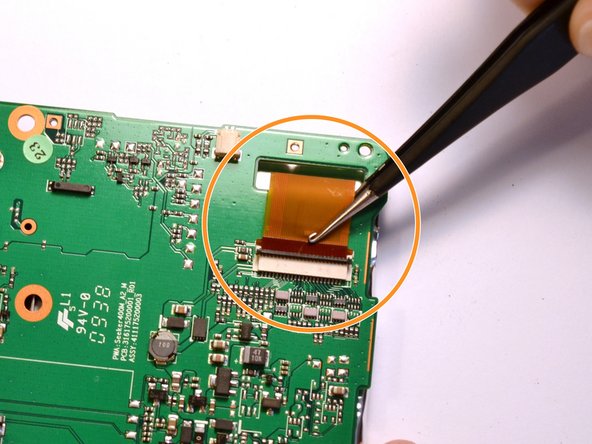
Raise the switch locking the ribbon cable in place.
-
Using twesers, pull the ribbon cable from the socket.
-
-
-
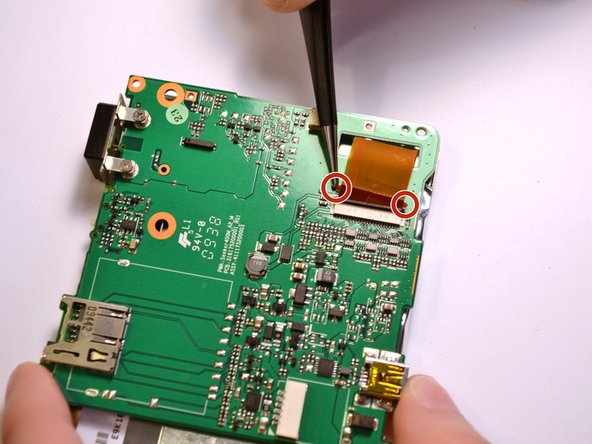
With the ribbon cable removed, the screen is completely disconnected from the device.
-
To replace the ribbon cable, press the two tabs to push the head into the socket.
-
-
-
Now that the screen has been removed from the motherboard, the motherboard is not connected to anything on the device.
-
Slide the ribbon cable through the opening in the circuit board in order to separate the two.
-


To reassemble your device, follow these instructions in reverse order.
To reassemble your device, follow these instructions in reverse order.
Team

Clemson, Team 7-3, Benson Spring 2016 Mitglied von Clemson, Team 7-3, Benson Spring 2016
CLEM-BENSON-S16S7G3
4 Mitglieder
7 Anleitungen geschrieben