Einleitung
This guide will show you how to remove and replace the motherboard inside your Magellan Roadmate 5250T-LM. It would be helpful to know how to solder before attempting this replacement. To remove the motherboard you must desolder it from the battery and speakers. After this, you will need to solder your new motherboard back on to the battery and speakers.
Was du brauchst
-
-
Remove all four 5mm screws from the back of the device using a Phillips Head screwdriver size 000.
-
-
-
-
Remove the tape covering the display connector on top of the motherboard.
-
Use a nylon spudger to flip up the black tab on the ZIF connector.
-
Pull the ribbon cable out with tweezers.
-
-
-
Remove the motherboard from the device by unscrewing all three 4mm screws that are connecting it to the casing with a Phillips Head screwdriver size 000.
-
-
-
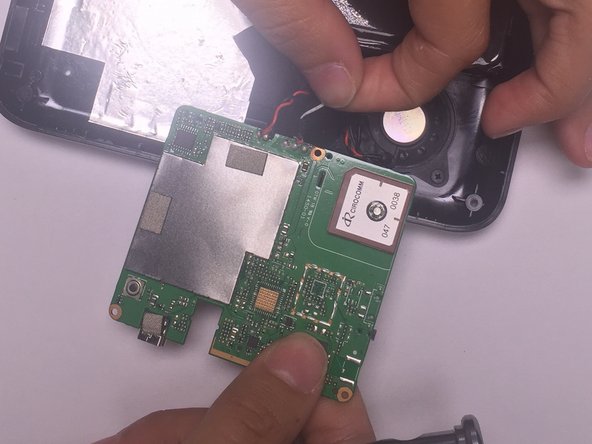
Disconnect the original battery from the motherboard and the speaker by desoldering all five wires that attach them to the motherboard.
-


To reassemble your device, follow these instructions in reverse order.
To reassemble your device, follow these instructions in reverse order.
Team

University of Alabama, Team 1-7, Sydow campbell Spring 2016 Mitglied von University of Alabama, Team 1-7, Sydow campbell Spring 2016
UA-SYDOW CAMPBELL-S16S1G7
4 Mitglieder
3 Anleitungen geschrieben