Zum Hauptinhalt wechseln

Magellan Roadmate 9055-LM Speaker Replacement

Was du brauchst

  1. Magellan Roadmate 9055-LM Speaker Replacement, Magellan Roadmate 9055-LM Back Panel Disassembly: Schritt 1, Bild 1 von 1
    • Flip your device with back panel facing up.

  2. Magellan Roadmate 9055-LM Speaker Replacement: Schritt 2, Bild 1 von 3 Magellan Roadmate 9055-LM Speaker Replacement: Schritt 2, Bild 2 von 3 Magellan Roadmate 9055-LM Speaker Replacement: Schritt 2, Bild 3 von 3
    • Unscrew four Phillips #0 screws from the back panel.

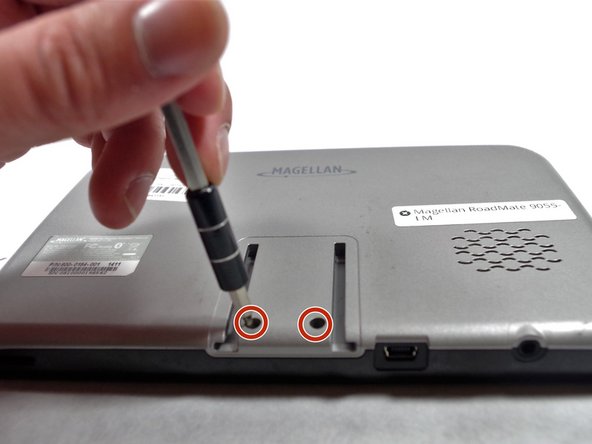
  3. Magellan Roadmate 9055-LM Speaker Replacement: Schritt 3, Bild 1 von 2 Magellan Roadmate 9055-LM Speaker Replacement: Schritt 3, Bild 2 von 2
    • Unscrew two Phillips #0 screws from the back panel.

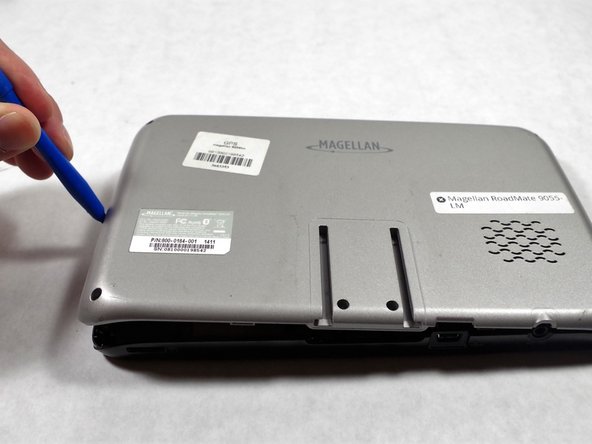
  4. Magellan Roadmate 9055-LM Speaker Replacement: Schritt 4, Bild 1 von 2 Magellan Roadmate 9055-LM Speaker Replacement: Schritt 4, Bild 2 von 2
    • Use a plastic opening tool to pop the right side of the panel.

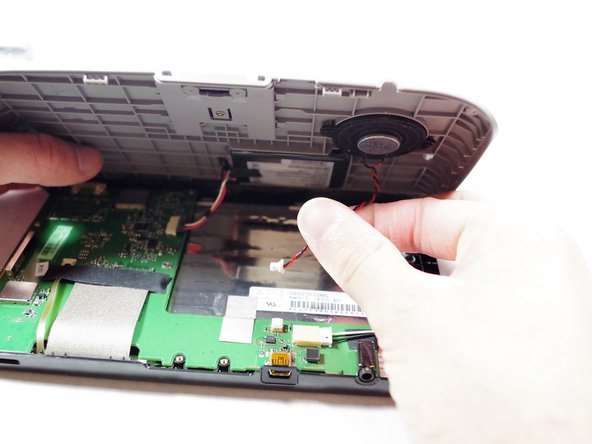
  5. Magellan Roadmate 9055-LM Speaker Replacement: Schritt 5, Bild 1 von 1
    • Lifting the back panel too quickly or forcefully may damage the speaker cable and battery cable, which are still attached underneath.

    • Gently lift up the back panel.

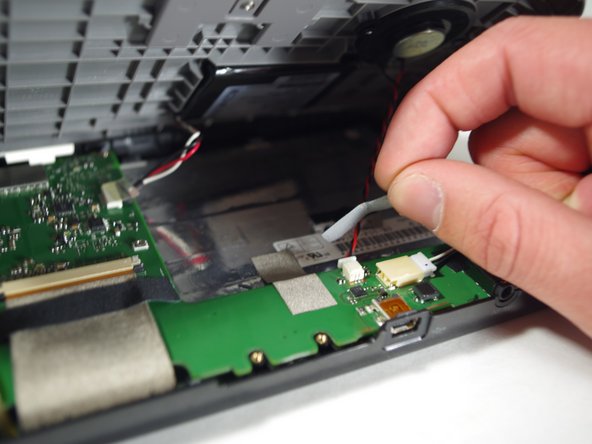
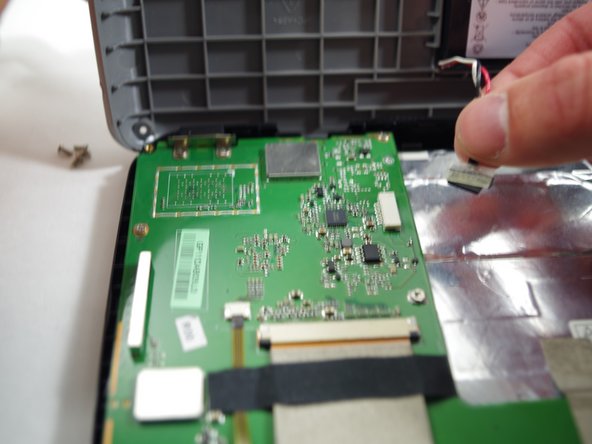
  6. Magellan Roadmate 9055-LM Speaker Replacement: Schritt 6, Bild 1 von 3 Magellan Roadmate 9055-LM Speaker Replacement: Schritt 6, Bild 2 von 3 Magellan Roadmate 9055-LM Speaker Replacement: Schritt 6, Bild 3 von 3
    • Remove the tape.

    • Unplug the cable for the speaker.

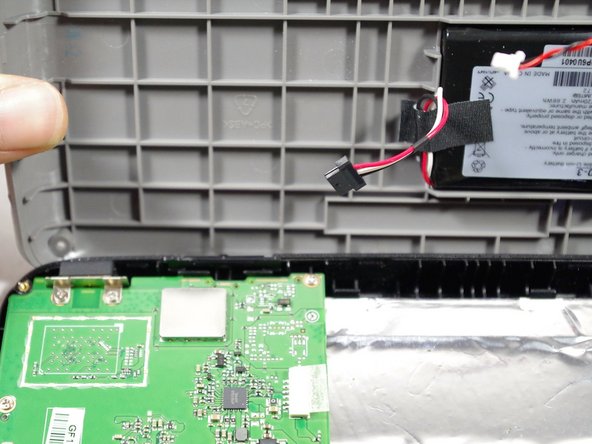
  7. Magellan Roadmate 9055-LM Speaker Replacement: Schritt 7, Bild 1 von 3 Magellan Roadmate 9055-LM Speaker Replacement: Schritt 7, Bild 2 von 3 Magellan Roadmate 9055-LM Speaker Replacement: Schritt 7, Bild 3 von 3
    • Remove the cable of the battery.

    • Tape removal is not necessary.

  8. Magellan Roadmate 9055-LM Speaker Replacement: Schritt 8, Bild 1 von 1
    • Place the back panel gently on the table.

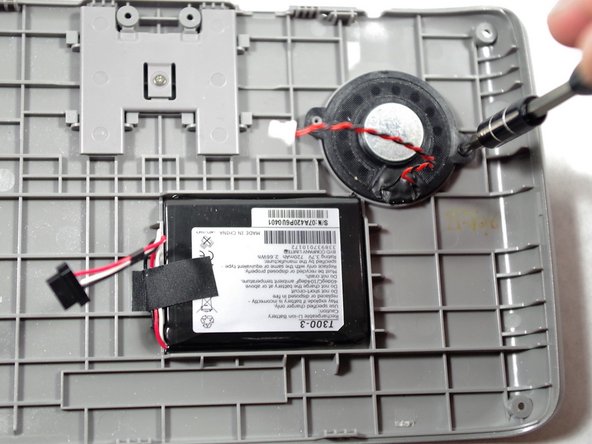
  9. Magellan Roadmate 9055-LM Speaker Replacement, Speaker: Schritt 9, Bild 1 von 2 Magellan Roadmate 9055-LM Speaker Replacement, Speaker: Schritt 9, Bild 2 von 2
    • Unscrew the left and the right screws using the ifixit screwdriver.

  10. Magellan Roadmate 9055-LM Speaker Replacement: Schritt 10, Bild 1 von 1
    • Now that you removed the screws, you can finally replace the speaker.

Abschluss

To reassemble your device, follow these instructions in reverse order.

Eine weitere Person hat diese Anleitung absolviert.

Giovanni

Mitglied seit: 10/18/16

313 Reputation

3 Anleitungen geschrieben

Team

UMass Dartmouth, Team 1-5, Catania Fall 2016 Mitglied von UMass Dartmouth, Team 1-5, Catania Fall 2016

UMASSD-CATANIA-F16S1G5

3 Mitglieder

7 Anleitungen geschrieben

0 Kommentare

Kommentar hinzufügen

Seitenaufrufe:

Letzte 24 Stunden: 1

Letzte 7 Tage: 1

Letzte 30 Tage: 3

Insgesamt: 143