Zum Hauptinhalt wechseln

Marco TA1 Gas Bottle Replacement

Was du brauchst

  1. Marco TA1 Gas Bottle Replacement, Let's get ready: Schritt 1, Bild 1 von 1
    • You need your TA1 handheld horn and a spare gas bottle to proceed.

  2. Marco TA1 Gas Bottle Replacement, Remove the trumpet from the gas bottle: Schritt 2, Bild 1 von 3 Marco TA1 Gas Bottle Replacement, Remove the trumpet from the gas bottle: Schritt 2, Bild 2 von 3 Marco TA1 Gas Bottle Replacement, Remove the trumpet from the gas bottle: Schritt 2, Bild 3 von 3
    • Press down the flap.

    • Be careful: if you press too much it may break.

  3. Marco TA1 Gas Bottle Replacement, Push the half-circle lock: Schritt 3, Bild 1 von 3 Marco TA1 Gas Bottle Replacement, Push the half-circle lock: Schritt 3, Bild 2 von 3 Marco TA1 Gas Bottle Replacement, Push the half-circle lock: Schritt 3, Bild 3 von 3
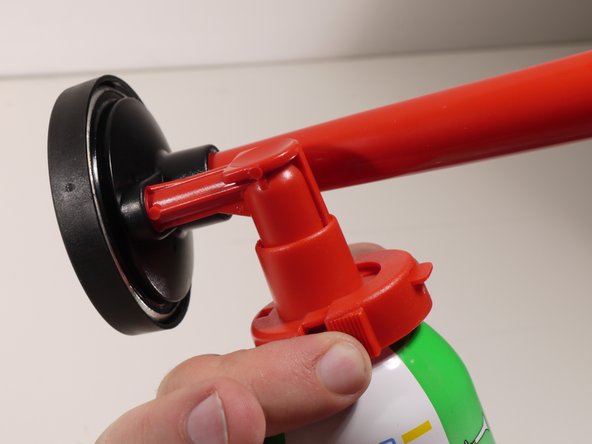
    • While pressing the flap, move the half-circle lock to free the trumpet from the tank.

  4. Marco TA1 Gas Bottle Replacement, Remove the trumpet from the bottle: Schritt 4, Bild 1 von 2 Marco TA1 Gas Bottle Replacement, Remove the trumpet from the bottle: Schritt 4, Bild 2 von 2
    • You don't need the empty tank anymore. Dispose it like required from your local laws.

  5. Marco TA1 Gas Bottle Replacement, Take the new gas bottle: Schritt 5, Bild 1 von 1
    • Take the new bottle and remove the cap.

  6. Marco TA1 Gas Bottle Replacement, Open the lock: Schritt 6, Bild 1 von 2 Marco TA1 Gas Bottle Replacement, Open the lock: Schritt 6, Bild 2 von 2
    • Open the lock on the trumpet.

  7. Marco TA1 Gas Bottle Replacement, Put the trumpet on the bottle: Schritt 7, Bild 1 von 2 Marco TA1 Gas Bottle Replacement, Put the trumpet on the bottle: Schritt 7, Bild 2 von 2
    • Put the trumpet on the bottle.

    • BE CAREFUL. Keep your fingers away from the trumpet and red circled moving parts: when the trumpet is on the gas bottle and you press it, it will honk!!

  8. Marco TA1 Gas Bottle Replacement, Close the lock on the bottle: Schritt 8, Bild 1 von 2 Marco TA1 Gas Bottle Replacement, Close the lock on the bottle: Schritt 8, Bild 2 von 2
    • BE CAREFUL. The horn may honk if you press it too strong on the red marked part.

  9. Marco TA1 Gas Bottle Replacement, Check that the lock it's completely sealed: Schritt 9, Bild 1 von 2 Marco TA1 Gas Bottle Replacement, Check that the lock it's completely sealed: Schritt 9, Bild 2 von 2
    • The red circled lock has to be like in the picture, out and up. If it's still inside, the trumpet may disconnect.

    • The blue circled part should be like in the picture, with no space between the components.

  10. Marco TA1 Gas Bottle Replacement, You've finished!: Schritt 10, Bild 1 von 1
    • Your gas horn it's now up and running, ready to be used again!

Abschluss

There's no limit on the number of times you change the gas bottle.

Ein:e weitere:r Nutzer:in hat diese Anleitung absolviert.

Marco Spa

Mitglied seit: 12/04/15

1.501 Reputation

5 Anleitungen geschrieben

0 Kommentare

Kommentar hinzufügen

Seitenaufrufe:

Letzte 24 Stunden: 1

Letzte 7 Tage: 2

Letzte 30 Tage: 5

Insgesamt: 281