Zum Hauptinhalt wechseln

Mechanical Pencil Spring Replacement

Was du brauchst

  1. Mechanical Pencil Spring Replacement, Spring: Schritt 1, Bild 1 von 2 Mechanical Pencil Spring Replacement, Spring: Schritt 1, Bild 2 von 2
    • Remove the eraser from the mechanical pencil.

    • Removing the eraser may be difficult if the eraser is too short.

  2. Mechanical Pencil Spring Replacement: Schritt 2, Bild 1 von 1
    • Remove the graphite lead from the pencil.

    • Make sure to give the pencil a few clicks to get any remaining lead out of the front of the pencil.

  3. Mechanical Pencil Spring Replacement: Schritt 3, Bild 1 von 2 Mechanical Pencil Spring Replacement: Schritt 3, Bild 2 von 2
    • Unscrew the cone/cap from the pencil.

    • You may be able to unscrew the cap. Some require you to pull it off using force. Procedures vary based on each pencil.

  4. Mechanical Pencil Spring Replacement: Schritt 4, Bild 1 von 2 Mechanical Pencil Spring Replacement: Schritt 4, Bild 2 von 2
    • Depress the shaft into the sleeve.

  5. Mechanical Pencil Spring Replacement: Schritt 5, Bild 1 von 3 Mechanical Pencil Spring Replacement: Schritt 5, Bild 2 von 3 Mechanical Pencil Spring Replacement: Schritt 5, Bild 3 von 3
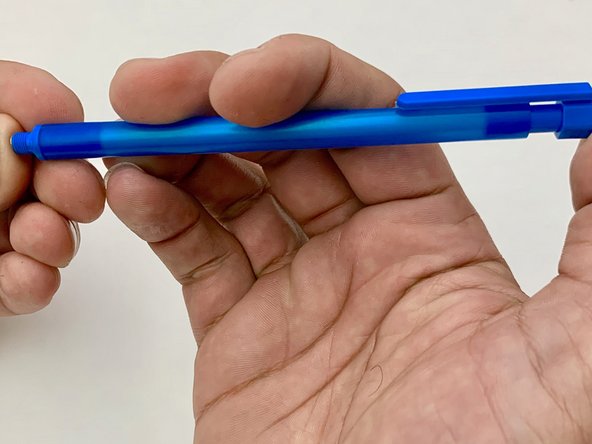
    • While keeping the shaft depressed, slide the gold dispenser ring back into the sleeve to expose the dispenser.

  6. Mechanical Pencil Spring Replacement: Schritt 6, Bild 1 von 3 Mechanical Pencil Spring Replacement: Schritt 6, Bild 2 von 3 Mechanical Pencil Spring Replacement: Schritt 6, Bild 3 von 3
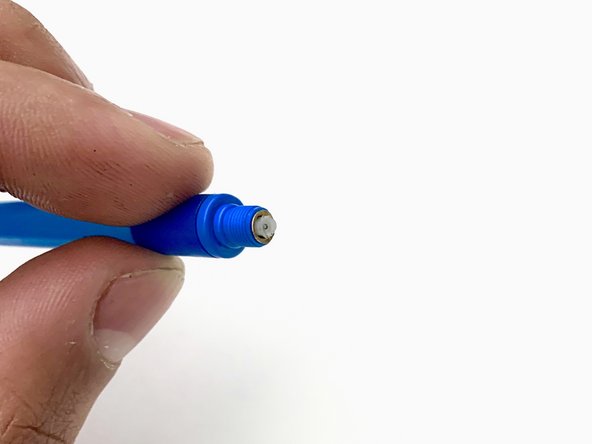
    • Use pliers to grasp the dispenser perpendicular to the open split.

    • Apply pressure and pull the dispenser straight out from the shaft and sleeve. This may be difficult.

    • If the dispenser is grasped incorrectly it could cause damage.

    • Be careful not to lose or bend the dispenser ring in the process. It is small and fragile.

  7. Mechanical Pencil Spring Replacement: Schritt 7, Bild 1 von 1
    • Remove the shaft and spring from the sleeve.

    • The spring is small. Be sure not to lose it so it can be discarded properly.

  8. Mechanical Pencil Spring Replacement: Schritt 8, Bild 1 von 2 Mechanical Pencil Spring Replacement: Schritt 8, Bild 2 von 2
    • Place the dispenser and dispenser ring into the sleeve in the order it was removed.

    • The flange or widest portion of the dispenser ring will be closest to the opening of the dispenser.

    • You will need to hold it in place for the next step.

  9. Mechanical Pencil Spring Replacement: Schritt 9, Bild 1 von 2 Mechanical Pencil Spring Replacement: Schritt 9, Bild 2 von 2
    • Place the new spring and old shaft into the sleeve in the order it was taken out.

    • The spring is small. Be sure not to lose it.

  10. Mechanical Pencil Spring Replacement: Schritt 10, Bild 1 von 3 Mechanical Pencil Spring Replacement: Schritt 10, Bild 2 von 3 Mechanical Pencil Spring Replacement: Schritt 10, Bild 3 von 3
    • Using your thumb or a hard surface pressed against the dispenser, push the shaft into the dispenser.

    • There should be an audible clicking sound.

    • Pushing the dispenser into the shaft from the front could cause damage to dispenser and dispenser ring.

Abschluss

To reassemble your device, follow steps 1 - 3 of these instructions in reverse order.

4 weitere Nutzer:innen haben diese Anleitung absolviert.

0 Kommentare

Kommentar hinzufügen

Seitenaufrufe:

Letzte 24 Stunden: 11

Letzte 7 Tage: 49

Letzte 30 Tage: 176

Insgesamt: 10,208