Diese Version enthält möglicherweise inkorrekte Änderungen. Wechsle zur letzten geprüften Version.
Was du brauchst
-
Dieser Schritt ist noch nicht übersetzt. Hilf mit, ihn zu übersetzen!
-
Remove the two plastic screw covers on the back of your Minimove by inserting the flat end of your plastic opening tool between the screw cover and the back panel and prying it out.
-
-
Dieser Schritt ist noch nicht übersetzt. Hilf mit, ihn zu übersetzen!
-
Use a Phillips #1 screwdriver to remove the two 12 mm screws.
-
-
Dieser Schritt ist noch nicht übersetzt. Hilf mit, ihn zu übersetzen!
-
Remove the four grey screw covers by inserting the plastic opening tool underneath the screw covers and rotating around the circumference.
-
-
Dieser Schritt ist noch nicht übersetzt. Hilf mit, ihn zu übersetzen!
-
Remove the two 8 mm screws with a Phillips #1 screwdriver.
-
Remove the two 12 mm screws with a long Phillips #1 screwdriver.
-
-
Dieser Schritt ist noch nicht übersetzt. Hilf mit, ihn zu übersetzen!
-
To remove the back panel, use the plastic opening tool and gently work around the outline of the panel. The outline wraps around the sides and can be spotted at the top back of the device.
-
-
Dieser Schritt ist noch nicht übersetzt. Hilf mit, ihn zu übersetzen!
-
After loosening the panel with the plastic opening tool, use moderate force to pry open the panel with your hands.
-
Carefully pull the panel off.
-
-
Dieser Schritt ist noch nicht übersetzt. Hilf mit, ihn zu übersetzen!
-
Use a Phillips #1 screwdriver to detach the wire from the back panel by removing the 8 mm screw connecting the wire to the antenna.
-
-
Dieser Schritt ist noch nicht übersetzt. Hilf mit, ihn zu übersetzen!
-
If desired, the antenna can now be removed by pulling inwards and horizontal to the panel bottom.
-
-
-
Dieser Schritt ist noch nicht übersetzt. Hilf mit, ihn zu übersetzen!
-
Use the Phillips #1 screwdriver to remove the four 12 mm screws.
-
Remove the five 6 mm screws at the top with the same screwdriver.
-
-
Dieser Schritt ist noch nicht übersetzt. Hilf mit, ihn zu übersetzen!
-
Use a Phillips #1 screwdriver and remove the two vertical 8 mm screws from the top.
-
-
Dieser Schritt ist noch nicht übersetzt. Hilf mit, ihn zu übersetzen!
-
Pry open the inner back panel by inserting the plastic opening tool in the crack at the top corner.
-
Use moderate force to pry it open and take the cover off.
-
-
Dieser Schritt ist noch nicht übersetzt. Hilf mit, ihn zu übersetzen!
-
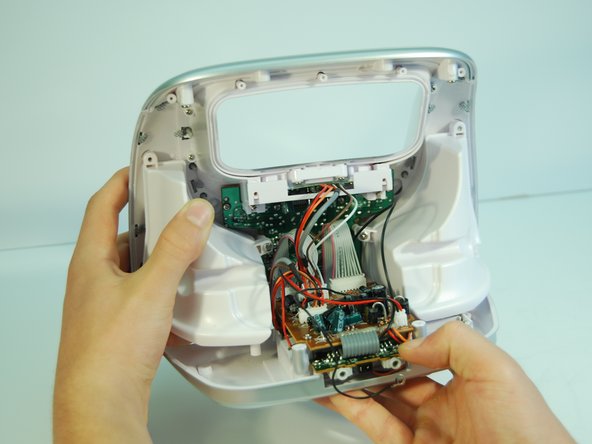
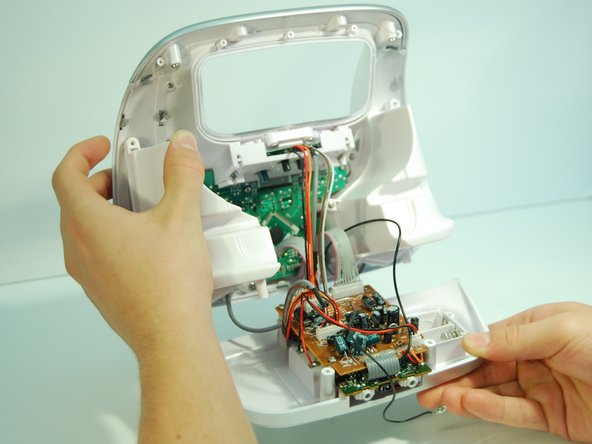
Remove the bottom panel of the boombox by carefully pulling the panel straight backwards from the boombox until the boards are free.
-
-
Dieser Schritt ist noch nicht übersetzt. Hilf mit, ihn zu übersetzen!
-
Use a Phillips #1 screwdriver to remove the two 8 mm screws encasing the iPod adapter near the top of the device.
-
-
Dieser Schritt ist noch nicht übersetzt. Hilf mit, ihn zu übersetzen!
-
Use moderate force to pry the plastic casing off with your finger while pushing with your thumb against the black, round capacitors.
-
-
Dieser Schritt ist noch nicht übersetzt. Hilf mit, ihn zu übersetzen!
-
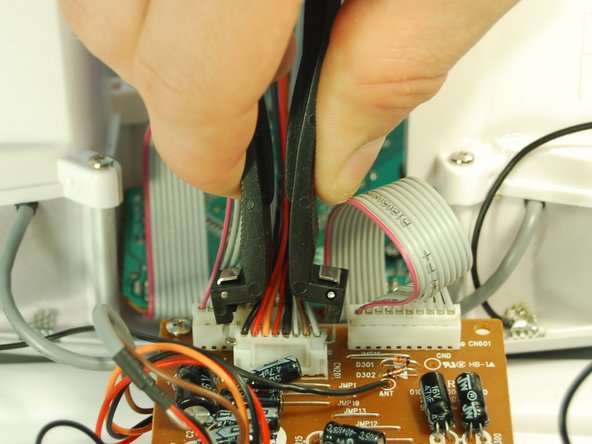
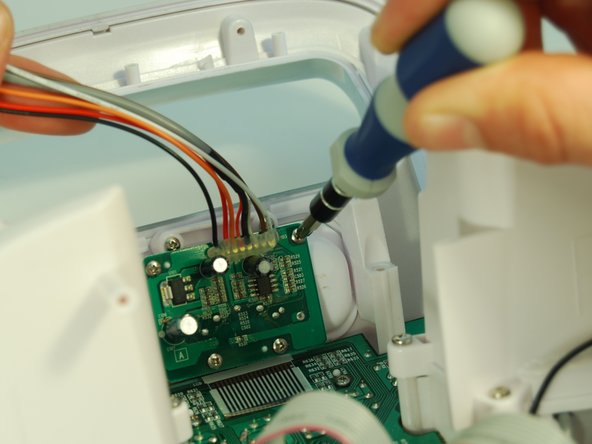
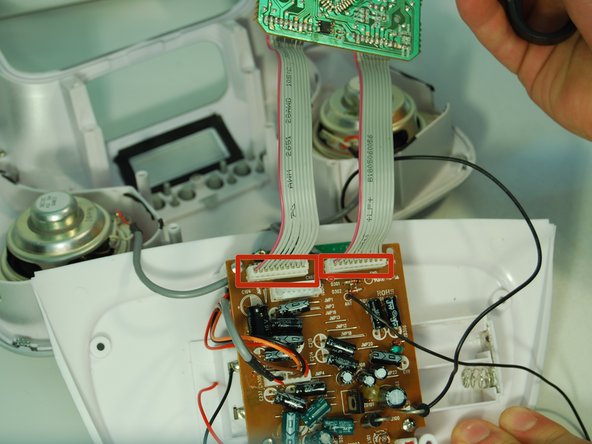
Follow the wires attaching to the iPod adapter and use the IC (Integrated Circuit) extractor to remove the indicated wire connectors from the motherboard.
-
Pinch the IC extractor just under the top lip of the wire housing.
-
-
Dieser Schritt ist noch nicht übersetzt. Hilf mit, ihn zu übersetzen!
-
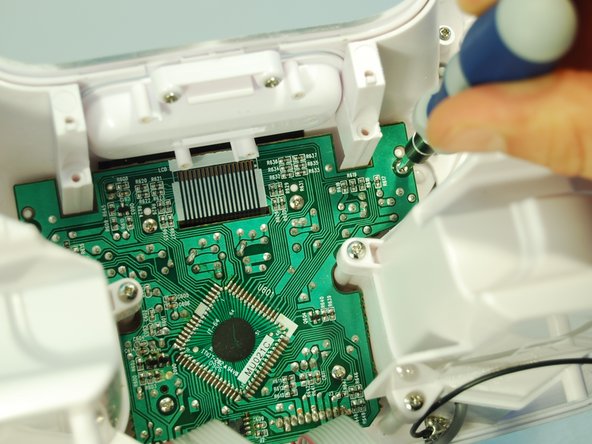
Going back to the small green daughterboard, unscrew the four 6 mm screws with a Phillips #1 screwdriver.
-
-
Dieser Schritt ist noch nicht übersetzt. Hilf mit, ihn zu übersetzen!
-
Remove the iPod adapter by sliding it out of the slot.
-
-
Dieser Schritt ist noch nicht übersetzt. Hilf mit, ihn zu übersetzen!
-
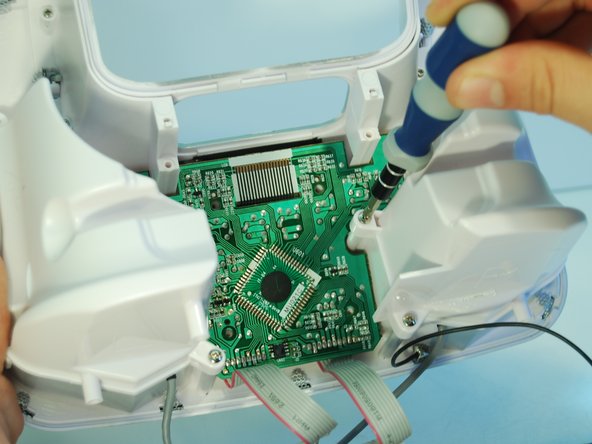
Locate and unscrew the four 8mm screws (in red) along the edge with a Phillips #1 screwdriver.
-
Unscrew the two 12mm screws (in orange) on the inside of the daughterboard.
-
-
Dieser Schritt ist noch nicht übersetzt. Hilf mit, ihn zu übersetzen!
-
Slide out the iPod adapter housing by applying moderate pressure with your two index fingers from the inside as well as your thumb downward.
-
-
Dieser Schritt ist noch nicht übersetzt. Hilf mit, ihn zu übersetzen!
-
Remove the four 8 mm screws using a Phillips #1 screwdriver.
-
-
Dieser Schritt ist noch nicht übersetzt. Hilf mit, ihn zu übersetzen!
-
Grab the outside of one speaker housing and pull outwards (starting with the top) while holding the main casing still with your other hand.
-
Remove the other housing on the opposite side the same way.
-
-
Dieser Schritt ist noch nicht übersetzt. Hilf mit, ihn zu übersetzen!
-
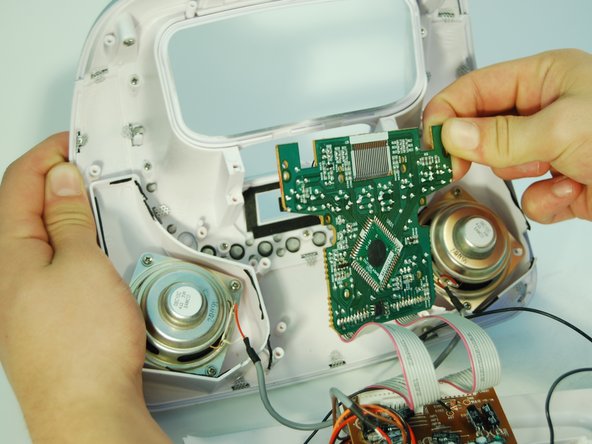
Gently lift the display daughterboard straight up and remove it from the case.
-
-
Dieser Schritt ist noch nicht übersetzt. Hilf mit, ihn zu übersetzen!
-
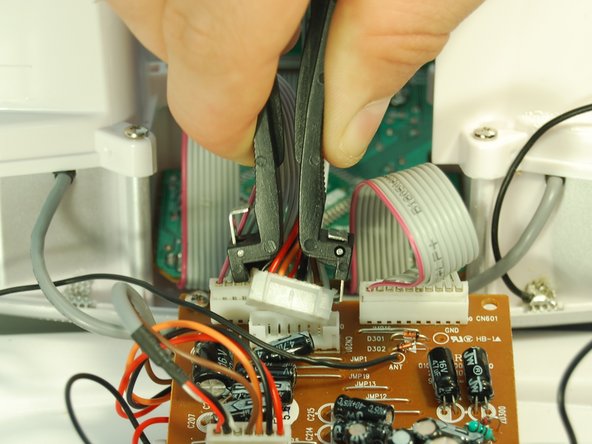
To finish, disconnect the two wires outlined in red rectangles that are connected to the motherboard using the IC extractor.
-
Pinch the IC extractor just under the top lip of the wire housing and pull firmly out.
-


Rückgängig: Ich habe diese Anleitung nicht absolviert.
2 weitere Nutzer:innen haben diese Anleitung absolviert.
Team

Cal Poly, Team 2-9, Amido Winter 2014 Mitglied von Cal Poly, Team 2-9, Amido Winter 2014
CPSU-AMIDO-W14S2G9
5 Mitglieder
6 Anleitungen geschrieben