Einleitung
Der Austausch des Standfußes ist eine der einfachsten Reparaturen am Surface 3. Du musst aber trotzdem das Display abnehmen und den Akku entfernen, um an das Teil zu gelangen.
Was du brauchst
-
-
Erwärme einen iOpener, wie in der iOpener Anleitung angegeben.
-
Lege den warmen iOpener auf die Kanten des Bildschirms. Die Wärme verringert die Klebekraft des Klebers zwischen Display und Gehäuse.
-
-
-
Schiebe ein iFixit Opening Pick (Plektrum) unter die Kante des Bildschirms bei der Lausprecherbuchse.
-
-
-
Arbeite dich vorsichtig um das Gerät herum, dazu brauchst du Plektren, einen warmen iOpener, und Glück.
-
-
-
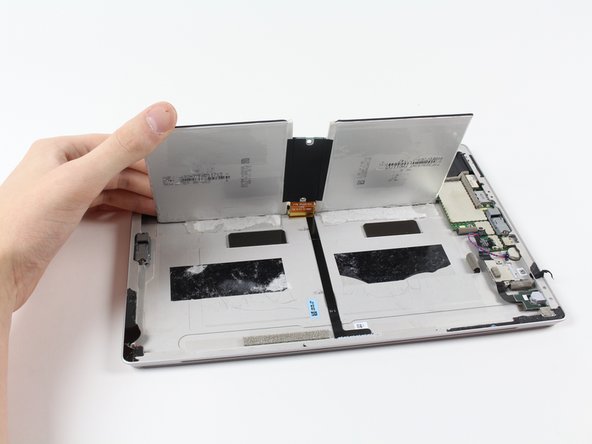
Drehe das Display um, so dass die darunter liegenden Teile gut zugänglich sind.
Please note that the WIFI antenna can become stuck to the display. It is located on the black plastic to the right of the camera and can be easily disconnected accidentally. Excellent guide otherwise.
I second this comment. Didn’t know it was there. The surface 3 pro guide clearly warns of this in the takeapart.
-
-
-
-
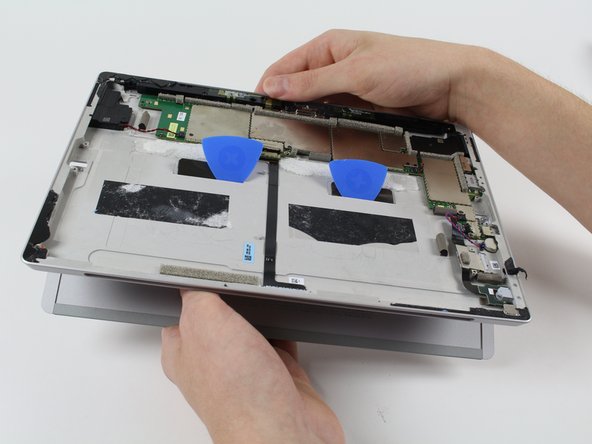
Schiebe Plastikkarten unter die Teile des Akkupacks.
-
Schiebe die Karten um den Akku herum, damit sich die Klebeverbindung darunter löst.
-
-
-
Schiebe vorsichtig den Flachverbinder für Versorgung und Daten des Akkus aus seinem Anschluss heraus.
-
Nun kannst du den Akku durch einen neuen ersetzen.
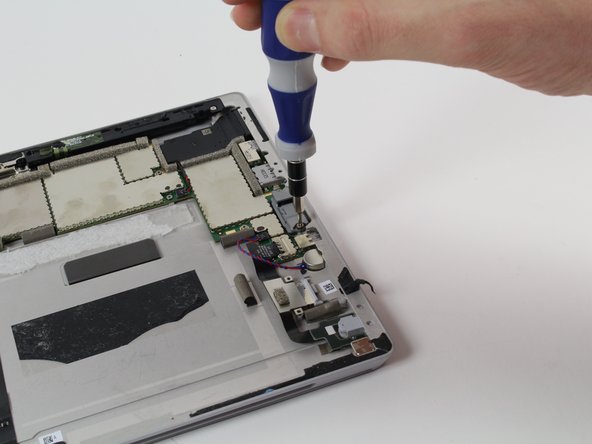
When replacing the battery, the connector will not slide back in where it came from easily. There are small “fingers” that press down on the top of the connector from the bottom of the logic board, they are pressed down against the back of the casing so firmly that the connector will not slide under them, instead the cable will ride up them and jam into the back of the logic board. I’ve found the best solution is to remove the screws from the logic board and use a spudger to gently lift the logic board to make a space under the fingers to allow the connector to slip back in.
Be aware of the fragility of the battery connector and ensure that the replacement has got the cut out on the leading edge. I’ve managed to break / snap the connecting cable on the replacement battery :-( so will have to order another and try again (at £25 its worth trying again IMHO).
I installed the battery but it was shorting. Examine a picture of the backside of the motherboard (ebay). There are THREE rows of connector pins to the battery, not just the row you see, and you’ve got to get under all the rows it’s supposed to connect to or it shorts. Only way to do this is to get some screws out and lift the motherboard enough to get it under.
It’s a very important point mentioned a couple of times above concerning the contact fingers. As the top edge of the circuit board seems to be stuck into the back case you have to prise up the bottom of the circuit board enough to slide the connector under and over a plastic stud. The problem is that there are three rows of fingers on the circuit board which connect to the battery connector and it’s very easy to lift the connector over the plastic stud and then not get it down again to get under the third row of fingers.
-
-
-
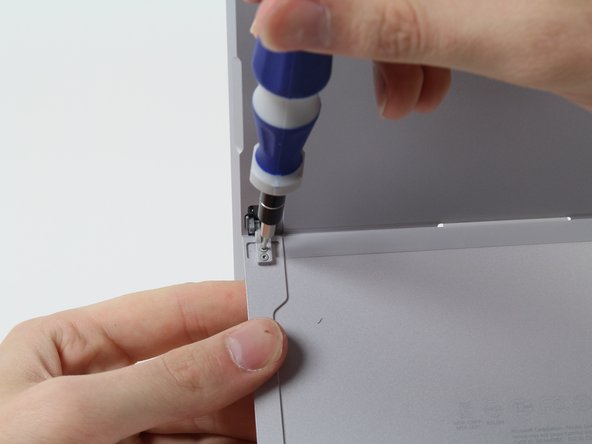
Die beiden Halterasten müssen durch die Schlitze im Gehäuse geführt werden, damit der Standfuß frei wird.
-
Setze die Plektren so ein, dass die Halterasten durch die Schlitze gleiten können. Ziehe dann den Standfuß einfach heraus.
-


Um dein Gerät wieder zusammenzusetzen, folge den Schritten in umgekehrter Reihenfolge.
Um dein Gerät wieder zusammenzusetzen, folge den Schritten in umgekehrter Reihenfolge.
Rückgängig: Ich habe diese Anleitung nicht absolviert.
4 weitere Nutzer:innen haben diese Anleitung absolviert.
Besonderer Dank geht an diese Übersetzer:innen:
100%
VauWeh hilft uns, die Welt in Ordnung zu bringen! Wie kann ich mithelfen?
Hier starten ›
Team

Cal Poly, Team 5-12, Maness Fall 2015 Mitglied von Cal Poly, Team 5-12, Maness Fall 2015
CPSU-MANESS-F15S5G12
4 Mitglieder
18 Anleitungen geschrieben
2 Kommentare
Please can you tell me which kickstand the surface pro 3 64 GB (2013) needs? Is it the same as the surface pro 4 ? I have broken the stand and am trying yo source a replacement.
no, I didn't break the screen upon removing batteries.
Robert Hale - Antwort