Einleitung
This guide will enable you to remove the screen of your Microsoft Surface Book.
If the glass is cracked already, tape across the entire screen with packaging tape to keep the glass together. You can get leverage by using the speaker grill openings as an entry point and the back of the LCD for more strength (since the glass will just shatter if it's already cracked).
Was du brauchst
-
-
Turn off your Surface Book and detach the display.
-
Heat and apply an iOpener or use a hair dryer or heat gun to heat the perimeter of the display, in order to soften the glue securing it.
-
Use a suction cup or iSclack or pull up on the edge of the display, and create a slight gap between the display glass and the frame.
-
Insert an opening pick into the gap.
-
-
-
Use the pick to slice all the way around the perimeter of the display to separate the glue.
-
Gently raise the display but don't fully detach it until the cables underneath are disconnected.
-
-
-
-
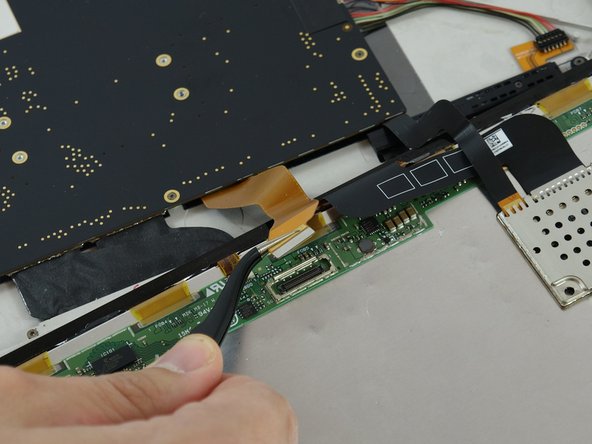
The ribbons are circled. Begin by removing the ribbon on the right (in red). With the curved tweezers, carefully remove the metal bracket to expose the end of the ribbon. Remove ribbon.
-
-
-
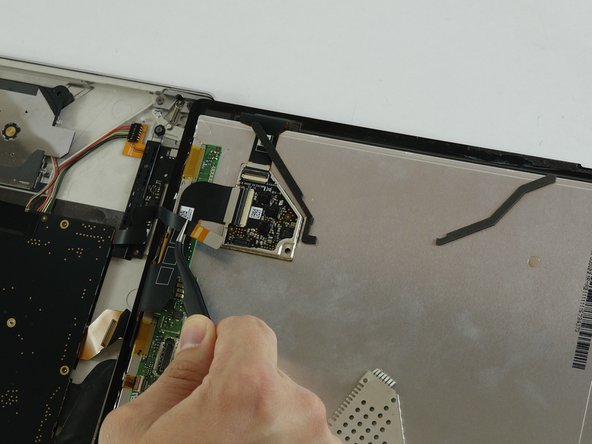
Next, remove the metal shield covering the other ribbon. Then remove the ribbon.
-


To reassemble your device, follow these instructions in reverse order.
To reassemble your device, follow these instructions in reverse order.
Rückgängig: Ich habe diese Anleitung nicht absolviert.
25 weitere Nutzer:innen haben diese Anleitung absolviert.
Team

USF Tampa, Team 1-6, Sullivan Spring 2017 Mitglied von USF Tampa, Team 1-6, Sullivan Spring 2017
USFT-SULLIVAN-S17S1G6
3 Mitglieder
14 Anleitungen geschrieben
30 Kommentare
It is very unlikely you will get this screen off without breaking it. Luckily, my customer only wanted the SSD out of the device so he didn't care if I damaged it. This screen is crazy fragile and the glue is very very strong. Do not do this job thinking you will likely not break the screen, unless you have done it before.
The only way to remove it without breaking it is to use good scotch tape and completely cover the screen with a minimum 4 layers of tape. This will keep the screen intact - but you still have to be very careful.
That’s definitely not the only way. I just did it with a guitar pick and heat pad. After doing a ton of Surface Pro 3’s, I think this one is actually pretty easy in comparison.
austin -
I needed 3 hours for this, Did this the first time. There is everything glued. and real hard to not break the screen.
Can you put the screen back on after removing it?