Zum Hauptinhalt wechseln
Gemeinsam reparieren - Jetzt registrieren

Microsoft Surface Laptop 3 13.5" LCD Assembly Replacement

Was du brauchst

  1. Microsoft Surface Laptop 3 13.5" LCD Assembly Replacement, LCD Assembly: Schritt 1, Bild 1 von 1
    • It's far easier than any other Surface device.

    Frag FixBot

    Kommentar hinzufügen

  2. Microsoft Surface Laptop 3 13.5" LCD Assembly Replacement: Schritt 2, Bild 1 von 1
    • From the bottom, carefully pry up the rubber feet on all 4 corners.

    Frag FixBot

    Kommentar hinzufügen

  3. Microsoft Surface Laptop 3 13.5" LCD Assembly Replacement: Schritt 3, Bild 1 von 1
    • Using a T5 screwdriver remove the 4 screws on each corner.

    Frag FixBot

    Kommentar hinzufügen

  4. Microsoft Surface Laptop 3 13.5" LCD Assembly Replacement: Schritt 4, Bild 1 von 1
    • Make sure the device is completely turned off before proceeding.

    Frag FixBot

    Kommentar hinzufügen

  5. Microsoft Surface Laptop 3 13.5" LCD Assembly Replacement: Schritt 5, Bild 1 von 1
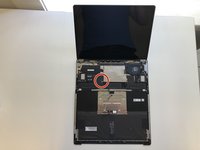
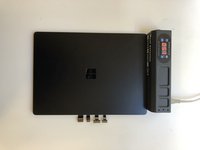
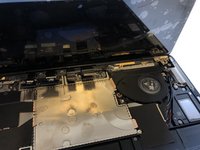
    • With the screen open, lift the keyboard out. It doesn't take much force as the part is only held in with magnets once the screws are removed.

    Frag FixBot

    Kommentar hinzufügen

  6. Microsoft Surface Laptop 3 13.5" LCD Assembly Replacement: Schritt 6, Bild 1 von 2 Microsoft Surface Laptop 3 13.5" LCD Assembly Replacement: Schritt 6, Bild 2 von 2
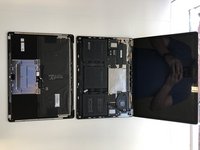
    • Invert the keyboard on itself and remove the unshielded keyboard assembly connector.

    Frag FixBot

    Kommentar hinzufügen

  7. Microsoft Surface Laptop 3 13.5" LCD Assembly Replacement: Schritt 7, Bild 1 von 3 Microsoft Surface Laptop 3 13.5" LCD Assembly Replacement: Schritt 7, Bild 2 von 3 Microsoft Surface Laptop 3 13.5" LCD Assembly Replacement: Schritt 7, Bild 3 von 3
    • Remove the clip-on shields for the display assembly.

    Frag FixBot

    Kommentar hinzufügen

  8. Microsoft Surface Laptop 3 13.5" LCD Assembly Replacement: Schritt 8, Bild 1 von 1
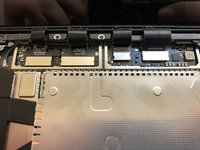
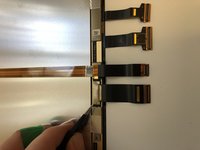
    • Unclip the connectors. They are pretty tight so I'd suggest using a spudger or 2.

    Frag FixBot

    Kommentar hinzufügen

  9. Microsoft Surface Laptop 3 13.5" LCD Assembly Replacement: Schritt 9, Bild 1 von 2 Microsoft Surface Laptop 3 13.5" LCD Assembly Replacement: Schritt 9, Bild 2 von 2
    • Using a T6 screwdriver, remove the 6 screws holding in the display.

    Frag FixBot

    Kommentar hinzufügen

  10. Microsoft Surface Laptop 3 13.5" LCD Assembly Replacement: Schritt 10, Bild 1 von 2 Microsoft Surface Laptop 3 13.5" LCD Assembly Replacement: Schritt 10, Bild 2 von 2
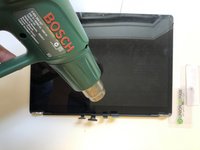
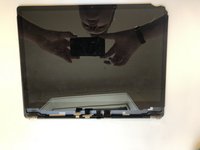
    • Lay the display on a heating pad being careful of the connectors. A heat gun would work too.

    • I used 60 Degrees C for around 15 minutes.

    Frag FixBot

    Kommentar hinzufügen

  11. Microsoft Surface Laptop 3 13.5" LCD Assembly Replacement: Schritt 11, Bild 1 von 2 Microsoft Surface Laptop 3 13.5" LCD Assembly Replacement: Schritt 11, Bild 2 von 2
    In diesem Schritt verwendetes Werkzeug:
    Plastic Cards
    $2.99
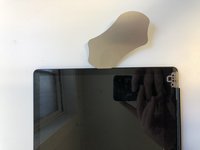
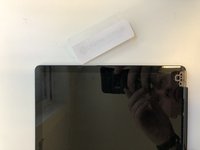
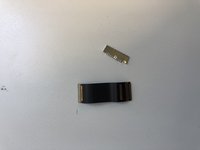
    • Use a metal card to get in between the glass and the housing. Swap to a plastic card to cut through the rest of the adhesive.

    Frag FixBot

    Kommentar hinzufügen

  12. Microsoft Surface Laptop 3 13.5" LCD Assembly Replacement: Schritt 12, Bild 1 von 1
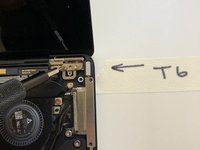
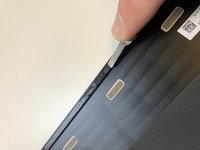
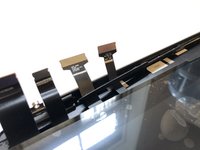
    • Watch out for the Sensors up the top. If you damage these the device will fail to turn on. It basically bricks completely without the sensors.

    Frag FixBot

    Kommentar hinzufügen

  13. Microsoft Surface Laptop 3 13.5" LCD Assembly Replacement: Schritt 13, Bild 1 von 2 Microsoft Surface Laptop 3 13.5" LCD Assembly Replacement: Schritt 13, Bild 2 von 2
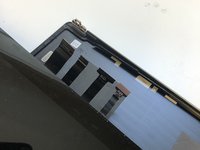
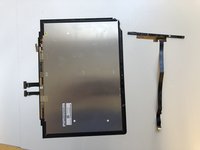
    • Heat up the bottom of the display and horizontally pull the screen out. Try to leave the bottom adhesive intact as we are going to be using this later.

    Frag FixBot

    Kommentar hinzufügen

  14. Microsoft Surface Laptop 3 13.5" LCD Assembly Replacement: Schritt 14, Bild 1 von 3 Microsoft Surface Laptop 3 13.5" LCD Assembly Replacement: Schritt 14, Bild 2 von 3 Microsoft Surface Laptop 3 13.5" LCD Assembly Replacement: Schritt 14, Bild 3 von 3
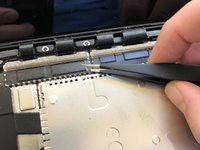
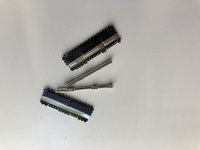
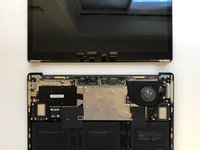
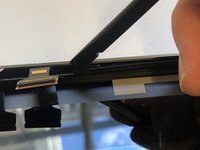
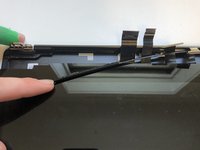
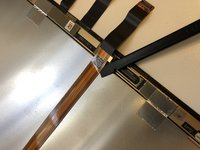
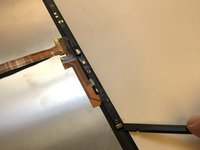
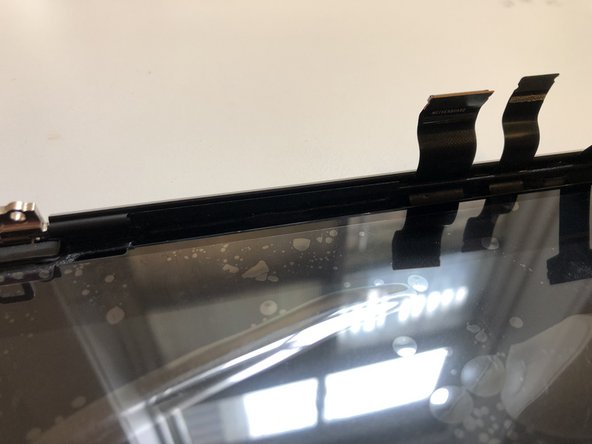
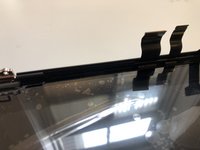
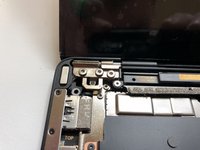
    • Remove one side of the plastic bar holding the cables in place. Slide the display out leaving the plastic bar intact.

    Frag FixBot

    Kommentar hinzufügen

  15. Microsoft Surface Laptop 3 13.5" LCD Assembly Replacement: Schritt 15, Bild 1 von 1
    • Screen off. Time to move on.

    Frag FixBot

    Kommentar hinzufügen

  16. Microsoft Surface Laptop 3 13.5" LCD Assembly Replacement: Schritt 16, Bild 1 von 2 Microsoft Surface Laptop 3 13.5" LCD Assembly Replacement: Schritt 16, Bild 2 von 2
    • Remove the snap-on shield and cable. We will need this later.

    Frag FixBot

    Kommentar hinzufügen

  17. Microsoft Surface Laptop 3 13.5" LCD Assembly Replacement: Schritt 17, Bild 1 von 2 Microsoft Surface Laptop 3 13.5" LCD Assembly Replacement: Schritt 17, Bild 2 von 2
    • CAREFULLY loosen the sensor cable on the back of the display.

    Frag FixBot

    Kommentar hinzufügen

  18. Microsoft Surface Laptop 3 13.5" LCD Assembly Replacement: Schritt 18, Bild 1 von 3 Microsoft Surface Laptop 3 13.5" LCD Assembly Replacement: Schritt 18, Bild 2 von 3 Microsoft Surface Laptop 3 13.5" LCD Assembly Replacement: Schritt 18, Bild 3 von 3
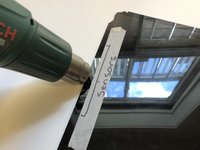
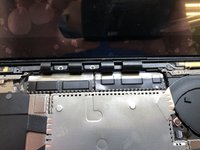
    • Heat the area around the sensors from the front. The adhesive here isn't very strong so you don't need loads of heat.

    Frag FixBot

    Kommentar hinzufügen

  19. Microsoft Surface Laptop 3 13.5" LCD Assembly Replacement: Schritt 19, Bild 1 von 3 Microsoft Surface Laptop 3 13.5" LCD Assembly Replacement: Schritt 19, Bild 2 von 3 Microsoft Surface Laptop 3 13.5" LCD Assembly Replacement: Schritt 19, Bild 3 von 3
    • Remove the old adhesive and make sure it's clean. You really don't want to be removing this screen once it's set down.

    Frag FixBot

    Kommentar hinzufügen

  20. Microsoft Surface Laptop 3 13.5" LCD Assembly Replacement: Schritt 20, Bild 1 von 2 Microsoft Surface Laptop 3 13.5" LCD Assembly Replacement: Schritt 20, Bild 2 von 2
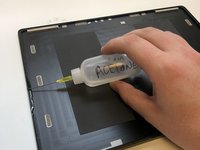
    • Install the new adhesive. Remove any large clumps on the bottom. We left the old stuff down there as it's a bit awkward to get to cleaning and reapplying-wise.

    Frag FixBot

    Kommentar hinzufügen

  21. Microsoft Surface Laptop 3 13.5" LCD Assembly Replacement: Schritt 21, Bild 1 von 1
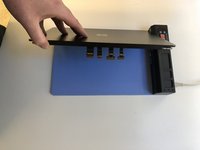
    • Test the new screen. Make sure you connect the sensors or it won't start or respond at all.

    Frag FixBot

    Kommentar hinzufügen

  22. Microsoft Surface Laptop 3 13.5" LCD Assembly Replacement: Schritt 22, Bild 1 von 2 Microsoft Surface Laptop 3 13.5" LCD Assembly Replacement: Schritt 22, Bild 2 von 2
    • Slide the cable back under the plastic bar and set it back in place. Lightly pull the cables to make sure there's no slack internally.

    Frag FixBot

    Kommentar hinzufügen

  23. Microsoft Surface Laptop 3 13.5" LCD Assembly Replacement: Schritt 23, Bild 1 von 1
    • Remove the plastic layer on top of your adhesive and set the screen into the housing. You need to push the screen in quite a bit at the bottom to make it sit correctly.

    Frag FixBot

    Kommentar hinzufügen

  24. Microsoft Surface Laptop 3 13.5" LCD Assembly Replacement: Schritt 24, Bild 1 von 3 Microsoft Surface Laptop 3 13.5" LCD Assembly Replacement: Schritt 24, Bild 2 von 3 Microsoft Surface Laptop 3 13.5" LCD Assembly Replacement: Schritt 24, Bild 3 von 3
    • Place the assembly in then screw it in. Connect the cables and replace the shields.

    Frag FixBot

    Kommentar hinzufügen

  25. Microsoft Surface Laptop 3 13.5" LCD Assembly Replacement: Schritt 25, Bild 1 von 1
    • Install the screws and feet and you're done!

    Frag FixBot

    Kommentar hinzufügen

Abschluss

Let me know how you got on. I think we can all agree this was much easier than a Book 1… lot less nerve-racking too.

Rückgängig: Ich habe diese Anleitung nicht absolviert.

9 weitere Personen haben diese Anleitung absolviert.

Eric

Mitglied seit: 01/24/17

1.495 Reputation

1 Anleitung geschrieben

Team

SMASHED IT, Auckland Mitglied von SMASHED IT, Auckland

Business

9 Mitglieder

3 Anleitungen geschrieben

2 Kommentare zur Anleitung

Real very helpful and very nicely explained

Praveen - Antwort Teilen

Thanks Praveen

Eric - Antwort Teilen

Kommentar hinzufügen

Seitenaufrufe:

Letzte 24 Stunden: 4

Letzte 7 Tage: 25

Letzte 30 Tage: 110

Insgesamt: 11,146