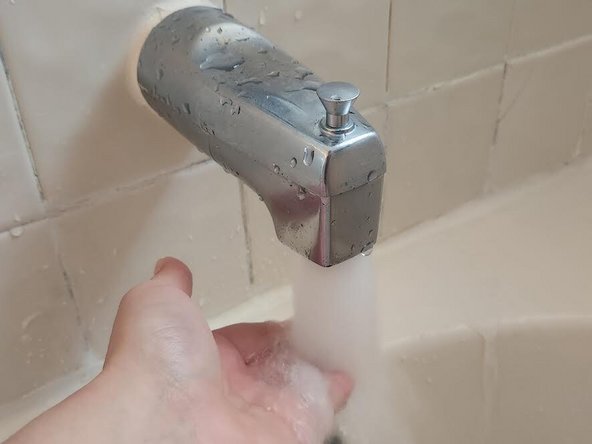
Zum Hauptinhalt wechseln

Moen Single Handle Faucet Cartridge (Model: 1225) Replacement

Was du brauchst

  1. Moen Single Handle Faucet Cartridge (Model: 1225) Replacement, Cartridge: Schritt 1, Bild 1 von 3 Moen Single Handle Faucet Cartridge (Model: 1225) Replacement, Cartridge: Schritt 1, Bild 2 von 3 Moen Single Handle Faucet Cartridge (Model: 1225) Replacement, Cartridge: Schritt 1, Bild 3 von 3
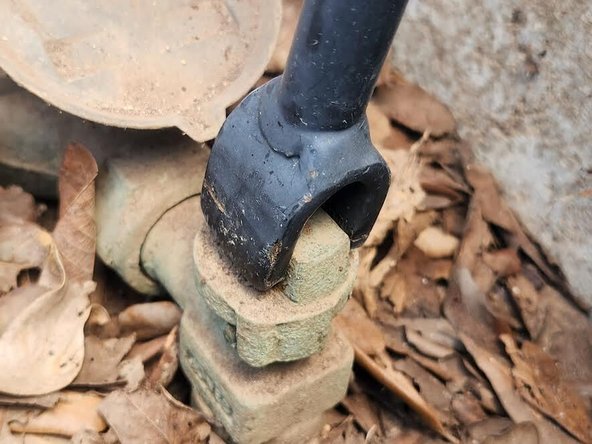
    • Turn off the main water supply by inserting your meter key into the curb stop valve handle and rotating it 180 degrees counterclockwise to the closed position.

    • If you have a gate valve, rotate the valve counterclockwise to the closed position.

  2. Moen Single Handle Faucet Cartridge (Model: 1225) Replacement: Schritt 2, Bild 1 von 2 Moen Single Handle Faucet Cartridge (Model: 1225) Replacement: Schritt 2, Bild 2 von 2
    • Open the faucet handle to relieve water pressure until there is no water flow.

  3. Moen Single Handle Faucet Cartridge (Model: 1225) Replacement: Schritt 3, Bild 1 von 3 Moen Single Handle Faucet Cartridge (Model: 1225) Replacement: Schritt 3, Bild 2 von 3 Moen Single Handle Faucet Cartridge (Model: 1225) Replacement: Schritt 3, Bild 3 von 3
    • Remove the handle cap.

  4. Moen Single Handle Faucet Cartridge (Model: 1225) Replacement: Schritt 4, Bild 1 von 3 Moen Single Handle Faucet Cartridge (Model: 1225) Replacement: Schritt 4, Bild 2 von 3 Moen Single Handle Faucet Cartridge (Model: 1225) Replacement: Schritt 4, Bild 3 von 3
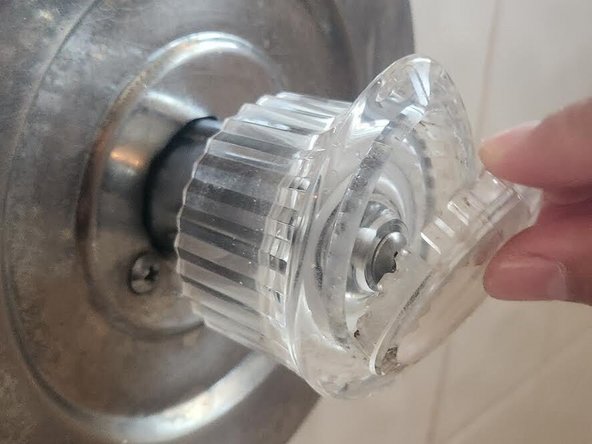
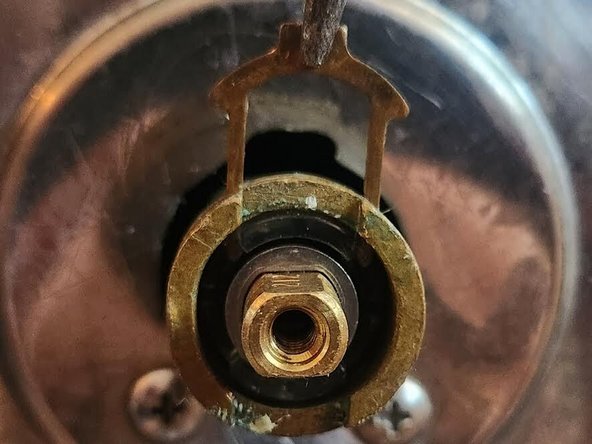
    • Use a Phillips screwdriver to unscrew the connecting handle screw (10-24 x 1-1/8" Button Head Phillips screw).
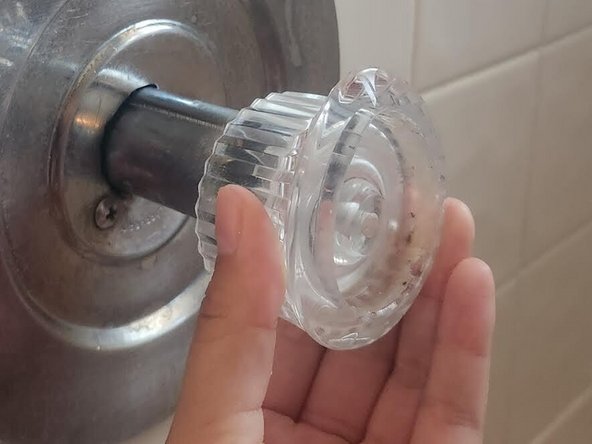
    • Remove the handle.

  5. Moen Single Handle Faucet Cartridge (Model: 1225) Replacement: Schritt 5, Bild 1 von 2 Moen Single Handle Faucet Cartridge (Model: 1225) Replacement: Schritt 5, Bild 2 von 2
    • Pull out the stop tube.

  6. Moen Single Handle Faucet Cartridge (Model: 1225) Replacement: Schritt 6, Bild 1 von 3 Moen Single Handle Faucet Cartridge (Model: 1225) Replacement: Schritt 6, Bild 2 von 3 Moen Single Handle Faucet Cartridge (Model: 1225) Replacement: Schritt 6, Bild 3 von 3
    • Remove the washer from the brass stem.

  7. Moen Single Handle Faucet Cartridge (Model: 1225) Replacement: Schritt 7, Bild 1 von 3 Moen Single Handle Faucet Cartridge (Model: 1225) Replacement: Schritt 7, Bild 2 von 3 Moen Single Handle Faucet Cartridge (Model: 1225) Replacement: Schritt 7, Bild 3 von 3
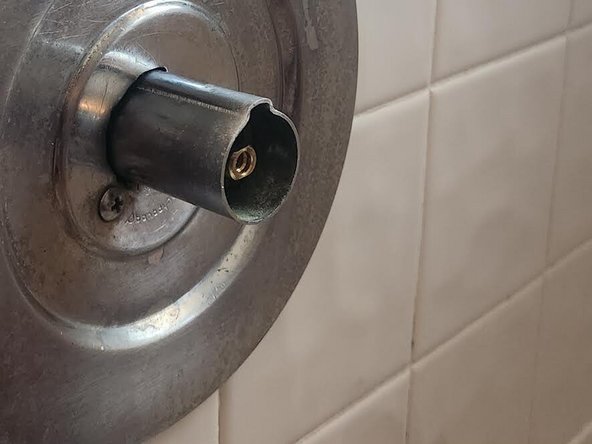
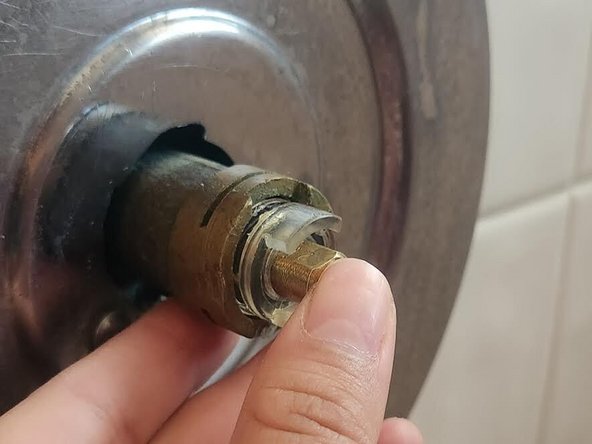
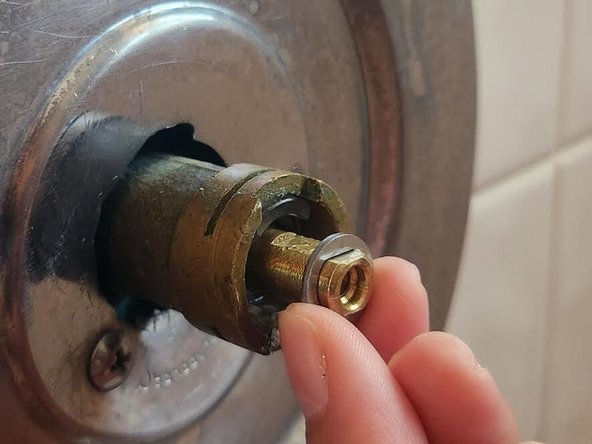
    • Using needle-nose pliers, clamp the tip of the notch of the cartridge retaining clip and pull it upwards to remove.

  8. Moen Single Handle Faucet Cartridge (Model: 1225) Replacement: Schritt 8, Bild 1 von 2 Moen Single Handle Faucet Cartridge (Model: 1225) Replacement: Schritt 8, Bild 2 von 2
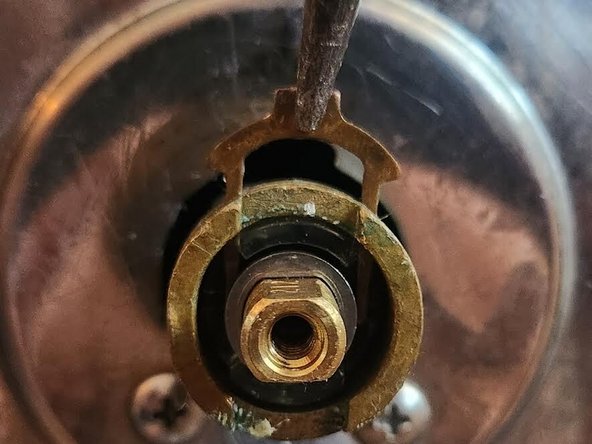
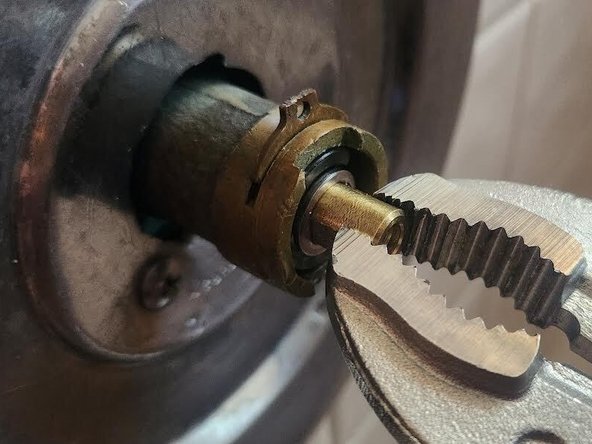
    • Using a pair of vise grips, clamp firmly onto the brass stem and pull out the old 1225 cartridge.

  9. Moen Single Handle Faucet Cartridge (Model: 1225) Replacement: Schritt 9, Bild 1 von 2 Moen Single Handle Faucet Cartridge (Model: 1225) Replacement: Schritt 9, Bild 2 von 2
    • On the new 1225 cartridge, orient the volume control holes parallel to the floor.

    • Insert the new 1225 cartridge into the valve.

  10. Moen Single Handle Faucet Cartridge (Model: 1225) Replacement: Schritt 10, Bild 1 von 2 Moen Single Handle Faucet Cartridge (Model: 1225) Replacement: Schritt 10, Bild 2 von 2
    • Insert the white twisting cap into the grooves of the new cartridge and push the cartridge into the valve.

    • Remove the white twisting cap.

  11. Moen Single Handle Faucet Cartridge (Model: 1225) Replacement: Schritt 11, Bild 1 von 3 Moen Single Handle Faucet Cartridge (Model: 1225) Replacement: Schritt 11, Bild 2 von 3 Moen Single Handle Faucet Cartridge (Model: 1225) Replacement: Schritt 11, Bild 3 von 3
    • Reinstall the cartridge retainer clip by sliding the clip into the valve.

  12. Moen Single Handle Faucet Cartridge (Model: 1225) Replacement: Schritt 12, Bild 1 von 3 Moen Single Handle Faucet Cartridge (Model: 1225) Replacement: Schritt 12, Bild 2 von 3 Moen Single Handle Faucet Cartridge (Model: 1225) Replacement: Schritt 12, Bild 3 von 3
    • Turn on the main water supply by inserting your meter key into the curb stop valve handle and rotating it 180 degrees clockwise to the open position.

    • If you have a gate valve, rotate the valve clockwise to the open position.

  13. Moen Single Handle Faucet Cartridge (Model: 1225) Replacement: Schritt 13, Bild 1 von 3 Moen Single Handle Faucet Cartridge (Model: 1225) Replacement: Schritt 13, Bild 2 von 3 Moen Single Handle Faucet Cartridge (Model: 1225) Replacement: Schritt 13, Bild 3 von 3
    • Clamp the brass stem with vice grips and rotate it 90 degrees to the left, checking the water temperature for hot water.

    • From this position, rotate the brass stem 180 degrees to the right, checking the water temperature for cold water.

    • If the hot and cold operations are reversed, use vice grips to clamp onto the brass stem and rotate it 180 degrees from the original position.

  14. Moen Single Handle Faucet Cartridge (Model: 1225) Replacement: Schritt 14, Bild 1 von 3 Moen Single Handle Faucet Cartridge (Model: 1225) Replacement: Schritt 14, Bild 2 von 3 Moen Single Handle Faucet Cartridge (Model: 1225) Replacement: Schritt 14, Bild 3 von 3
    • Push the washer onto the brass stem.

  15. Moen Single Handle Faucet Cartridge (Model: 1225) Replacement: Schritt 15, Bild 1 von 2 Moen Single Handle Faucet Cartridge (Model: 1225) Replacement: Schritt 15, Bild 2 von 2
    • Replace the stop tube by pushing it onto the valve.

  16. Moen Single Handle Faucet Cartridge (Model: 1225) Replacement: Schritt 16, Bild 1 von 3 Moen Single Handle Faucet Cartridge (Model: 1225) Replacement: Schritt 16, Bild 2 von 3 Moen Single Handle Faucet Cartridge (Model: 1225) Replacement: Schritt 16, Bild 3 von 3
    • Insert the handle onto the stop tube.

    • Use a Phillips screwdriver to screw in the connecting handle screw (10-24 x 1-1/8" Button Head Phillips screw).

  17. Moen Single Handle Faucet Cartridge (Model: 1225) Replacement: Schritt 17, Bild 1 von 3 Moen Single Handle Faucet Cartridge (Model: 1225) Replacement: Schritt 17, Bild 2 von 3 Moen Single Handle Faucet Cartridge (Model: 1225) Replacement: Schritt 17, Bild 3 von 3
    • Replace the handle cap.

Abschluss

If your faucet continues to leak after replacing the cartridge, there may be another underlying issue causing the problem with your plumbing. Inspect the O-rings, seals, and other components of the faucet for any damage and consult professional assistance to resolve the issue.

Ein:e weitere:r Nutzer:in hat diese Anleitung absolviert.

Faith Larimore

Mitglied seit: 07/05/23

295 Reputation

1 Anleitung geschrieben

Team

0 Kommentare

Kommentar hinzufügen

Seitenaufrufe:

Letzte 24 Stunden: 3

Letzte 7 Tage: 18

Letzte 30 Tage: 97

Insgesamt: 737