Zum Hauptinhalt wechseln

Moto X Pure Edition Back Panel Removal

Archivierte Anleitung
Diese Anleitung wurde ausschließlich für historische Zwecke erhalten. Verwende die aktualisierte Version dieser Anleitung, um deine Reparatur durchzuführen.
Grundständige Anleitung
Dies ist eine grundständige Anleitung, die nur als Teil einer anderen Anleitung verwendet werden sollte.

Was du brauchst

  1. Moto X Pure Edition Back Panel Removal, Back Panel: Schritt 1, Bild 1 von 3 Moto X Pure Edition Back Panel Removal, Back Panel: Schritt 1, Bild 2 von 3 Moto X Pure Edition Back Panel Removal, Back Panel: Schritt 1, Bild 3 von 3
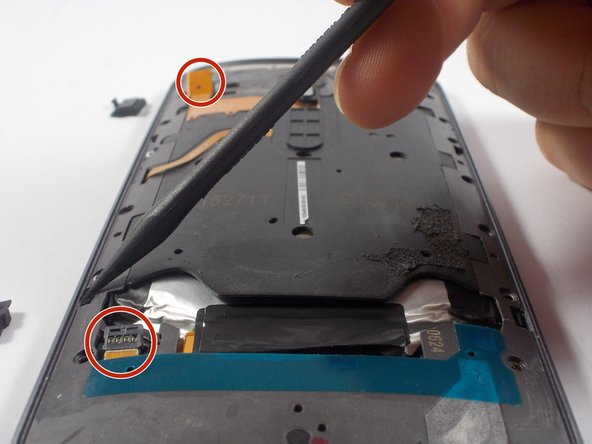
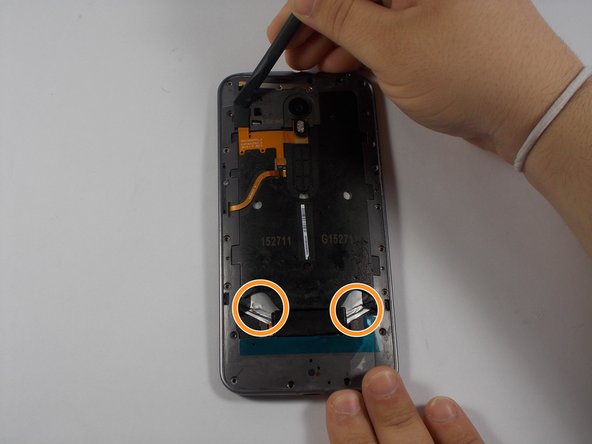
    • Disconnect the two battery connections.

    • Remove the two parallel black tabs by pulling on them.

  2. Moto X Pure Edition Back Panel Removal: Schritt 2, Bild 1 von 3 Moto X Pure Edition Back Panel Removal: Schritt 2, Bild 2 von 3 Moto X Pure Edition Back Panel Removal: Schritt 2, Bild 3 von 3
    • All screw lengths are 2.5mm

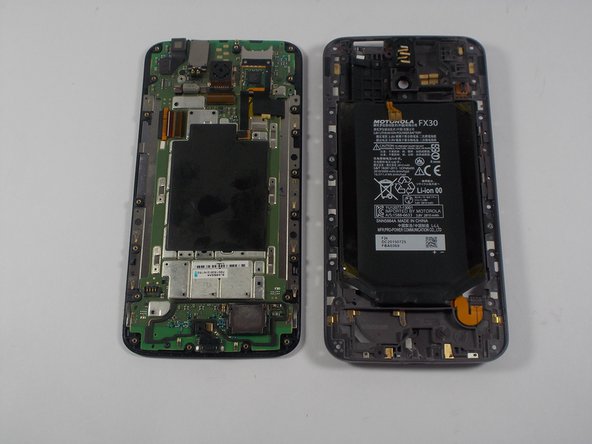
    • Using the T3 screw driver, remove all 20 T3 screws.

    • Do NOT remove the silver screw circled in orange.

    • This holds in the Power/Volume buttons and is not necessary to remove. There are 2 very tiny springs behind the volume buttons that are easy to lose if you remove this screw.

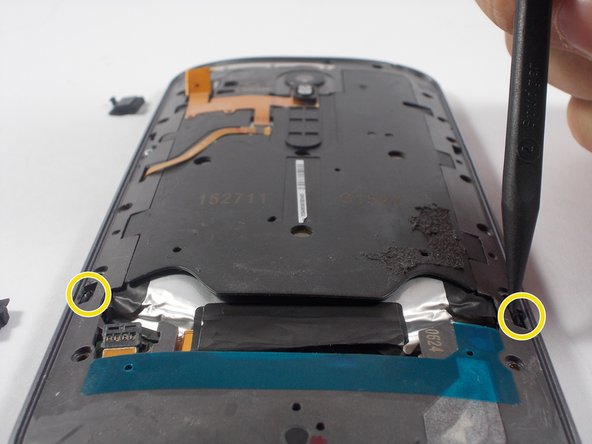
    • Using the nylon spudger, remove the two clips holding the panel in place.

Abschluss

To reassemble your device, follow these instructions in reverse order.

2 weitere Nutzer:innen haben diese Anleitung absolviert.

Team

UMass Dartmouth, Team 5-2, Landers Spring 2016 Mitglied von UMass Dartmouth, Team 5-2, Landers Spring 2016

UMASSD-LANDERS-S16S5G2

3 Mitglieder

15 Anleitungen geschrieben

0 Kommentare

Kommentar hinzufügen

Seitenaufrufe:

Letzte 24 Stunden: 0

Letzte 7 Tage: 0

Letzte 30 Tage: 0

Insgesamt: 148