Diese Übersetzung enthält möglicherweise noch nicht die neuesten Änderungen der Original-Anleitung. Hilf mit, die Übersetzung zu aktualisieren oder sieh dir die Original-Anleitung an.
Einleitung
Benutze diese Anleitung, um das LCD mit Touchscreen in deinem Motorola Moto X Pure Edition auszutauschen.
Entlade den Akku aus Sicherheitsgründen vor der Reparatur auf unter 25%. Das verringert das Risiko eines Feuers, falls der Akku während der Reparatur versehentlich beschädigt wird.
Bevor du anfängst, sieh dir den letzten Schritt dieser Anleitung an und stelle sicher, dass dein Ersatzteil mit dem hier abgebildeten übereinstimmt. Diese Anleitung ist für den Austausch eines Displays, das bereits in einem neuen Rahmen vorinstalliert ist. Falls du stattdessen ein Display ohne Rahmen gekauft hast, musst du dein altes Display sorgfältig vom Rahmen ablösen und dann das neue Display in den Rahmen einkleben. Diese Schritte werden nicht in dieser Anleitung erklärt.
Was du brauchst
-
-
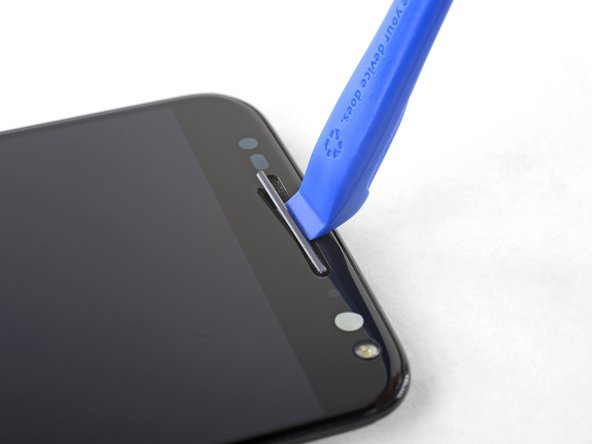
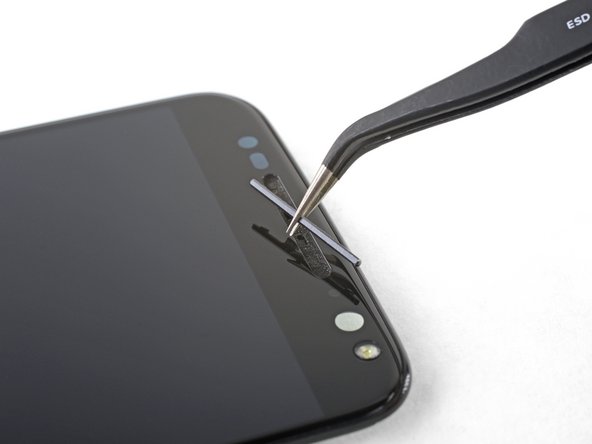
Setze ein SIM Karten-Auswurfwerkzeug, ein Bit oder eine aufgebogene Büroklammer in das kleine Loch im SIM Karteneinschub.
-
Drücke darauf, um den Einschaub herauszuholen.
-
-
-
Bereite einen iOpener vor und erwärme damit etwa fünf Minuten lang die rechte Kante auf der Rückseite des Smartphones. Dadurch wird der Kleber, mit dem die Rückabdeckung befestigt ist, aufgeweicht.
-
-
-
In den folgenden Schritten wirst du den Kleber durchschneiden, mit dem die Rückabdeckung befestigt ist.
-
Schneide nicht in diesem Bereich, sonst könnten empfindliche Flachbandkabel beschädigt werden.
-
-
-
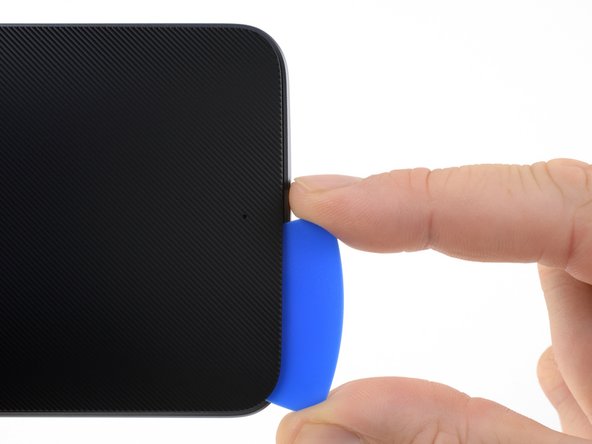
Drücke die Spitzen einer Pinzette zusammen und setze sie in das kleine Loch auf der Kante der Rückabdeckung neben dem SIM Kartenslot.
-
Hebe die Abdeckung leicht mit der Pinzette an und schiebe ein Plektrum in den Spalt zwischen Abdeckung und Rahmen.
Insert only one of the tweezers’ point into the hole. Once the rubber backing is lifted high enough, slip a corner of the opening pick under the rubber backing. Leave the first pick near the corner while you use a second pick as directed in Step 6.
-
-
-
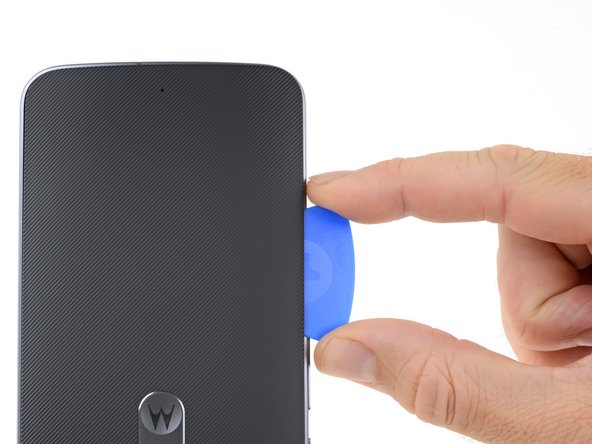
Schiebe das Plektrum an der Kante entlang, um den Kleber der Rückabdeckung zu durchtrennen.
-
Versuche, das Plektrum so tief wie möglich unter die Abdeckung zu schieben in die Mitte der Abdeckung. Dort befindet sich eine dicke Schicht Kleber, die durchtrennt werden muss.
I did not have a pick, used a few old credit cards, leaving them in place to keep the phone back separated.
Used a hair dryer to heat up a little, one section at a time, was enough to remove. Pulled apart slowly.
Left adhesive on the back and on the phone, where possible, using a tiny screw driver to separate. Reused whatever adhesive remained to reattach.
-
-
-
Bereite einen iOpener vor und erwärme damit etwa fünf Minuten lang die linke Kante der Rückabdeckung. So wird der Kleber, mit dem der Rest der Rückabdeckung befestigt ist, aufgeweicht.
-
-
-
Durchtrenne den Kleber an der linken Seite.
-
Versuche, das Plektrum so tief wie möglich unter die Abdeckung in die Mitte der Abdeckung zu schieben. Dort befindet sich eine dicke Schicht Kleber, die durchtrennt werden muss.
-
-
-
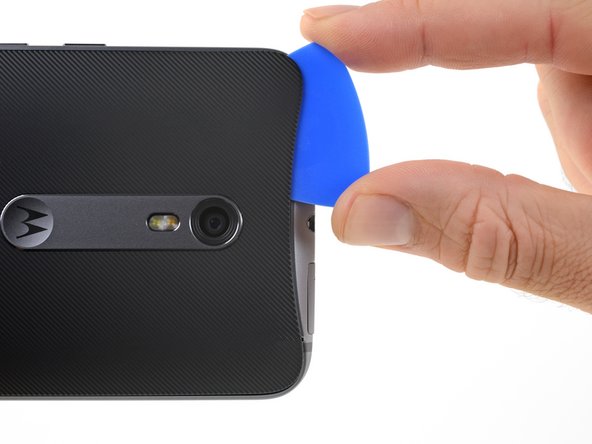
Durchtrenne den Kleber an der Oberkante, führe dabei das Plektrum vorsichtig um die Rückkamera.
-
-
-
-
Heble die Abdeckung vorsichtig vom Smartphone ab.
-
Entferne zuerst mithilfe einer Pinzette und einem Spudger alle Klebereste von der Rückabdeckung und vom Rahmen.
-
Reinige dann die Klebebereiche mit hochkonzentriertem Isopropylalkohol (mindestens 90%) und einem fusselfreien Tuch. Wische nur in eine Richtung, nicht hin und her. Die Oberfläche wird so für den neuen Kleber vorbereitet.
-
Die Ersatzklebestreifen werden mit den exakt vorgestanzten Kontouren der Rückabdeckung geliefert. Ansonsten kannst du Klebeband wie Tesa 61395 benutzen. Bevor du die vorgestanzte Klebefolie auf der Rückabdeckung anbringst, musst du den Metalleinsatz entfernen. Bringe den Klebestreifen an, dann wieder den Metalleinsatz.
-
Nach dem Einbau der Rückabdeckung solltest du mehrere Minuten lang festen und gleichmässigen Druck auf dein Smartphone ausüben, damit sich der Kleber gut verbindet.
Had the pre-cut adhesive sheet for reinstalling the Moto X Pure’s back cover. It seemed like the most “original” option at the time. I tried and tried to get it aligned inside the back cover, but found it virtually impossible to do. You pretty much have to get it perfectly aligned and then stick it down all at once. If it makes contact with the cover before it’s perfectly aligned, it’s all over. You’ll never get it back off without destroying it.
After failing with the pre-cut sheet, I resorted to the die-cut strips and corner pieces. This worked just fine.
-
-
-
Heble die Gummiabdeckung über dem Akkustecker mit der Spitze eines Spudgers hoch.
-
Entferne die Gummiabdeckung.
-
-
-
Heble den Akkustecker mit dem flachen Ende des Spudgers aus seinem Anschluss heraus nach oben.
Reconnecting the battery was difficult, did not align exactly. Note there are 2 slots that line up and 4 pins. Used a 10x magnifying lens with LED light, purchased to do this job. This step (reassembly) is where the magnifier came in handy. Had to move battery around a bit to get it to line up. Ended up removing adhesive tape from battery, so I could get in place to attach the connector. Battery held in place with screws and phone case, so far so good.
this is the difficult part. I find it is easier to remove this connector as the midframe and phone screen are separating (see step 19). Be also careful in prying this mine got broken luckily it is connected to the old battery which I replaced anyway
Broke the battery plug right off the motherboard! Trying to do a 2nd battery replacement. Only push up gently on the edge of the tab and straight up. Shopping for a new phone.
-
-
-
Setze die Spudgerspitze gegen die Ecke des Blitz-Steckers , um den Stecker aus seinem Anschluss heraus nach oben zu hebeln.
-
-
-
Entferne die zwanzig 2,4 mm Schrauben mit einem T3 Torx Schraubendreher.
Need to add a step for removing the bar holding the buttons in place. Step 5 from the tear down. Still can’t take the mid frame off though.
I stripped the threads on one of the 20 screws, had to drill it out. (Managed to do this without cracking the screen, completed battery replacement, all ok.)
Careful removing the screws, be sure of tight grip. I saw T4 torx suggested on another site for Moto X Pure, this might grip better? Try both.
I did not have to remove the screw holding the volume buttons bar in place. These stay attached, not needed for replacing the battery. Just the 20 screws shown.
DO NOT REMOVE THE SILVER SCREW HOLDING IN THE VOLUME AND ON-OFF BUTTON. If these buttons fall out there are 4 very small springs that will pop out and are very hard to reinsert. If they do pop out do not use tweezers to reinsert but use a magnetic screw driver bit to reinsert.
This is extremely easy to overlook. This screw is a different color (silver versus black) but when you’re in the swing of removing all the screws it’s tempting to just remove ALL the screws. I goofed, had the buttons fall out, could only find 3 of the springs. Put two back in the volume rocker and only one in the power button since it’s smaller, seems like it wouldn’t need two as much. Everything still works, maybe just slightly less tactile than before. Even without the the springs, there’s still some mechanical return to the buttons, so if you do lose them don’t despair.
This is not working, got two out. Most just strip.
Update. The driver provided is not the right size. I had some tools laying around and found one that fit. This allowed me to get all the screws out except the six I stripped using the driver provided by ifiixit. Turns out they come out pretty easy if you have the right size bit. Would have been an easy fix had I not bought the tools…. go figure.
What is the right size bit?
The T3 Torx Driver was bundled in the bag with the Alcohol Prep Pad, not with the rest of the drivers! So look before you there before you call support like I did.
T4 works better, T3 also works. Try both and proceed carefully, get a good grip before turning.
-
-
-
Drücke die kleine Klammer, mit der die linke Seite des Mittelrahmens befestigt ist, zur Kante des Smartphones, um sie zu lösen.
On reassembly, these did not really click back in place. Held tight when reattaching the 20 (19 in my case) screws).
I had to push rather hard to release both clips. The tip of the spudger bent under the pressure I had to apply. But the the clips did finally release without damage.
-
-
-
Wiederhole den vorherigen Schritt, um die Klammer an der rechten Seite des Mittelrahmens zu lösen.
-
-
-
Halte das Display an den Kanten fest und hebe den Mittelrahmen vorsichtig vom Display.
-
Entferne den Mittelrahmen vom Display.
My mid-frame and display were separated on the long sides but seemed a little bit stuck on the top and bottom. I used the flat end of the spudger to carefully pry the two assemblies apart at either end.
In my case, stuck in the middle. Pulled apart very slowly, giving the adhesive a chance to separate, and not tearing whatever it was in there. Kept an eye on the inside middle, and very SLOW let it separate. Or was that the battery? In either case, go slow on all steps.
Yeah, everything went according to the guide until this step. I lifted the midframe away from the screen assembly as shown and something in the center didn’t separate at all. I spent a good half hour terrified that I had missed a step or a screw or that there was something different about my phone. In the end I read the comments and very slowly and patiently lifted the midframe until something uncoupled and the two parts cleanly separated. I was certain that permanent damage must have been done, but upon reassembling everything seems to be working perfectly.
Note to self - check that ALL (20) screws have been removed… especially if midframe is stubborn lifting up - i (almost) forgot about the one near the display cable (and it’s threaded into the motherboard instead of the frame) :)
In my unit, the midframe released from the display nicely just as described in the instructions.
-
-
-
Entferne das Klebeband, das den Display-Kabelstecker bedeckt.
-
-
-
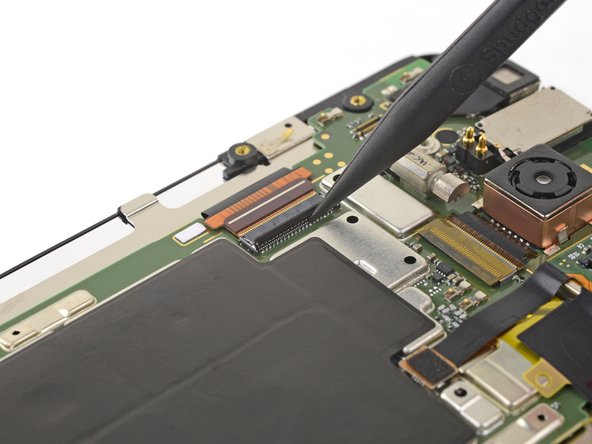
Klappe den Sicherungsbügel am ZIF Verbinder des Displaykabels mit der Spudgerspitze auf.
-
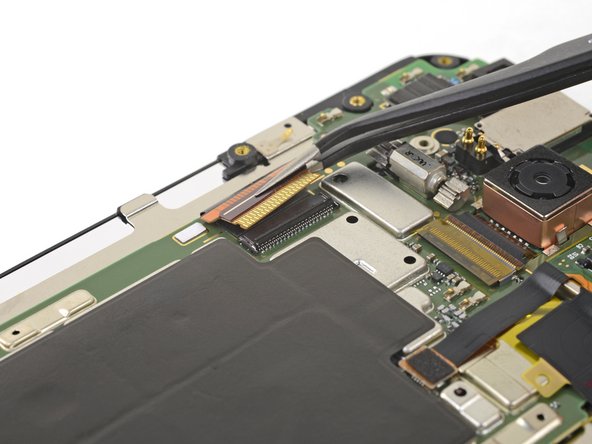
Ziehe das Display-Flachbandkabel gerade aus seinem Anschluss heraus. Das Kabel sollte parallel zur Oberfläche herauskommen.
This step means straight in a flat or horizontal sense, as in move the ribbon cable toward the side of the phone, The image makes it appear that it was lifted up away from the back of the phone.
Thanks Chris!
I’ve adjusted the wording slightly to clarify the action.
-
-
-
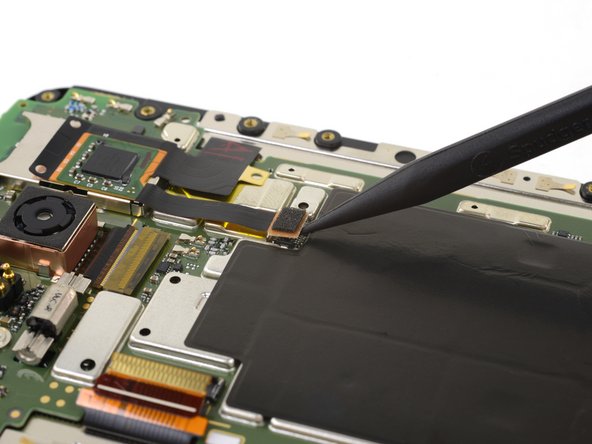
Hebe den zweiten Displaystecker mithilfe der Spudgerspitze aus seinem Anschluss.
-
-
-
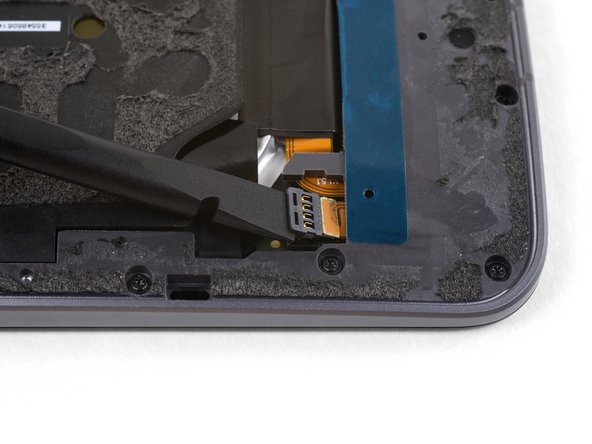
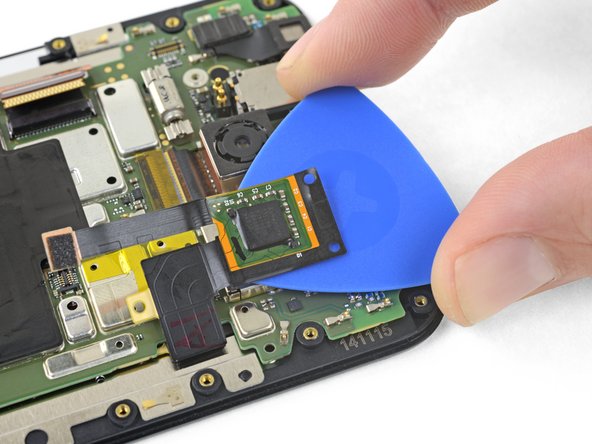
Bereite einen iOpener vor und lege ihn auf die kleine Leiterplatine, die oben am SIM Kartenslot befestigt ist.
-
-
-
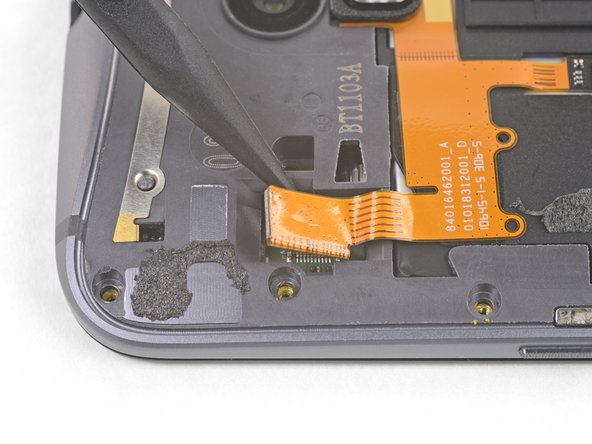
Schiebe ein Plektrum unter die Leiterplatine, um den Kleber zu durchtrenne und die Leiterplatine vom SIM Kartenslot abzulösen.
-
-
-
Entferne die 2,4 mm Schraube unten am Motherboard mit einem T3 Torx Schraubendreher.
-
-
-
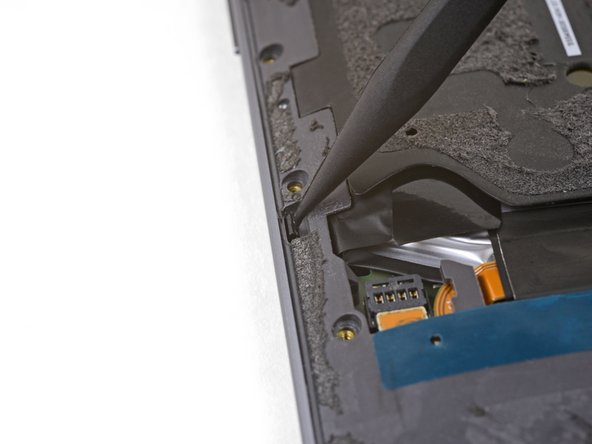
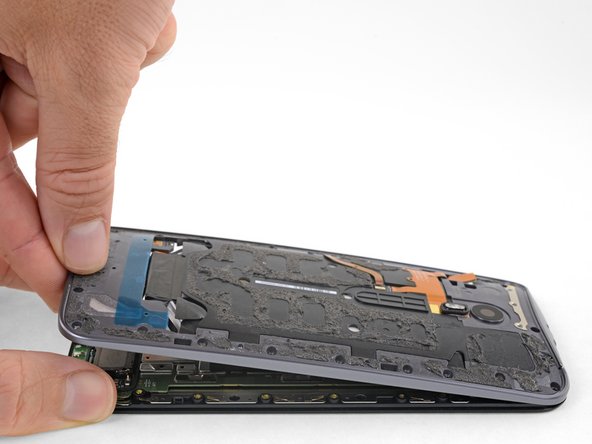
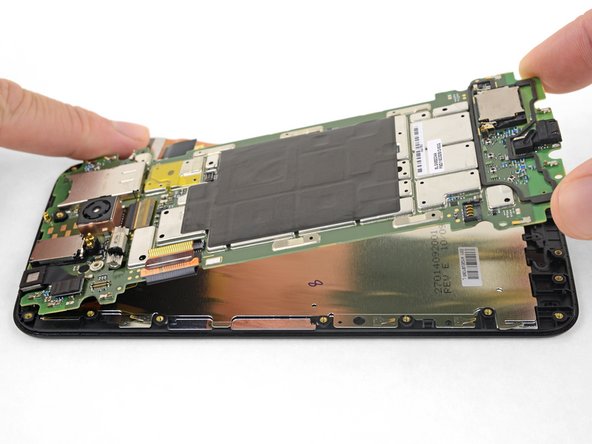
Beginne das Motherboard von unten her von der Displayeinheit abzuheben.
-
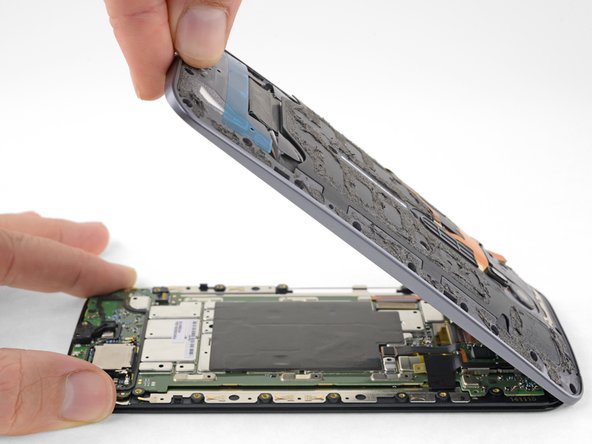
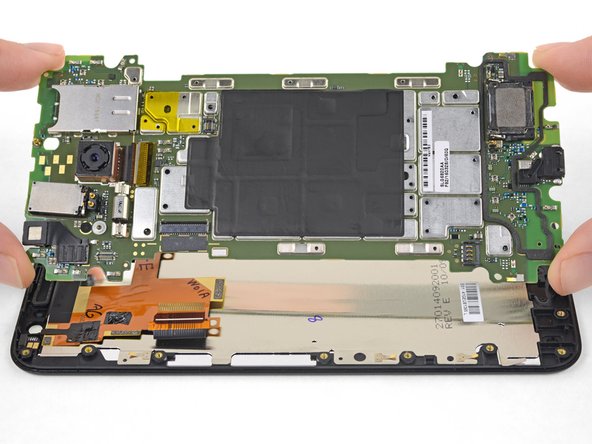
Entferne das Motherboard.
-
-
-
Nur das LCD Display und der Touchscreen (mit Rahmen) bleiben noch übrig.
-
Kontrolliere sorgfältig, ob dein Ersatzteil passt, und ob alle notwendigen Teile vom alten Rahmen entfernt wurden, damit sie auf den neuen Rahmen übertragen werden können.
-
Dein neues Display verfügt unter Umständen nicht über die kleinen metallenen Lautsprecherschutzvorrichtungen, die über den vorderen Lautsprechergittern angebracht sind. Wenn das der Fall ist, mache mit dem nächsten Schritt weiter. Wenn sie bei deinem Display bereits vorinstalliert sind, kannst du hier aufhören.
note to self - upon reassembly the battery low display flashed on - but the power button didn’t work … so after a hour, took the cover off and re-seated the ribbon wire that comes from the power button - then the power button worked normally (although still trying to get the speaker guards to snap in but those are probably cosmetic anyway)
also, mine was off for more than a year and had to reset phone by running recovery restart boot-loader … (reset) described in (volume down and power) https://support.motorola.com/us/en/produ...
-
-
-
Heble die obere Schutzvorrichtung mit einem Plastiköffnungswerkzeug hoch und aus dem Lautsprechergitter heraus.
-
Entferne die Lautsprecher-Schutzvorrichtung.
-
-
-
Wiederhole den vorherigen Schritt bei der unteren Schutzvorrichtung.
-
Um die Schutzvorrichtung wieder einzubauen, musst du die kleinen Ausbuchtungen auf der Schutzvorrichtung mit den Vertiefungen im Gitter ausrichten und die Schutzvorrichtung gerade in das Gitter hineindrücken.
I’ve cracked two screens attempting to reinstall the guards. Be REALLY careful doing this.
Any tips? I can’t get mine to go back in. They came out so easily!
Use the tweezers to hold the guard and also as a spacer to keep it centered up and down. Then press in one of the tabs and once its in move the tweezers out of the way and press in the other tab.
-


Vergleiche dein neues Ersatzteil mit dem Originalteil, du musst vor dem Einbau eventuell Komponenten übertragen oder Schutzfolien vom Neuteil abziehen.
Um dein Gerät wieder zusammenzubauen, folge den Schritten dieser Anleitung in umgekehrter Reihenfolge.
Bitte entsorge deinen Elektroschrott fachgerecht.
Lief die Reparatur nicht wie geplant? Auf unserem Antwortenforum kannst du Hilfe bei der Fehlersuche finden.
Rückgängig: Ich habe diese Anleitung nicht absolviert.
18 weitere Nutzer:innen haben diese Anleitung absolviert.
Besonderer Dank geht an diese Übersetzer:innen:
92%


Diese Übersetzer:innen helfen uns, die Welt zu reparieren! Wie kann ich mithelfen?
Hier starten ›

3 Kommentare
what i needed to know how to replace speaker covers
I have Motorola moto x pure edition that the LCD screen went bad/ blacked out. I found a replacement screen. Now the left half of the screen works perfectly but the right half is scrambled. What causes this? Is there a bad component that I can replace to fix this? Has anyone else experienced this? Is it a bad motherboard?
I have 2 of these phones, but really needed to replace the screen on the latest one to get data off it. I thought I’d get the walnut back off the first phone, but I found it wasn’t as easy as the rubber backing, perhaps heat transfer issues, and super hard to get it started, I have a small crack at that point.