Zum Hauptinhalt wechseln

Motorola Moto G 1st Generation Front Camera Replacement

Was du brauchst

  1. Achtung: Die Schritte 1-3 stammen von einer Anleitung, die derzeit bearbeitet wird.

    Motorola Moto G 1st Generation Front Camera Replacement, Rear Panel: Schritt 1, Bild 1 von 3 Motorola Moto G 1st Generation Front Camera Replacement, Rear Panel: Schritt 1, Bild 2 von 3 Motorola Moto G 1st Generation Front Camera Replacement, Rear Panel: Schritt 1, Bild 3 von 3
    • Before you start following any of the steps of this guide, completely turn the device off.

    • Take the plastic back cover off by either using a plastic Pry tool or simply using your hands. Start from the bottom by the charging port

  2. Motorola Moto G 1st Generation Front Camera Replacement, Removing the Screws: Schritt 2, Bild 1 von 1
    • Unscrew the 3.5mm screws, total of 14, located on the back protective cover by using a T5 Torx screwdriver.

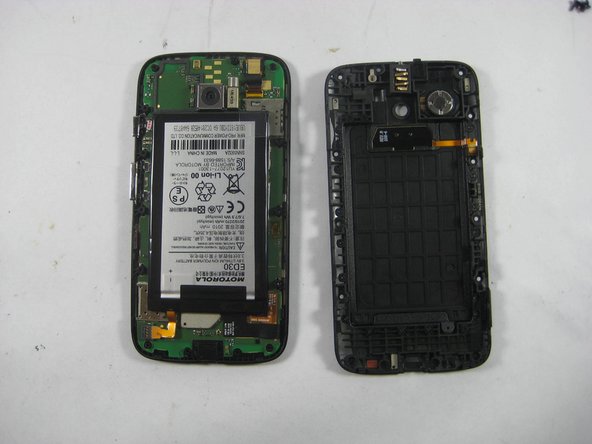
  3. Motorola Moto G 1st Generation Front Camera Replacement, Removing the Battery Cover: Schritt 3, Bild 1 von 2 Motorola Moto G 1st Generation Front Camera Replacement, Removing the Battery Cover: Schritt 3, Bild 2 von 2
    • Use a plastic opening tool to remove the protective cover.

    • Carefully work the plastic tool around all the edges of the phone.

    • The protective cover holds the Volume and the Home buttons which might fall off the assembly when the cover is removed.

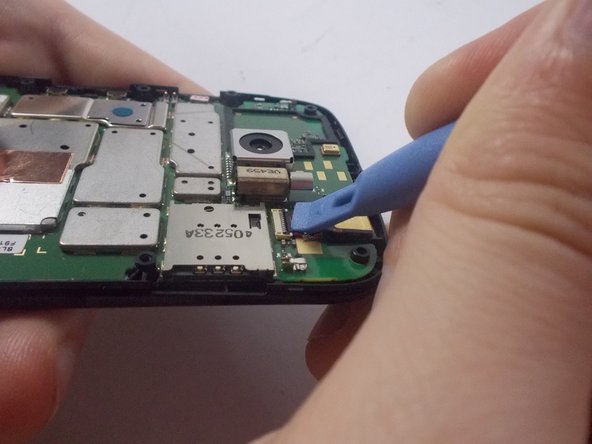
  4. Motorola Moto G 1st Generation Front Camera Replacement, Disconnecting the Front Camera: Schritt 4, Bild 1 von 2 Motorola Moto G 1st Generation Front Camera Replacement, Disconnecting the Front Camera: Schritt 4, Bild 2 von 2
    • Use the Pry tool to disconnect the Front Camera, found in the upper right corner, from the motherboard.

    • You want to pry up the black tab that locks it in place. It may be under a protective sticker.

    • Though the battery is removed in our second photo, it is not required for removing the front camera.

  5. Motorola Moto G 1st Generation Front Camera Replacement, Removing the Front Camera: Schritt 5, Bild 1 von 2 Motorola Moto G 1st Generation Front Camera Replacement, Removing the Front Camera: Schritt 5, Bild 2 von 2
    • Remove the camera from the phone by using the tweezers.

    • To reassemble, follow the steps in reverse.

Abschluss

To reassemble your device, follow these instructions in reverse order.

4 weitere Nutzer:innen haben diese Anleitung absolviert.

Team

UMass Dartmouth, Team 5-7, Vijaybhaskar Fall 2014 Mitglied von UMass Dartmouth, Team 5-7, Vijaybhaskar Fall 2014

UMASSD-VIJAYBHASKAR-F14S5G7

3 Mitglieder

8 Anleitungen geschrieben

0 Kommentare

Kommentar hinzufügen

Seitenaufrufe:

Letzte 24 Stunden: 0

Letzte 7 Tage: 1

Letzte 30 Tage: 1

Insgesamt: 1,258