Einleitung
Motorola Moto G5 Plus Touch Screen can be damaged if it is dropped or scratched. This guide will show you how to remove the touch screen on the device and replace it with a new one.
Was du brauchst
-
-
Remove the SIM card using a thin paperclip by inserting one end of the paper clip into the small hole on the top left corner. This will eject the SIM card from the phone.
-
-
-
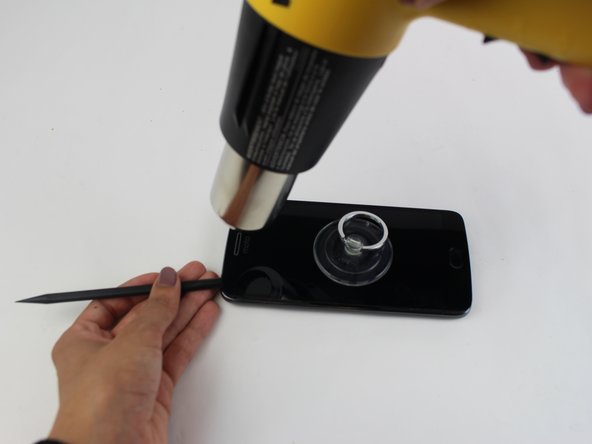
Stick the small suction cup onto the screen. Use this to remove the screen from the phone frame in later steps.
-
Using a heat gun on a low setting, slowly raise the temperature of the screen by repeatedly running the heat gun along the edges of the screen. This will soften the glue that holds the screen to the phone frame.
-
Use the suction cup to gently pull up on the screen while using the plastic opening tool to gently pry the edges of the screen up.
-
Once the screen has been completely separated from the phone frame, flip it to one side to expose the inside of the phone.
-
-
-
-
Using a size 000 Philips head screwdriver, unscrew the nineteen 4 mm screws. Yellow tinted kapton tape will need to be removed to get to some of the screws.
-
-
-
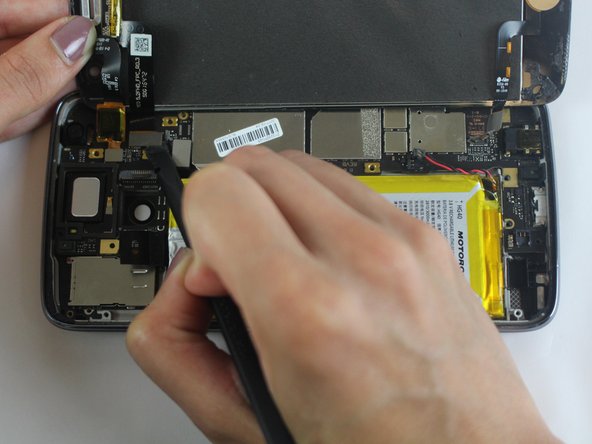
Unplug the battery by lifting up on the black plug with the plastic opening tool. This will shut off any power to the phone and prevent further damage.
-
-
-
Remove the 3 flat-topped connectors that connect the screen to the phone frame by prying them up with the plastic opening tool.
-
Fully detach the screen and set it to the side.
-
-
-
Remove the fingerprint sensor button from the screen by pushing it out with your fingers.
-


To reassemble your device, follow these instructions in reverse order.
To reassemble your device, follow these instructions in reverse order.
Team

USF Tampa, Team S1-G6, Leahy Fall 2017 Mitglied von USF Tampa, Team S1-G6, Leahy Fall 2017
USFT-LEAHY-F17S1G6
5 Mitglieder
21 Anleitungen geschrieben