Einleitung
This is an old guide—refer to the new LCD and digitizer guide for the most up-to-date process.
Was du brauchst
-
-
I purchased a new LCD and Digitizer on eBay for about $50. I also purchased a new battery since I figured I would have it open. An OEM battery ran me $30.
-
The last item I purchased on eBay was a new back for the phone, I could have purchased just the back adhesive but I wanted to change the color up too.
-
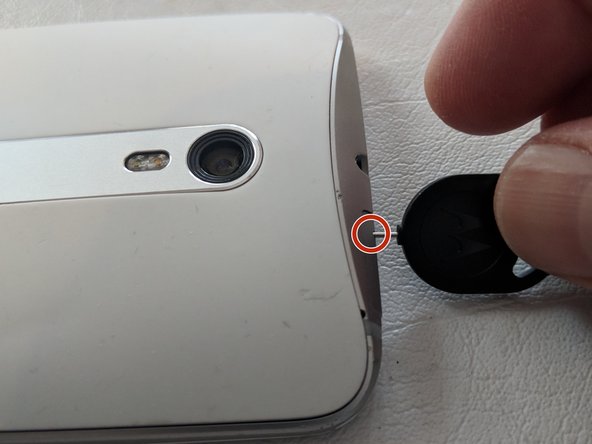
First Step is to remove the sim tray.
-
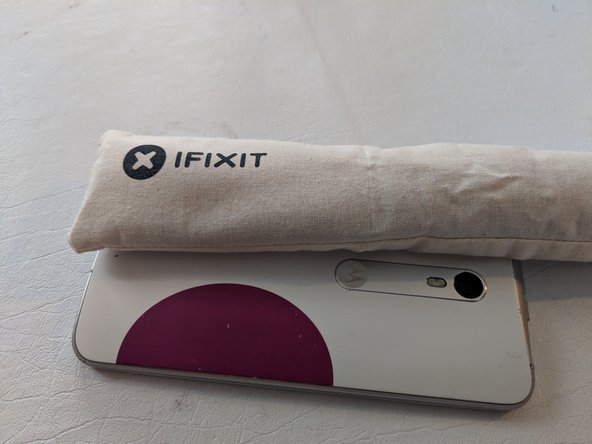
Then using your iFixit opener or a hair dryer you want to warm the back of the phone to loosen the adhesive.
-
-
-
After warming the back for a while the adhesive should be loosened up. Take the small point of the sim tray opener and insert it in the small hole just next to the sim tray on the back of the phone.
-
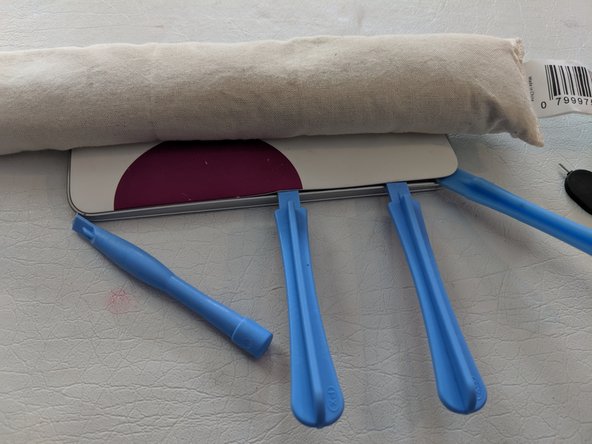
Carefully pry up to start removing the back. If it does not start to lift, you may need to use more heat. The adhesive is rather strong so be careful and go slowly.
-
As you work your way around use the tools to slowly separate the back from the adhesive. You could also use a guitar pick or something similar to keep the back separate from the adhesive.
-
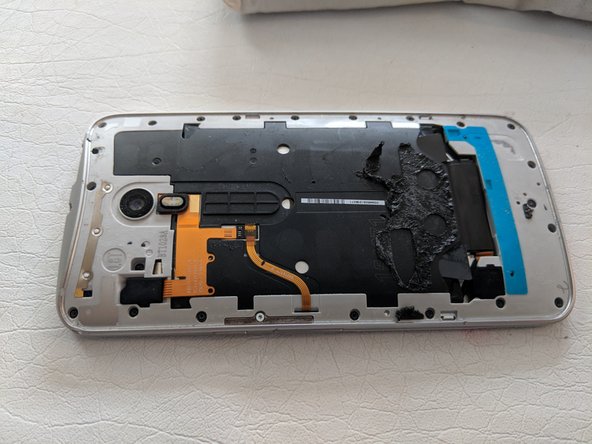
Once you have the back completely removed you can clean up any loose adhesive that is still on the phone or the back. You want to clean that all off if you are going to be using a new adhesive sheet. I used small rubbing alcohol pads and a spudger to scrape the remaining off.
-
-
-
-
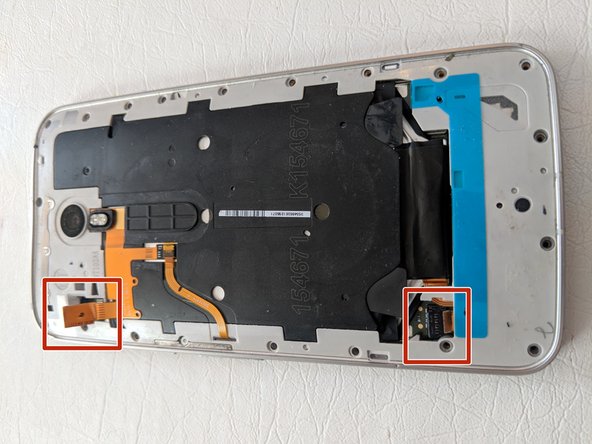
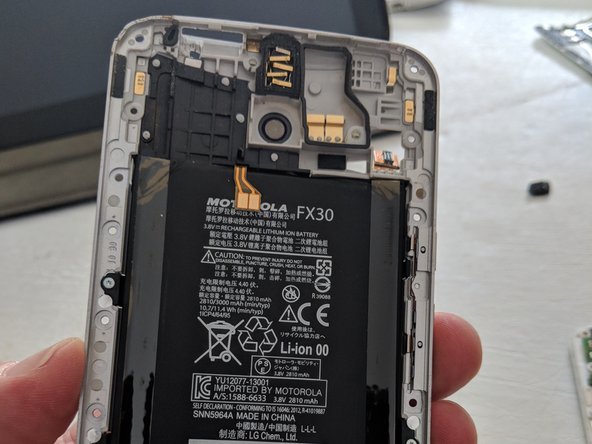
There are two ribbon connectors that you need to disconnect before proceeding. The battery and the flash.
-
I have highlighted the locations for the connectors, but first you need to use a spudger or tweezers to remove two black rubber protectors.
-
Pop those protectors up and then you can see the ribbon connectors beneath.
-
Using the spudger tool carefully pop up the connectors to disconnect them.
-
-
-
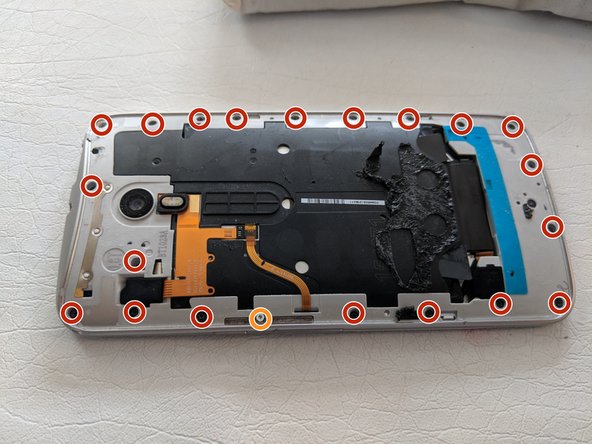
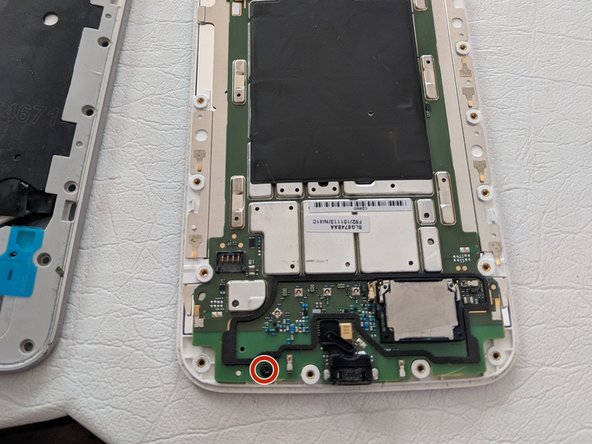
To remove the back frame there are a series of screws all around the outside. I believe they are Torx T3 or T4. Some of the screws on mine needed T3 and some needed T4.
-
DO NOT REMOVE the screw highlighted in Orange. That is the screw that holds in the rocker button for the volume. Leave that one in as it only is attached to the back frame.
-
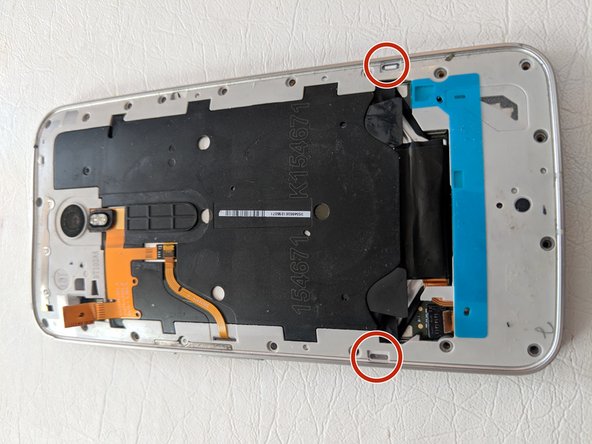
Once all the screws are removed you can use the spudger to release two catches and release the back frame from the front assembly.
-
I also had to go around the entire metal frame and lightly pry the two sections apart.
-
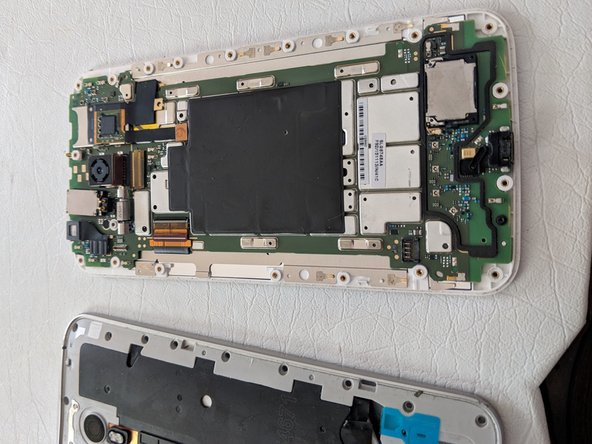
Once that is done you are left with two pieces. The back frame which will still contain the battery. And the front assembly which contains the motherboard and the LCD assembly.
-
-
-
There is a single screw at the bottom of the main board that holds it into the front assembly.
-
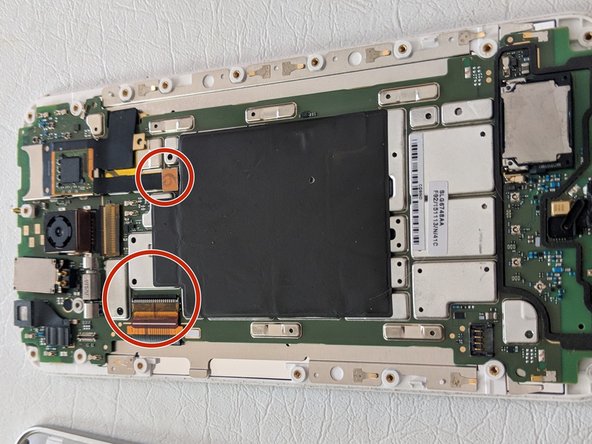
There are now two ribbon cables that need to be disconnected.
-
The first is easily popped straight up with a spudger tool.
-
The second one requires that you unlock a black plastic lever and then the ribbon can be slid out.
-
To unlock it the black plastic 'strip' must be flipped up. It hinges up and out toward the side of the phone.
-


To reassemble your device, follow these instructions in reverse order.
To reassemble your device, follow these instructions in reverse order.
