Einleitung
Grundständige Anleitung
Was du brauchst
-
-
Lege einen erwärmten iOpener fünf Minuten lang auf den unteren Bereich der rückseitigen Glasscheibe.
-
-
-
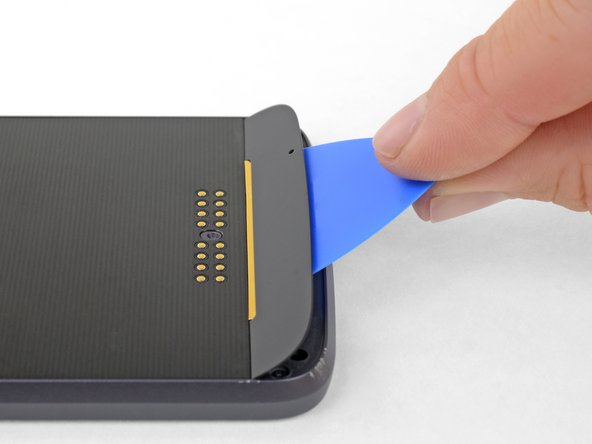
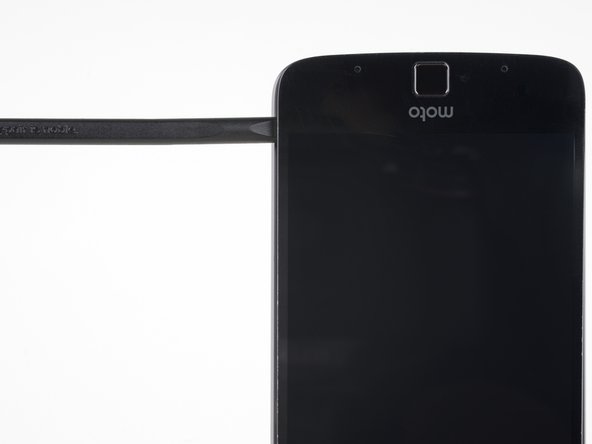
Setze ein Plektrum in den schmalen Spalt zwischen Rückgehäuse und Glasscheibe ein.
-
Heble mit der Spitze des Plektrums unter der Glasscheibe vorsichtig nach oben, um die Scheibe und das Rückgehäuse ein wenig voneinander zu trennen.
The opening picks are too thick and weak to accomplish this step. Plan on breaking the glass with a knife and replacing it with new glass from ebay. Search Dogxiong For Motorola Moto Z/Moto Z Force Black Back Rear Battery Housing Top if the following link doesn’t work: https://www.ebay.com/i/123308522723?chn=...
This step was a challenge. The picks are quite thick. I ended up using a box cutter knife to carefully separate one corner. Then I used one of the picks to complete this procedure. Once I realized that this worked, I breathed a sigh of relief. Then I did the same thing for steps 5 & 6.
I used a single edge razor blade in a holder. This worked much better then trying to get a pick inserted. Also, you really have to get the panel warm to heat up the glue enough to break it loose.
I managed to remove the remove the panel without a heat gun, but I did carefully use a square end hobby knife blade to life the glass far enough to insert the pick. The adhesive is across the entire panel, so it does not feel like it is lifting correctly as only the local area will actually lift.
IO found the Jimmy from my iFixit tool kit worked well with the iOpener and letting the opener sit for about 10 minutes then using a pick to keep the glass separated.
iOpener then blow dryer. Used tweezers to lift the paper thin glass. Once I got movement I shoved the pick in to cut the rest of the glue.
If you use a back cover like me, don't worry about scratching these glass panels. They're entirely pointless and not visible to be honest.
Took maybe an hour to get through this part.
Agreed. Hope you play guitar…because these picks are worthless for anything else. Use an exacto knife or razor blades of some sort.
Boxcutter blade, hair dryer, and just bust the glass off. Not worth trying to save!
-
-
-
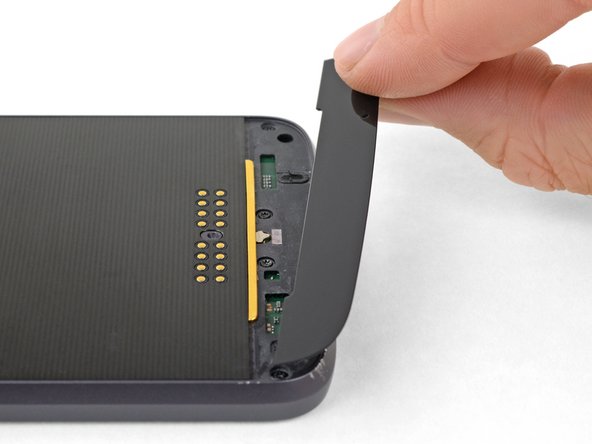
Schiebe das Plektrum zwischen Scheibe und Rückgehäuse.
-
Schiebe das Plektrum die ganze Länge der Scheibe entlang, um die Klebeverbindung zum Rückgehäuse aufzutrennen.
I used the heat gun and it worked great.
-
-
-
Wiederhole die vorherigen vier Schritte (Erhitzen und Ablösen) für die obere Glasscheibe.
When cleaning the Glass Panes, DO NOT use metal tools, This will scrape the paint off of the back of the glass and damage the glass. Use of Alcohol helps loosen and remove the glue. I used a small plastic scraper and alcohol. Just takes a little bit of time.
I was unable to remove the top one with the tools provided. I ended up breaking the glass and had to take it piece by piece. It depends the age of the phone and how strong the adhesive was. You can buy replacements on eBay or Amazon ( https://www.amazon.com/Dogxiong-Battery-... ). I bought it while I was fixing the phone since I broke the glass.
The upper glass panel proved to be more tricky. The previous square end hobby knife blade kept breaking, so I had to get a new regular hobby knife blade, which still broke, but managed to pry the panel up enough to get the other blade and eventually the pick in it. Wear safety glasses when prying with a metal blade The entire panel has adhesive, but the right side when viewed in the above photo has less, so it should be easier to lift. Additional examination of the adhesive reveals that there is a small spot in the corner that does not have any adhesive, presumably to aid with disassembly.
Got it off but it is all broken up, The top is definitely better adhered than the bottom.
SO MUCH ADHESIVE!! Just break it off and get replacement glass for $7.
I was unable to get the adhesive off without breaking it using the iopener, but a heat gun did the trick real fast. would definitely recommend over the iopener
-
-
-
-
Entferne die sechs 4 mm Torx T3 Schrauben, mit denen die Displayeinheit befestigt ist.
Why did they give me a T5 when it clearly states a T3?
Good thing I had their other tool kit with all of the bits.
what do you do if one of the Torx screw heads falls apart so you can’t turn the screw?
I ground the head off with a very small Dremel grinding tip. I wil find out if I created any new problems when I connect the new battery. Not even sure the battery is the problem. My daughters phone just stopped working and wouldn’t turn on even when plugged in.
I guess if the battery isn’t the problem, then I cna’t make it any worse.
I ordered the sjtek kit:
“Motorola Moto Z Force Droid XLTE XT1650-02 Screen Replacement LCD Display Touch Screen Digitizer Glass Assembly Parts 5.5" AMOLED Black with Frame”
It came with the wrong sized screwdriver as the previous poster described. By the time I could tell something was wrong with the screwdriver, I had two stripped screw heads. Don’t order this kit unless you have your own set of phone repair tools
@ewb62 The iFixit kit includes both the T3 and T5 driver bits—however, the T3 is commonly packed in the parts tray, rather than the tools tray with the other driver bits. Check the entire package carefully and you should find it. If not, contact customer support so they can ship the missing bit out to you ASAP. Sorry for the confusion!
I have the T5!!! Where's the T3??? Unbelievable.
So now what?
Never mind. I ordered the wrong kit. The Z force has the 4 bits
-
-
-
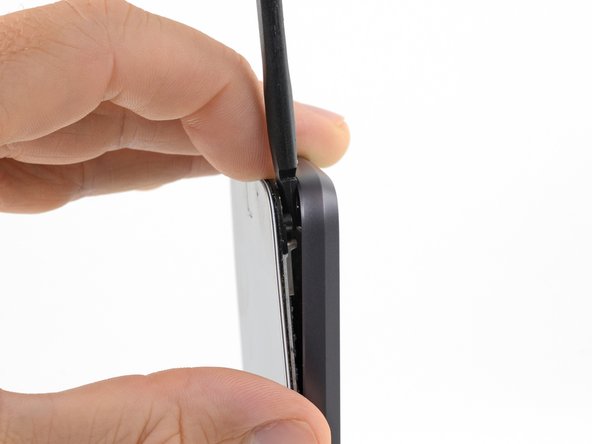
Setze die Spudgerspitze in das Loch in der rechten unteren Ecke des Rückgehäuses ein.
-
Drücke den Spudger in das Loch hinein, um so das Display vom Rückgehäuse zu lösen.
-
-
-
Halte mit dem Finger den Spalt zwischen Displayeinheit und Rückgehäuse offen und entferne den Spudger.
-
Setze dann das flache Ende des Spudgers in den Spalt zwischen dem Rückgehäuse und der Displayeinheit ein.
I broke the display and had to buy another one because I didn't realize this part is 3- layered. I accidentally separated the glass from the digitizer. : ( so make sure you pop out the entire thicknesses with the spudger before you try lifting it away from the phone.
-
-
-
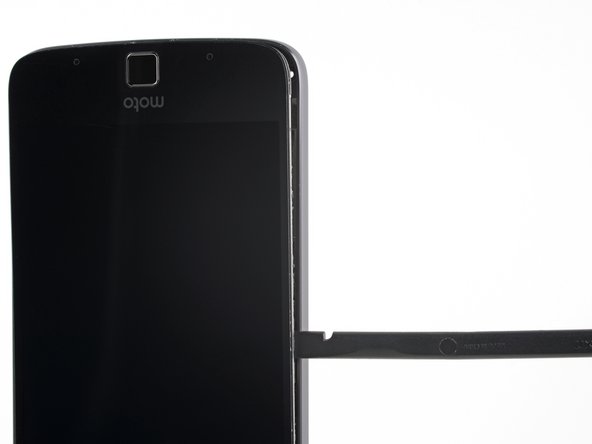
Schiebe den Spudger an der Seite des Smartphones entlang, bis du zu der Raste kommst, mit der das Display am Rückgehäuse befestigt ist.
-
Verdrehe den Spudger ganz nahe an der Klammer, um das Display vom Rückgehäuse wegzuhebeln und die Klammer zu lösen.
If it is being difficult, confirm that you have removed all 6 (SIX) screws. This is from personal experience.
BECAREFUL twisting the spudger. You need to be right on the clip. If you are too far away from the clip you will crack the LCD screen from the inside (happened to me and ended up having to buy a new screen). I found a video where it shows working one of the picks all the way around the screen first to separate the glue / sealant that is used FIRST. then you can locate the clips easier Prying after all the glue is worked loose make it sperate a lot easier.
HINT - The clip on the button side is not in the middle of the side it is slightly higher towards the Power button. The left side (no buttons) the clip is directly in the middle of the side.
-
-
-
Wiederhole dieses Verfahren des Trennens und Hebelns an der anderen Seite des Smartphones.
On this side, I got the spudger 1/2 way up, and it wouldn’t give. I wound up working around from the other side, then down from the top to finally release it. It felt like the tension was released after everything else came out, and it popped right out. jml.
Clips are a broad term. No pictures of what to release and how. Ruined digitizer following these instructions.
-
-
-
Kippe die obere rechte Ecke des Displays nach unten, um eine der Laschen auszuklinken, die das Display oben festhalten.
-
Kippe als nächstes die andere Ecke nach unten, um die andere Lasche auszuklinken.
I also agree with this. I just kept shaking things until it loosened. Getting it back on was just as a struggle and took some forcing.
I found the previous step wasn’t clear enough about prying the screen past the midway point once you get to those 2 side tabs. I used the pick to keep separating the screen past those side tabs up until I reached the top corners. Then I laid the phone down, screen side up. I held onto the metal frame with one hand, and with my other hand I grasped the screen near the bottom side (by the fingerprint reader) and gently wriggled the screen left and right, with slight pressure in the direction of the fingerprint reader, and a little torque in the direction of opening in the “book” layout shown above. Voila! Opened like a charm.
-
-
-
Hebe die rechte Kante des Displays an und schlage es auf wie eine Buchseite, aber nicht mehr als 45°.
-
Hebe das Display vorsichtig etwas an, um die Raste an der Kante des Rückgehäuses zu lösen, wobei du den 45° Winkel beibehalten musst.
-
Lege das Display auf die Tischplatte hinter dem Smartphone ab und öffne es bis auf 90°, so dass du an das Displaykabel herankommen kannst.
Note that there are several strips of glue along the edges of the display which will need to be reapplied during reassembly.
During reassembly (once you have put the display cable back into its socket), I recommend plugging the charger cable into the phone for a few seconds to see if you see the lightening bolt (charging indicator) on the front panel. This will allow you to be certain that, both, the battery and display connectors have been properly and securely connected.
-
-
-
Hebe den Displaykabelstecker mit dem flachen Ende des Spudgers aus seinem Anschluss heraus.
-
-
-
Entferne das Display.
-
Wenn du eine neue Displayeinheit einbaust, dann schaue dir genau an, wo die Klebestellen am alten Display waren und befestige die Klebestreifen in gleicher Weise am neuen Ersatzteil.
-


Um dein Gerät wieder zusammenzusetzen, folge den Schritten in umgekehrter Reihenfolge.
Um dein Gerät wieder zusammenzusetzen, folge den Schritten in umgekehrter Reihenfolge.
Besonderer Dank geht an diese Übersetzer:innen:
100%

Diese Übersetzer:innen helfen uns, die Welt zu reparieren! Wie kann ich mithelfen?
Hier starten ›

I was unable to get the iOpener to heat the glass panes hot enough to loosen the glue. I was able to use a heat gun. Just heat it on low setting for about 1.5 min. (Any longer and you risk damaging the phone.
Kimball Marston - Antwort
I heated the iOpener several times to no avail. Then when i switched from the pick to a box cutter (see my comment on next step) it turned out that the glue WAS heated enough.
Michael Roland - Antwort
I agree with the heat gun. Only needed to use it on low for a few seconds. iOpener did not work, ended up using an exacto knife and heat gun after breaking the bottom glass. Found the replacement glass on Amazon for 6.99 for both pieces.
zx12bullet - Antwort
I did this with the iOpener, about 45 seconds on a 1200W+ microwave. The mistake I made was not realizing how thin the glass is. Think paper thin. You do not have to dig far to get into it. I did peel off a protective outer plastic that was on both of mine. Shattered the top one, learned, bottom one came out without issues.
Paul Porter - Antwort
The iOpener was completely useless. use he heat gun as suggested above.
Patrick Connerney - Antwort
Before you start, get some 91% Isopropyl Alcohol from the drug store, find an 1800 watt hair dryer and a box cutter blade, and order the replacement glass pieces from ebay or amazon. Once you have it all, put some alcohol on the edges, wait a couple of minutes, heat the glass for 30-60 sec with the hair dryer, and bulldoze the glass pieces with the blade and spudger. Unless you value your time at less than $7/hr, you’ll be happy you didn’t bother trying the 1% chance to save the original glass.
Udo Dirkschneider - Antwort