Einleitung
Welcome to a step-by-step guide for replacing both the LCD screen and connector ribbon on your Motorola v180 mobile phone (Model Number: v180). If you are encountering issues such as a cracked or malfunctioning LCD screen or a faulty connector ribbon leading to issues with the screen and the device's motherboard connecting, this guide will take you through the process of restoring the full functionality of your device. These replacements will fix screen display or connectivity issues you may be experiencing. Specific display and connectivity issues include distorted visuals, flickering screens, or unresponsive touchscreens.
Before you begin, have the necessary tools available and ensure you have compatible replacement parts for your Motorola v180. While no specialized skills are required for this repair, patience, attention to detail, and basic knowledge of electronics will be handy. It is important to work in a well-lit, clutter-free environment, taking breaks if needed, and handling small pieces with care. Please note that the connector ribbon is delicate and requires careful handling to avoid further damage during the replacement process. Additionally, making sure to properly align and secure the new LCD screen and connector ribbon attachment is necessary for a successful repair. With the detailed instructions, you will successfully complete your repair and get your device back to full functionality.
Let's begin the steps to fix your Motorola v180 LCD screen and connector ribbon.
Was du brauchst
-
-
Gently tug on the upper edge of the faceplate, and it will easily detach.
-
-
In diesem Schritt verwendetes Werkzeug:Tweezers$4.99
-
Insert a pair of tweezers between the silver and black sections of the cover.
-
-
-
-
Power off the Motorola V180.
-
Flip the phone over to its back side.
-
Hold down the button and slide off the back cover.
-
Remove the battery.
-
-
-
Use your T6 Torx Screwdriver to unscrew the four screws located on the back of the phone.
-
Remove the SIM card located on the back of the phone.
-
-
-
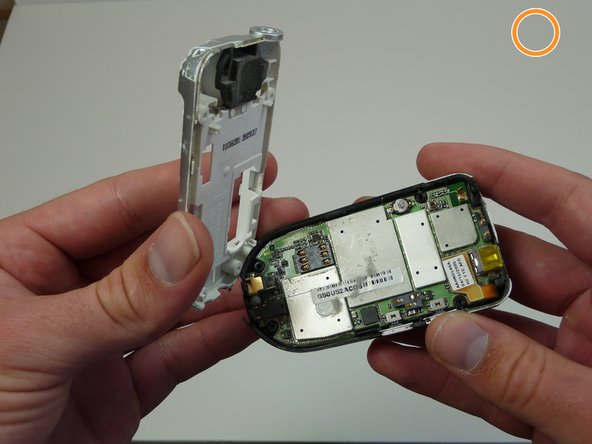
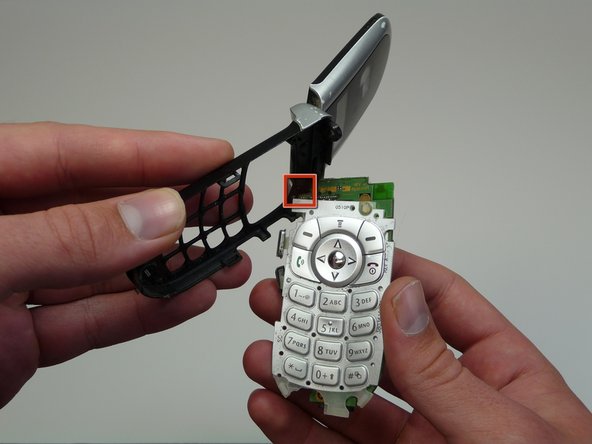
Unclip the pronged rectangle connector ribbon attached to the motherboard.
-
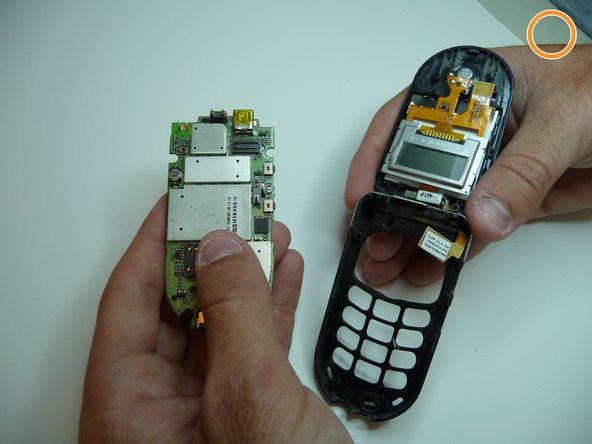
Remove the motherboard.
-
-
-
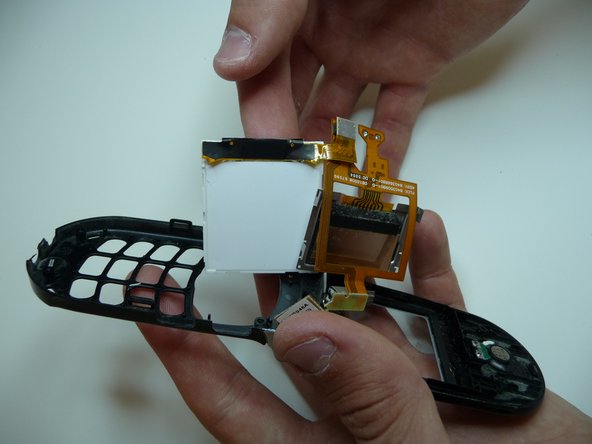
Now that the connector ribbon is loose, the screen (white part) can swing away.
-
Some of the black "tape" can be peeled back, but the screen is still attached. Further work may be necessary to fully separate this part.
-
-
-
Slide out the part of the connector ribbon that was just attached to the motherboard through this narrow slot in the phone.
-
Once the connector ribbon is successfully removed from the slot, proceed to remove the entire unit from the phone.
-


To reassemble your device, follow these instructions in reverse order.
To reassemble your device, follow these instructions in reverse order.
Team

Cal Poly, Team 6-16, Maness Spring 2010 Mitglied von Cal Poly, Team 6-16, Maness Spring 2010
CPSU-MANESS-S10S6G16
4 Mitglieder
13 Anleitungen geschrieben