Einleitung
This guide will cover the steps on how to remove the back plate of a Motorola V60i.
Was du brauchst
-
-
Flip the phone over so the back cover is facing up.
-
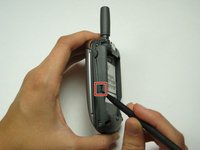
Using either a finger or a spudger, press the button located near the top of the phone by the antenna.
-
-
-
Pry up the back plate from the phone.
-
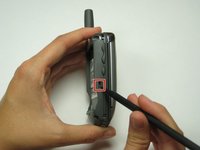
Push the button near the bottom of the battery using either your finger or the spudger to release the battery.
-
-
-
-
Using a T6 Torx screwdriver, remove the four screws from the back of the phone.
-


To reassemble your device, follow these instructions in reverse order.
To reassemble your device, follow these instructions in reverse order.
Team

Cal Poly, Team 30-40, Garner Spring 2010 Mitglied von Cal Poly, Team 30-40, Garner Spring 2010
CPSU-GARNER-S10S30G40
4 Mitglieder
19 Anleitungen geschrieben