Diese Version enthält möglicherweise inkorrekte Änderungen. Wechsle zur letzten geprüften Version.
Was du brauchst
-
Dieser Schritt ist noch nicht übersetzt. Hilf mit, ihn zu übersetzen!
-
Flip the Mr. Coffee DW13 over so that the lid is facing away from you and the base is facing toward you.
-
-
Dieser Schritt ist noch nicht übersetzt. Hilf mit, ihn zu übersetzen!
-
Remove the eight 11 mm screws that secure the base of the machine with a Phillips Head #2 screwdriver.
-
-
Dieser Schritt ist noch nicht übersetzt. Hilf mit, ihn zu übersetzen!
-
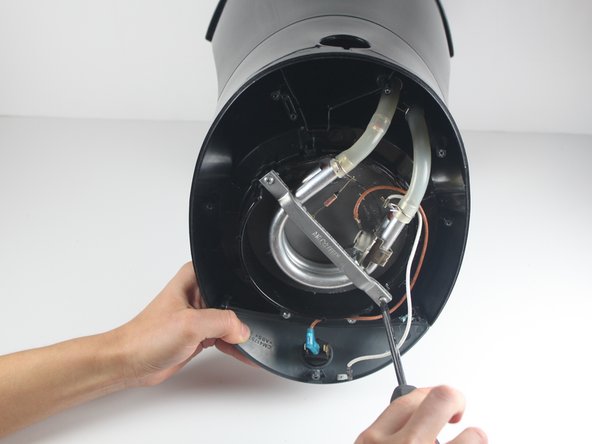
Gently lift the base cover to expose the inside of the coffee machine.
-
-
-
Dieser Schritt ist noch nicht übersetzt. Hilf mit, ihn zu übersetzen!
-
Identify and remove the two 13mm screws securing the silver support bracket using a phillips head screw driver.
-
-
Dieser Schritt ist noch nicht übersetzt. Hilf mit, ihn zu übersetzen!
-
Gently lift the silver support bracket freeing the heating plate from the heating coil.
-
-
Dieser Schritt ist noch nicht übersetzt. Hilf mit, ihn zu übersetzen!
-
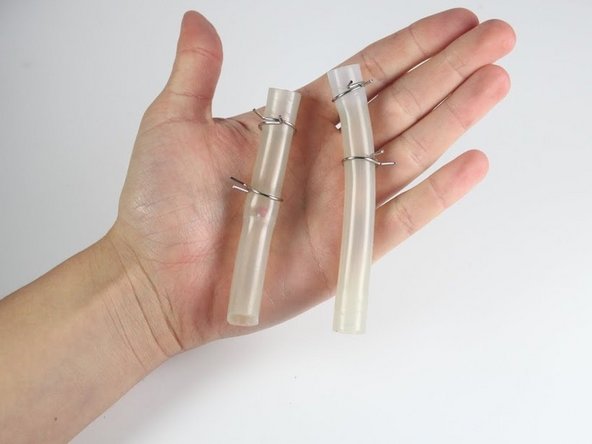
Use pliers to pinch and loosen the crimps.
-
-
Dieser Schritt ist noch nicht übersetzt. Hilf mit, ihn zu übersetzen!
-
Once the crimps are loosened, slide them down the tubing.
-
-
Dieser Schritt ist noch nicht übersetzt. Hilf mit, ihn zu übersetzen!
-
Separate the tubing from the heating coil by grasping the tubing in one hand and the heating coil in the other and gently pulling apart.
-
-
Dieser Schritt ist noch nicht übersetzt. Hilf mit, ihn zu übersetzen!
-
Gently pull on plastic tubing, freeing it from the coffee maker
-


Rückgängig: Ich habe diese Anleitung nicht absolviert.
3 weitere Nutzer:innen haben diese Anleitung absolviert.
Team

Cal Poly, Team 10-31, Maness Winter 2014 Mitglied von Cal Poly, Team 10-31, Maness Winter 2014
CPSU-MANESS-W14S10G31
4 Mitglieder
6 Anleitungen geschrieben
8 Kommentare
Great photos. I've done this on another mr coffee model twice. Once for lime buildup, once for a coffee ground clogging it. Make sure you are gentle with the soft tubing. I split the hose at one end. The clamps now barely covers the split, but I'm looking for a replacement tube and ball valve.
I did not have to detach the heating coil from the plate in order to remove the tubing.
I found that the check valve was clogged with debris on my unit. Blowing it out cleared the clog. My unit's check valve is built into the tube that goes from the reservoir to the coil, so I only had to remove that tube to solve my issue.
Where does the tube with the check valve attach?
latimert36@windstream.net
Water inlet tube from the tank on my model Mr. Coffee BVMC-SJX33GT.