Zum Hauptinhalt wechseln
Gemeinsam reparieren - Jetzt registrieren

Nabi 2 Motherboard Replacement

Was du brauchst

    1. Nabi 2 Motherboard Replacement, Nabi 2 Back Cover Removal: Schritt 1, Bild 1 von 3 Nabi 2 Motherboard Replacement, Nabi 2 Back Cover Removal: Schritt 1, Bild 2 von 3 Nabi 2 Motherboard Replacement, Nabi 2 Back Cover Removal: Schritt 1, Bild 3 von 3
      • Remove the rubber bumper from the tablet.

      Frag FixBot

      Kommentar hinzufügen

    2. Nabi 2 Motherboard Replacement: Schritt 2, Bild 1 von 2 Nabi 2 Motherboard Replacement: Schritt 2, Bild 2 von 2
      • With a PH00 screwdriver, remove the four outermost screws from the back of the tablet.

      Frag FixBot

      Kommentar hinzufügen

    3. Nabi 2 Motherboard Replacement: Schritt 3, Bild 1 von 3 Nabi 2 Motherboard Replacement: Schritt 3, Bild 2 von 3 Nabi 2 Motherboard Replacement: Schritt 3, Bild 3 von 3
      • Carefully, insert a plastic opening tool into the seam of the device and begin gently prying the two plastic pieces apart.

      • Work the tool all the way around the device. Small plastic clips should release. If they do not, gently apply outwards pressure until the clips give.

      • Do not force the clips open, as they are fairly easy to break

      Frag FixBot

      Kommentar hinzufügen

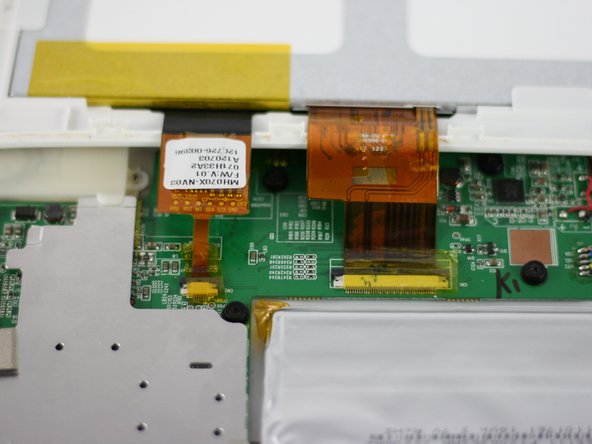
    1. Nabi 2 Motherboard Replacement, Screen: Schritt 4, Bild 1 von 3 Nabi 2 Motherboard Replacement, Screen: Schritt 4, Bild 2 von 3 Nabi 2 Motherboard Replacement, Screen: Schritt 4, Bild 3 von 3
      • Lay the tablet down flat and remove the yellow tape from the ZIF connector on each side

      Frag FixBot

      Kommentar hinzufügen

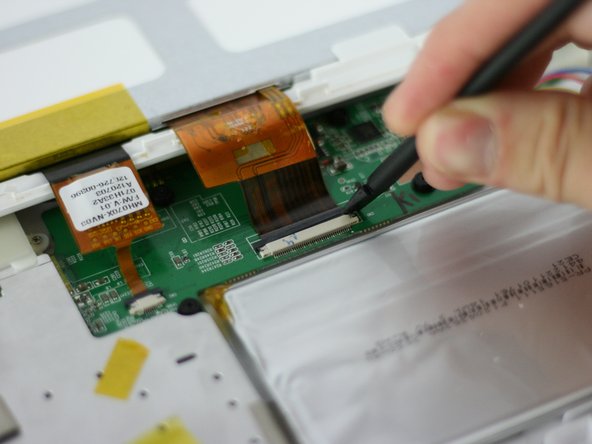
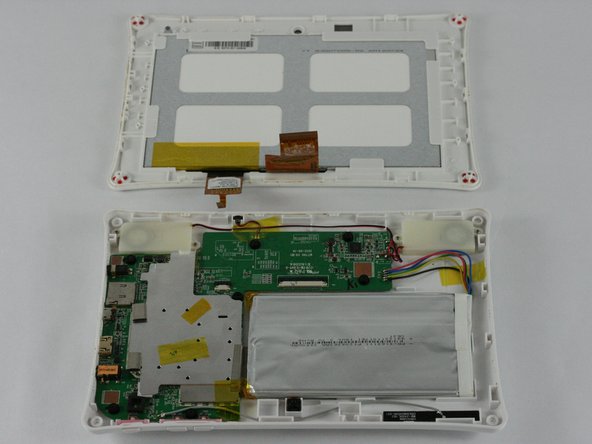
    2. Nabi 2 Motherboard Replacement: Schritt 5, Bild 1 von 3 Nabi 2 Motherboard Replacement: Schritt 5, Bild 2 von 3 Nabi 2 Motherboard Replacement: Schritt 5, Bild 3 von 3
      • Using a spudger, slide the brown tab forward on each side of the connector

      • Slide until the connector is completely loose, then separate the screen from the bottom half of the tablet

      • If the screen is not working correctly, you will need to replace the entire display assembly

      Frag FixBot

      Kommentar hinzufügen

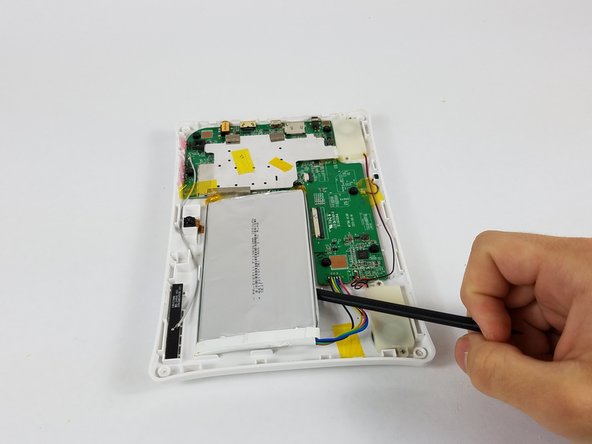
    1. Nabi 2 Motherboard Replacement, Battery: Schritt 6, Bild 1 von 3 Nabi 2 Motherboard Replacement, Battery: Schritt 6, Bild 2 von 3 Nabi 2 Motherboard Replacement, Battery: Schritt 6, Bild 3 von 3
      • Use the spudger to pop the battery out of place and set it aside.

      Frag FixBot

      Kommentar hinzufügen

    2. Nabi 2 Motherboard Replacement: Schritt 7, Bild 1 von 3 Nabi 2 Motherboard Replacement: Schritt 7, Bild 2 von 3 Nabi 2 Motherboard Replacement: Schritt 7, Bild 3 von 3
      • Desolder the battery connection and remove the battery completely

      • Note the color order for future replacemement

      Frag FixBot

      Kommentar hinzufügen

    1. Nabi 2 Motherboard Replacement, Internal Speakers: Schritt 8, Bild 1 von 1
      • Using the soldering iron, detach the speaker's wires from the circuit board.

      Frag FixBot

      Kommentar hinzufügen

    2. Nabi 2 Motherboard Replacement: Schritt 9, Bild 1 von 3 Nabi 2 Motherboard Replacement: Schritt 9, Bild 2 von 3 Nabi 2 Motherboard Replacement: Schritt 9, Bild 3 von 3
      • Using a Phillips PH 000 screwdriver, unscrew the two 3 mm Phillips #000 screws on each side of the speakers that hold the speakers in place.

      Frag FixBot

      Kommentar hinzufügen

    3. Nabi 2 Motherboard Replacement: Schritt 10, Bild 1 von 1
      • Once the screws have been removed, remove the speakers from the device.

      Frag FixBot

      Kommentar hinzufügen

    1. Nabi 2 Motherboard Replacement, Motherboard: Schritt 11, Bild 1 von 2 Nabi 2 Motherboard Replacement, Motherboard: Schritt 11, Bild 2 von 2
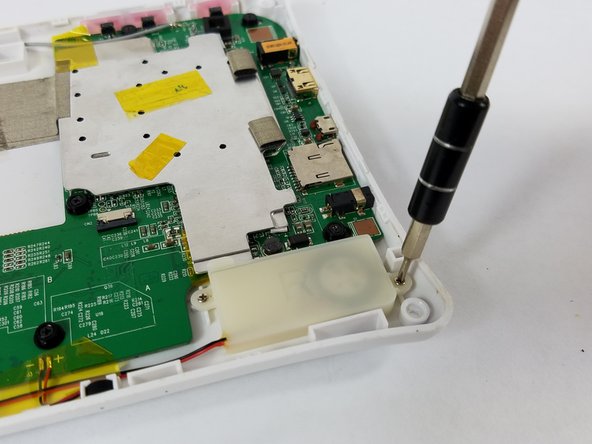
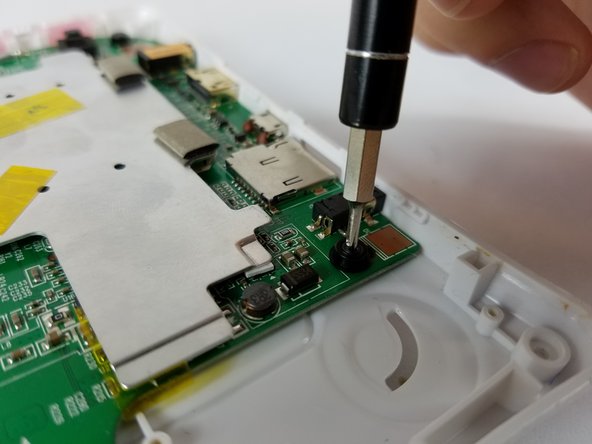
      • Remove the seven 4 mm Phillips #000 screws with a PH#000 screwdriver

      Frag FixBot

      Kommentar hinzufügen

    2. Nabi 2 Motherboard Replacement: Schritt 12, Bild 1 von 3 Nabi 2 Motherboard Replacement: Schritt 12, Bild 2 von 3 Nabi 2 Motherboard Replacement: Schritt 12, Bild 3 von 3
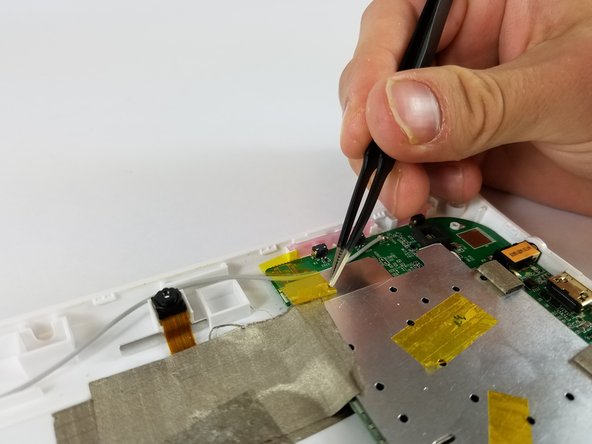
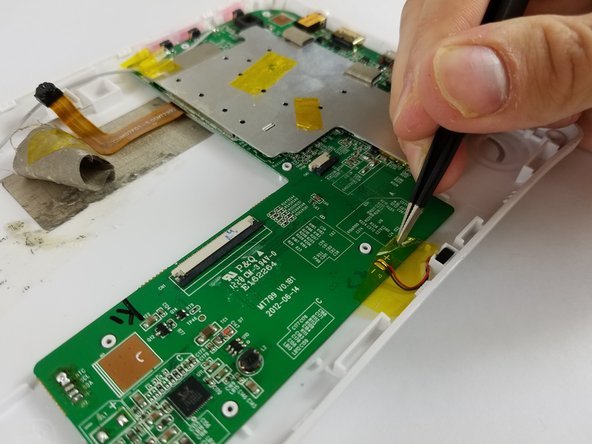
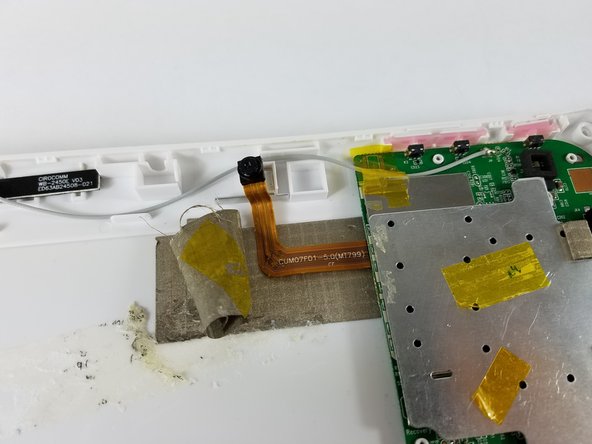
      • Remove the tape that is attaching the motherboard to the plastic casing

      Frag FixBot

      Kommentar hinzufügen

    3. Nabi 2 Motherboard Replacement: Schritt 13, Bild 1 von 3 Nabi 2 Motherboard Replacement: Schritt 13, Bild 2 von 3 Nabi 2 Motherboard Replacement: Schritt 13, Bild 3 von 3
      • Remove the motherboard by lifting from the area indicated

      Frag FixBot

      Kommentar hinzufügen

Abschluss

To reassemble your device, follow these instructions in reverse order.

Rückgängig: Ich habe diese Anleitung nicht absolviert.

Eine weitere Person hat diese Anleitung absolviert.

Team

USF Tampa, Team 4-3, Lacy Spring 2016 Mitglied von USF Tampa, Team 4-3, Lacy Spring 2016

USFT-LACY-S16S4G3

4 Mitglieder

84 Anleitungen geschrieben

0 Kommentare zur Anleitung

Kommentar hinzufügen

Seitenaufrufe:

Letzte 24 Stunden: 2

Letzte 7 Tage: 17

Letzte 30 Tage: 64

Insgesamt: 1,640