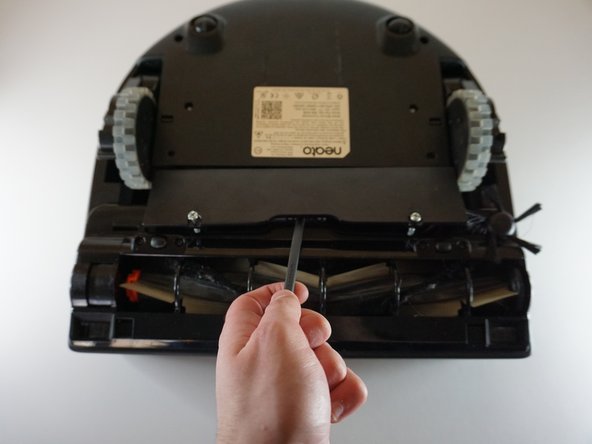
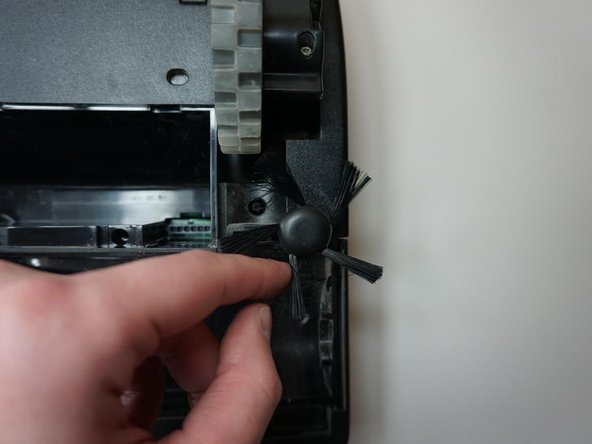
Zum Hauptinhalt wechseln

Neato BOTVAC CONNECTED Side Wheel Replacement

Was du brauchst

  1. Neato BOTVAC CONNECTED Side Wheel Replacement, Battery: Schritt 1, Bild 1 von 1
    • Place the top of the Neato Botvac Connected against a flat surface.

  2. Neato BOTVAC CONNECTED Side Wheel Replacement: Schritt 2, Bild 1 von 2 Neato BOTVAC CONNECTED Side Wheel Replacement: Schritt 2, Bild 2 von 2
    • Remove the two 5.5 mm screws with a Phillips #2 screwdriver.

  3. Neato BOTVAC CONNECTED Side Wheel Replacement: Schritt 3, Bild 1 von 2 Neato BOTVAC CONNECTED Side Wheel Replacement: Schritt 3, Bild 2 von 2
    • Using the spudger, remove the panel covering the battery.

  4. Neato BOTVAC CONNECTED Side Wheel Replacement: Schritt 4, Bild 1 von 3 Neato BOTVAC CONNECTED Side Wheel Replacement: Schritt 4, Bild 2 von 3 Neato BOTVAC CONNECTED Side Wheel Replacement: Schritt 4, Bild 3 von 3
    • Gently remove the connecting wires attached to the battery.

    • The wires are attached to the vacuum through a clip.

  5. Neato BOTVAC CONNECTED Side Wheel Replacement: Schritt 5, Bild 1 von 1
    • Using the spudger, gently remove the battery from the device.

  6. Neato BOTVAC CONNECTED Side Wheel Replacement, Front Roller Brush: Schritt 6, Bild 1 von 2 Neato BOTVAC CONNECTED Side Wheel Replacement, Front Roller Brush: Schritt 6, Bild 2 von 2
    • Remove the following screws with a Torx screwdriver:

    • Four 2.3 mm screws.

  7. Neato BOTVAC CONNECTED Side Wheel Replacement: Schritt 7, Bild 1 von 1
    • Gently remove the thin panel held by the four screws with a spudger.

  8. Neato BOTVAC CONNECTED Side Wheel Replacement: Schritt 8, Bild 1 von 1
    • Gently remove the two small wheels, and the axles attached to them.

  9. Neato BOTVAC CONNECTED Side Wheel Replacement: Schritt 9, Bild 1 von 1
    • Gently remove the panel that is on top of the front roller with the spudger.

  10. Neato BOTVAC CONNECTED Side Wheel Replacement: Schritt 10, Bild 1 von 1
    • Gently remove the front brush.

  11. Neato BOTVAC CONNECTED Side Wheel Replacement, Side Brush: Schritt 11, Bild 1 von 2 Neato BOTVAC CONNECTED Side Wheel Replacement, Side Brush: Schritt 11, Bild 2 von 2
    • Gently twist the side brush back and forth.

  12. Neato BOTVAC CONNECTED Side Wheel Replacement: Schritt 12, Bild 1 von 3 Neato BOTVAC CONNECTED Side Wheel Replacement: Schritt 12, Bild 2 von 3 Neato BOTVAC CONNECTED Side Wheel Replacement: Schritt 12, Bild 3 von 3
    • Spin the side brush counter counterclockwise.

  13. Neato BOTVAC CONNECTED Side Wheel Replacement: Schritt 13, Bild 1 von 1
    • Use the spudger to gently pry up and remove the side brush.

  14. Neato BOTVAC CONNECTED Side Wheel Replacement, Filter: Schritt 14, Bild 1 von 1
    • Flip the cleaner around and locate the front panel.

  15. Neato BOTVAC CONNECTED Side Wheel Replacement: Schritt 15, Bild 1 von 1
    • Gently remove the front panel by opening it with a spudger.

  16. Neato BOTVAC CONNECTED Side Wheel Replacement: Schritt 16, Bild 1 von 2 Neato BOTVAC CONNECTED Side Wheel Replacement: Schritt 16, Bild 2 von 2
    • Use the spudger to gently remove the paper filter.

  17. Neato BOTVAC CONNECTED Side Wheel Replacement, Side Wheel: Schritt 17, Bild 1 von 1
    • Remove the following screws with a TR10 Torx screwdriver:

    • Six 2.3 mm screws.

  18. Neato BOTVAC CONNECTED Side Wheel Replacement: Schritt 18, Bild 1 von 2 Neato BOTVAC CONNECTED Side Wheel Replacement: Schritt 18, Bild 2 von 2
    • Remove the front bumper by pulling it horizontally on each side.

  19. Neato BOTVAC CONNECTED Side Wheel Replacement: Schritt 19, Bild 1 von 1
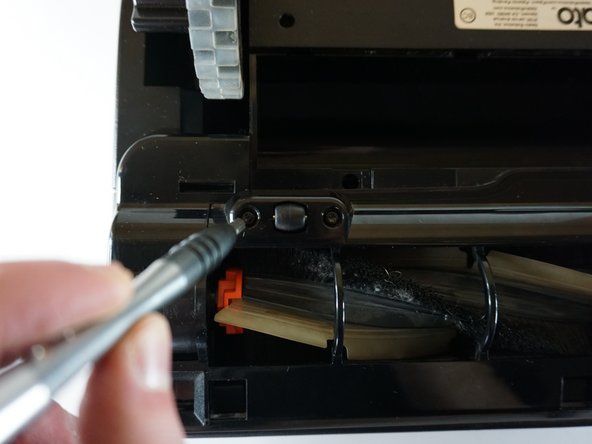
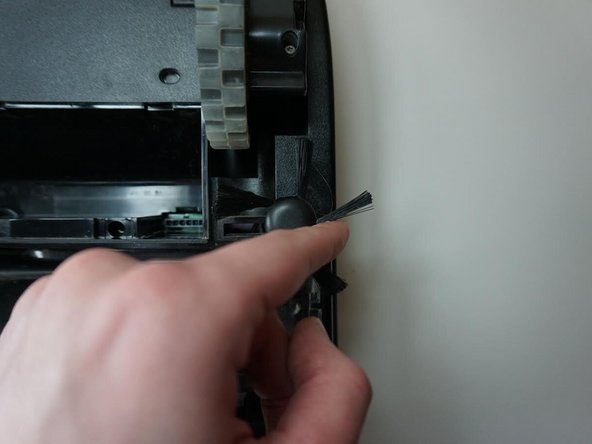
    • Remove the screw that is directly attached to the wheel on the side using a Phillips #2 screwdriver.

  20. Neato BOTVAC CONNECTED Side Wheel Replacement: Schritt 20, Bild 1 von 1
    • Remove the two 2.3 mm screws on the front of the vacuum with a TR10 Torx screwdriver.

  21. Neato BOTVAC CONNECTED Side Wheel Replacement: Schritt 21, Bild 1 von 1
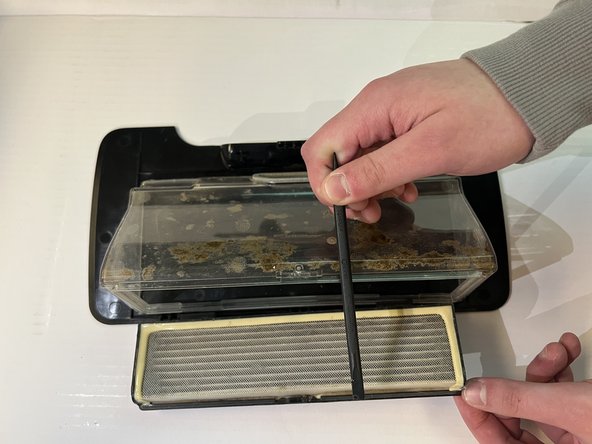
    • Remove the layer below the front bumper by pressing firmly on the two levers located nearby.

  22. Neato BOTVAC CONNECTED Side Wheel Replacement: Schritt 22, Bild 1 von 3 Neato BOTVAC CONNECTED Side Wheel Replacement: Schritt 22, Bild 2 von 3 Neato BOTVAC CONNECTED Side Wheel Replacement: Schritt 22, Bild 3 von 3
    • Gently take out the top panel, and take out the connecting wires.

  23. Neato BOTVAC CONNECTED Side Wheel Replacement: Schritt 23, Bild 1 von 1
    • Remove the following screws with a TR10 Torx screwdriver:

    • Two 2.3 mm screws.

  24. Neato BOTVAC CONNECTED Side Wheel Replacement: Schritt 24, Bild 1 von 1
    • Flip around the vacuum and remove the wheel with the spudger.

Abschluss

To reassemble your device, follow these instructions in reverse order.

Eine weitere Person hat diese Anleitung absolviert.

Justin Silva

Mitglied seit: 03/20/23

645 Reputation

5 Anleitungen geschrieben

Team

UMass Dartmouth, Team 6-3, Botvin Spring 2023 Mitglied von UMass Dartmouth, Team 6-3, Botvin Spring 2023

UMASSD-BOTVIN-S23S6G3

4 Mitglieder

5 Anleitungen geschrieben

0 Kommentare

Kommentar hinzufügen

Seitenaufrufe:

Letzte 24 Stunden: 0

Letzte 7 Tage: 2

Letzte 30 Tage: 21

Insgesamt: 279