Diese Version enthält möglicherweise inkorrekte Änderungen. Wechsle zur letzten geprüften Version.
Was du brauchst
-
Dieser Schritt ist noch nicht übersetzt. Hilf mit, ihn zu übersetzen!
-
Be sure that the rifle is discharged and unloaded before starting disassembly.
-
-
Dieser Schritt ist noch nicht übersetzt. Hilf mit, ihn zu übersetzen!
-
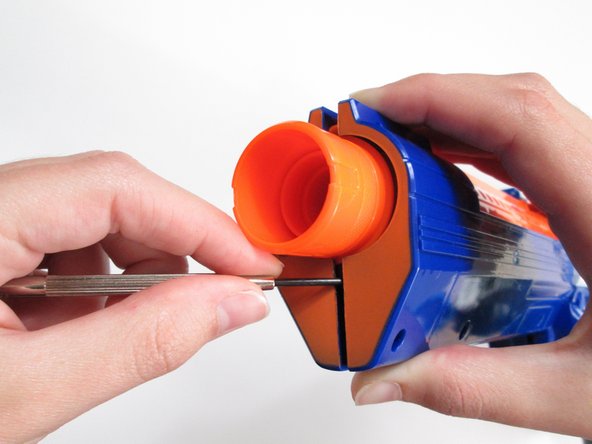
Looking from the rear of the rifle, remove the two 10 mm phillips screws holding the orange cap to the butt of the rifle.
-
Pull off the orange cap.
-
-
Dieser Schritt ist noch nicht übersetzt. Hilf mit, ihn zu übersetzen!
-
With the rifle barrel pointing left, remove the two 8mm phillips screws holding the slide mechanism together.
-
Remove the three 10 mm phillips screws from the bottom of the slide mechanism.
-
Separate and remove the two halves of the slide mechanism.
-
-
-
Dieser Schritt ist noch nicht übersetzt. Hilf mit, ihn zu übersetzen!
-
Again with the rifle barrel pointing left, remove the fourteen 10 mm phillips screws from the main body of the rifle.
-
Remove the two 5 mm phillips screws from the main body.
-
Remove the two 8 mm phillips screws from the main body.
-
-
Dieser Schritt ist noch nicht übersetzt. Hilf mit, ihn zu übersetzen!
-
Pull the two halves of the rifle apart.
-
Remove the access gate and barrel cover.
-
-
Dieser Schritt ist noch nicht übersetzt. Hilf mit, ihn zu übersetzen!
-
You should now be able to pull the main firing spring from the rear of the rifle.
-
-
Dieser Schritt ist noch nicht übersetzt. Hilf mit, ihn zu übersetzen!
-
Slide the plunger lock rearwards and towards yourself to lift it out.
-
-
Dieser Schritt ist noch nicht übersetzt. Hilf mit, ihn zu übersetzen!
-
Pull the plunger towards the rear of the rifle to remove it.
-


Team

Cal Poly, Team 10-35, Maness Winter 2014 Mitglied von Cal Poly, Team 10-35, Maness Winter 2014
CPSU-MANESS-W14S10G35
4 Mitglieder
5 Anleitungen geschrieben