Diese Anleitung enthält neuere Änderungen. Wechsel zur neuesten unüberprüften Version.
Einleitung
Use this guide to detach the damaged left shell so you'll be able to replace it with an undamaged shell. This guide can also be used with the 5 other Nerf N-Strike Elite Hail-Fire guides to replace other parts.
Was du brauchst
-
-
Remove the two 9.0 mm Phillips screws securing the battery compartment.
-
Slide the battery compartment out.
-
-
-
Remove the single 11.0 mm Phillips screw securing the magazine cartridge chambers.
-
Pull the entire chamber upwards to separate it from the rest of the Nerf Gun.
-
-
-
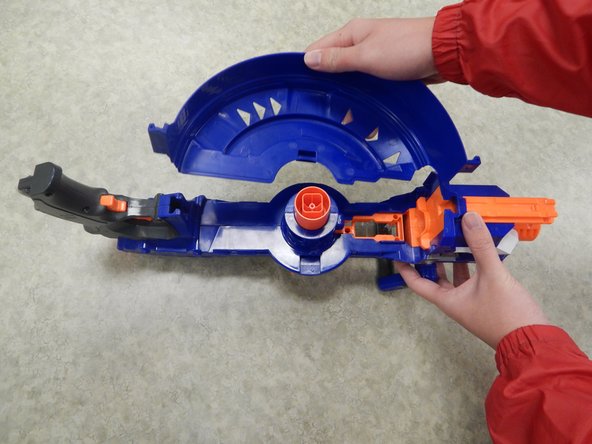
Remove both halves of the ring by tugging on it upwards until the lock gets freed.
-
-
-
-
Remove the three 9.0 mm Phillips screws holding the top latch of the Nerf Gun together.
-
-
-
Remove the three 9.0 mm Phillips screws holding together the firing chamber.
-
Remove the single 7.0 mm Phillips screw below the barrel.
-
Remove the two 14.0 mm Philips screws using a screwdriver with a length of approximately 4.0 inches and a diameter of approximately 0.2 cm.
-
-
-
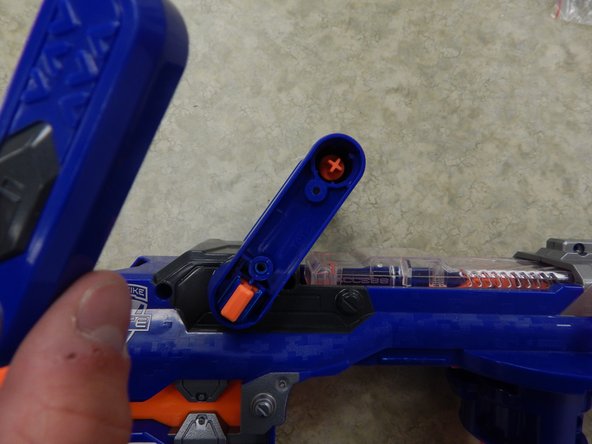
Remove the single 14.0 mm Phillips screw holding together the handle and the Nerf Gun.
-
-
-
Remove the two 9.0 mm Phillips screws holding together the handle.
-
Remove the plastic cover of the handle.
-
-
-
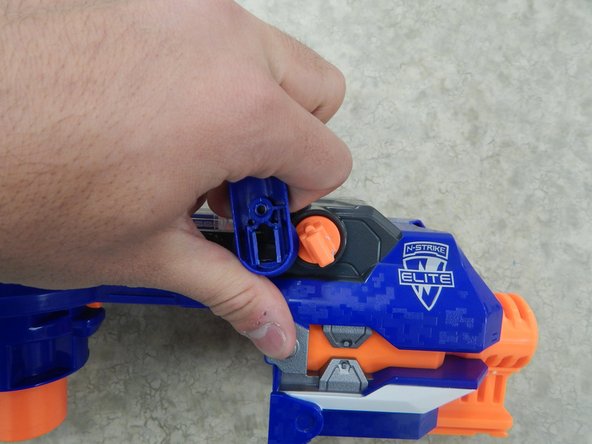
Insert one plastic opening tool inside one side of the orange part depicted in the picture.
-
Insert a second plastic opening tool to the other side of the orange part and gradually pull the piece out, freeing it from the handle.
-
-
-
Pull one end of the handle away from the orange latch.
-
Repeat the procedure on the other side to completely remove the handle from the rest of the Nerf Gun.
-


To reassemble your device, follow these instructions in reverse order.
To reassemble your device, follow these instructions in reverse order.
Rückgängig: Ich habe diese Anleitung nicht absolviert.
Ein:e weitere:r Nutzer:in hat diese Anleitung absolviert.
Team

Cal Poly, Team 13-13, Regan Winter 2014 Mitglied von Cal Poly, Team 13-13, Regan Winter 2014
CPSU-REGAN-W14S13G13
4 Mitglieder
7 Anleitungen geschrieben