Zum Hauptinhalt wechseln

Nerf N-Strike Elite Hail-Fire Trigger Circuit Board Replacement

Was du brauchst

  1. Nerf N-Strike Elite Hail-Fire Trigger Circuit Board Replacement, Left Shell: Schritt 1, Bild 1 von 3 Nerf N-Strike Elite Hail-Fire Trigger Circuit Board Replacement, Left Shell: Schritt 1, Bild 2 von 3 Nerf N-Strike Elite Hail-Fire Trigger Circuit Board Replacement, Left Shell: Schritt 1, Bild 3 von 3
    • Before disassembling your Nerf Hail-Fire, be sure to remove the batteries.

    • Remove the two 9.0 mm Phillips screws securing the battery compartment.

    • Slide the battery compartment out.

  2. Nerf N-Strike Elite Hail-Fire Trigger Circuit Board Replacement: Schritt 2, Bild 1 von 1
    • Remove the five 9.0 mm Phillips screws securing the trigger.

  3. Nerf N-Strike Elite Hail-Fire Trigger Circuit Board Replacement: Schritt 3, Bild 1 von 2 Nerf N-Strike Elite Hail-Fire Trigger Circuit Board Replacement: Schritt 3, Bild 2 von 2
    • Remove the single 11.0 mm Phillips screw securing the magazine cartridge chambers.

    • Pull the entire chamber upwards to separate it from the rest of the Nerf Gun.

  4. Nerf N-Strike Elite Hail-Fire Trigger Circuit Board Replacement: Schritt 4, Bild 1 von 3 Nerf N-Strike Elite Hail-Fire Trigger Circuit Board Replacement: Schritt 4, Bild 2 von 3 Nerf N-Strike Elite Hail-Fire Trigger Circuit Board Replacement: Schritt 4, Bild 3 von 3
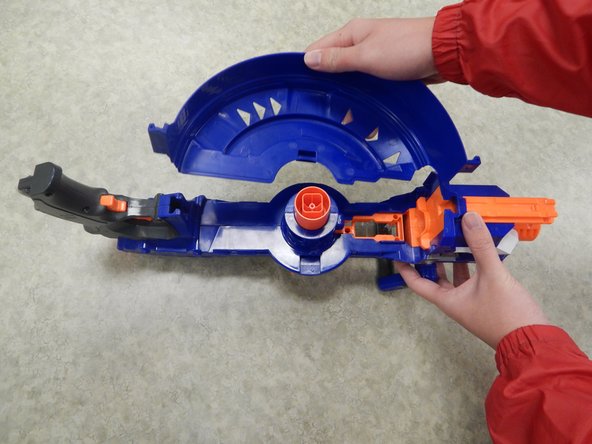
    • Remove both halves of the ring by tugging on it upwards until the lock gets freed.

    • This requires quite a bit of force and if you are not careful, you may break the plastic lock.

  5. Nerf N-Strike Elite Hail-Fire Trigger Circuit Board Replacement: Schritt 5, Bild 1 von 1
    • Remove the four 9.0 mm Phillips screws from the newly revealed cylinder.

  6. Nerf N-Strike Elite Hail-Fire Trigger Circuit Board Replacement: Schritt 6, Bild 1 von 1
    • Remove the three 9.0 mm Phillips screws holding the top latch of the Nerf Gun together.

  7. Nerf N-Strike Elite Hail-Fire Trigger Circuit Board Replacement: Schritt 7, Bild 1 von 1
    • Remove the three 9.0 mm Phillips screws holding together the firing chamber.

    • Remove the single 7.0 mm Phillips screw below the barrel.

    • Remove the two 14.0 mm Philips screws using a screwdriver with a length of approximately 4.0 inches and a diameter of approximately 0.2 cm.

  8. Nerf N-Strike Elite Hail-Fire Trigger Circuit Board Replacement: Schritt 8, Bild 1 von 1
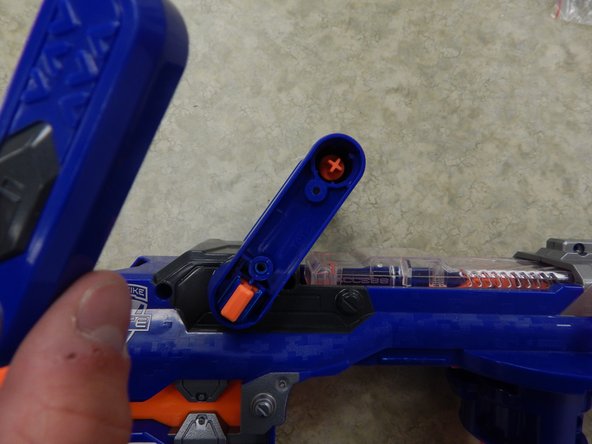
    • Remove the single 14.0 mm Phillips screw holding together the handle and the Nerf Gun.

  9. Nerf N-Strike Elite Hail-Fire Trigger Circuit Board Replacement: Schritt 9, Bild 1 von 2 Nerf N-Strike Elite Hail-Fire Trigger Circuit Board Replacement: Schritt 9, Bild 2 von 2
    • Remove the two 9.0 mm Phillips screws holding together the handle.

    • Remove the plastic cover of the handle.

  10. Nerf N-Strike Elite Hail-Fire Trigger Circuit Board Replacement: Schritt 10, Bild 1 von 2 Nerf N-Strike Elite Hail-Fire Trigger Circuit Board Replacement: Schritt 10, Bild 2 von 2
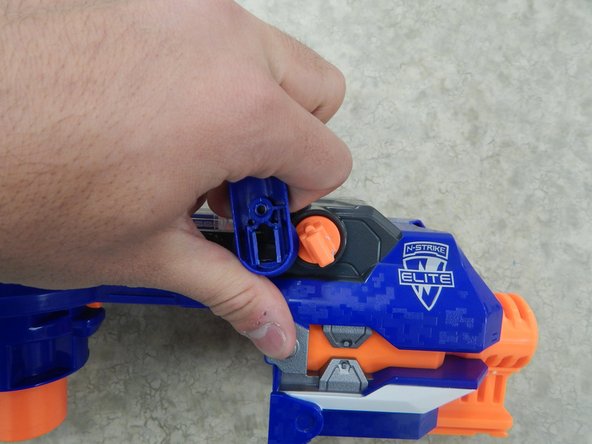
    • Insert one plastic opening tool inside one side of the orange part depicted in the picture.

    • Insert a second plastic opening tool to the other side of the orange part and gradually pull the piece out, freeing it from the handle.

  11. Nerf N-Strike Elite Hail-Fire Trigger Circuit Board Replacement: Schritt 11, Bild 1 von 3 Nerf N-Strike Elite Hail-Fire Trigger Circuit Board Replacement: Schritt 11, Bild 2 von 3 Nerf N-Strike Elite Hail-Fire Trigger Circuit Board Replacement: Schritt 11, Bild 3 von 3
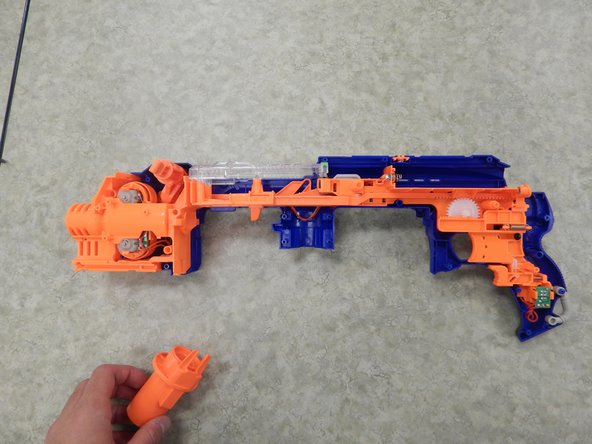
    • Pull one end of the handle away from the orange latch.

    • Repeat the procedure on the other side to completely remove the handle from the rest of the Nerf Gun.

  12. Nerf N-Strike Elite Hail-Fire Trigger Circuit Board Replacement: Schritt 12, Bild 1 von 3 Nerf N-Strike Elite Hail-Fire Trigger Circuit Board Replacement: Schritt 12, Bild 2 von 3 Nerf N-Strike Elite Hail-Fire Trigger Circuit Board Replacement: Schritt 12, Bild 3 von 3
    • Lift the entire left shell slowly. The process should be easy and if there is any resistance, there is something wrong. You may have forgotten a screw.

    • Completely remove the left shell from the rest of the Nerf Gun.

  13. Nerf N-Strike Elite Hail-Fire Trigger Circuit Board Replacement, Inner Plastic Components: Schritt 13, Bild 1 von 3 Nerf N-Strike Elite Hail-Fire Trigger Circuit Board Replacement, Inner Plastic Components: Schritt 13, Bild 2 von 3 Nerf N-Strike Elite Hail-Fire Trigger Circuit Board Replacement, Inner Plastic Components: Schritt 13, Bild 3 von 3
    • Remove the cartridge support.

  14. Nerf N-Strike Elite Hail-Fire Trigger Circuit Board Replacement: Schritt 14, Bild 1 von 3 Nerf N-Strike Elite Hail-Fire Trigger Circuit Board Replacement: Schritt 14, Bild 2 von 3 Nerf N-Strike Elite Hail-Fire Trigger Circuit Board Replacement: Schritt 14, Bild 3 von 3
    • Remove the handle crank.

  15. Nerf N-Strike Elite Hail-Fire Trigger Circuit Board Replacement: Schritt 15, Bild 1 von 2 Nerf N-Strike Elite Hail-Fire Trigger Circuit Board Replacement: Schritt 15, Bild 2 von 2
    • Remove the clear plastic barrel cover.

  16. Nerf N-Strike Elite Hail-Fire Trigger Circuit Board Replacement: Schritt 16, Bild 1 von 2 Nerf N-Strike Elite Hail-Fire Trigger Circuit Board Replacement: Schritt 16, Bild 2 von 2
    • Remove the firing pin.

  17. Nerf N-Strike Elite Hail-Fire Trigger Circuit Board Replacement, Right Shell: Schritt 17, Bild 1 von 2 Nerf N-Strike Elite Hail-Fire Trigger Circuit Board Replacement, Right Shell: Schritt 17, Bild 2 von 2
    • Lift the trigger mechanism out of the shell.

    • You cannot fully remove the trigger mechanism just yet. However taking it out of the shell helps in later steps.

  18. Nerf N-Strike Elite Hail-Fire Trigger Circuit Board Replacement: Schritt 18, Bild 1 von 3 Nerf N-Strike Elite Hail-Fire Trigger Circuit Board Replacement: Schritt 18, Bild 2 von 3 Nerf N-Strike Elite Hail-Fire Trigger Circuit Board Replacement: Schritt 18, Bild 3 von 3
    • Remove the two 9.0 mm Phillips screws.

  19. Nerf N-Strike Elite Hail-Fire Trigger Circuit Board Replacement: Schritt 19, Bild 1 von 3 Nerf N-Strike Elite Hail-Fire Trigger Circuit Board Replacement: Schritt 19, Bild 2 von 3 Nerf N-Strike Elite Hail-Fire Trigger Circuit Board Replacement: Schritt 19, Bild 3 von 3
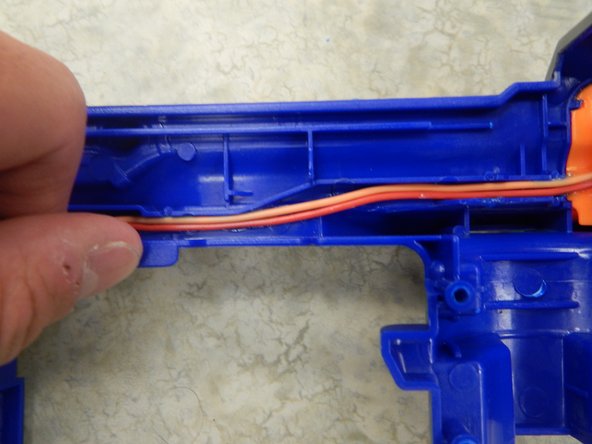
    • To remove the motor and trigger mechanism you have to detach these two wires which are glued to the shell.

    • Hold close to the wire and pull upward slowly.

    • If you pull too quickly you can potentially damage the wire.

  20. Nerf N-Strike Elite Hail-Fire Trigger Circuit Board Replacement: Schritt 20, Bild 1 von 2 Nerf N-Strike Elite Hail-Fire Trigger Circuit Board Replacement: Schritt 20, Bild 2 von 2
    • Once all the pieces are removed the right shell should be fully accessible.

  21. Nerf N-Strike Elite Hail-Fire Trigger Circuit Board Replacement, Trigger Circuit Board: Schritt 21, Bild 1 von 1
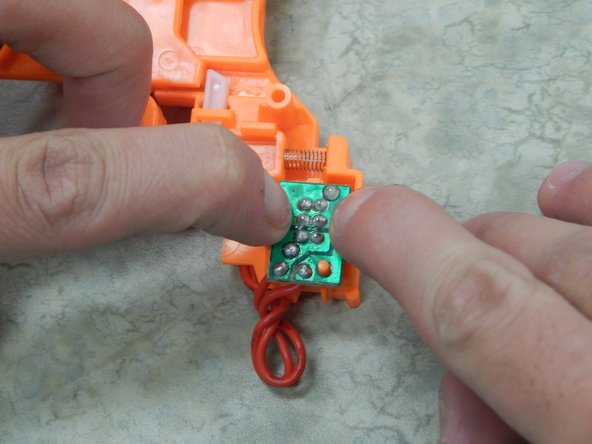
    • Once you have the handle disassembled locate the triggering circuit board.

  22. Nerf N-Strike Elite Hail-Fire Trigger Circuit Board Replacement: Schritt 22, Bild 1 von 3 Nerf N-Strike Elite Hail-Fire Trigger Circuit Board Replacement: Schritt 22, Bild 2 von 3 Nerf N-Strike Elite Hail-Fire Trigger Circuit Board Replacement: Schritt 22, Bild 3 von 3
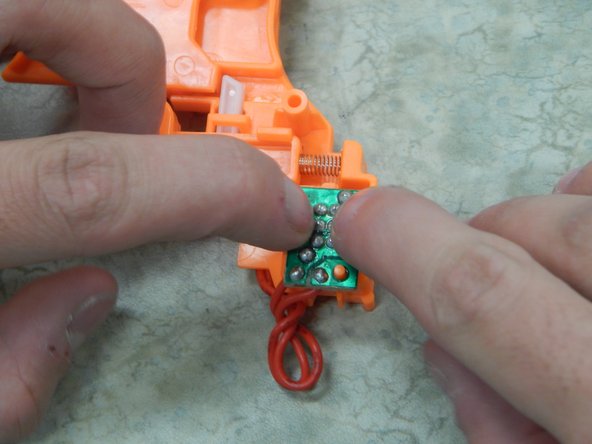
    • Find the two plastic clasps and position your hands so you can pry them open with your fingers. We recommend that you try and pry them open without removing the piece so you can feel how fragile the plastic is.

  23. Nerf N-Strike Elite Hail-Fire Trigger Circuit Board Replacement: Schritt 23, Bild 1 von 2 Nerf N-Strike Elite Hail-Fire Trigger Circuit Board Replacement: Schritt 23, Bild 2 von 2
    • The circuit board has sharp metal solder points on it. If your finger slips you could injure yourself. Consider using gloves.

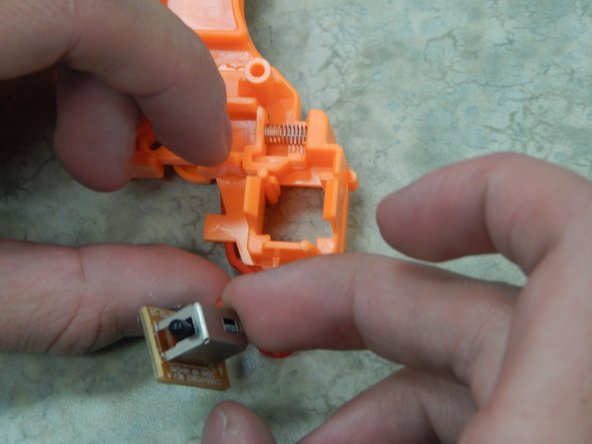
    • To remove use two fingers to pry the plastic edges apart and with your thumbs remove the circuit board. Having a friend help with this step could be beneficial.

Abschluss

To reassemble your device, follow these instructions in reverse order.

Ein:e weitere:r Nutzer:in hat diese Anleitung absolviert.

sage

Mitglied seit: 01/24/14

301 Reputation

3 Anleitungen geschrieben

Team

Cal Poly, Team 13-13, Regan Winter 2014 Mitglied von Cal Poly, Team 13-13, Regan Winter 2014

CPSU-REGAN-W14S13G13

4 Mitglieder

7 Anleitungen geschrieben

Ein Kommentar

Hi, my Trigger circuit board has a white build up on it.

im not sure if this is a sign of a fried circuit, but my gun won’t rev up. Is there anything I can do?

its located in one of the 6 little metal sauter marks in the middle of it.

Drunpublished - Antwort

Kommentar hinzufügen

Seitenaufrufe:

Letzte 24 Stunden: 0

Letzte 7 Tage: 0

Letzte 30 Tage: 1

Insgesamt: 1,160