Diese Version enthält möglicherweise inkorrekte Änderungen. Wechsle zur letzten geprüften Version.
Was du brauchst
-
Dieser Schritt ist noch nicht übersetzt. Hilf mit, ihn zu übersetzen!
-
Using a screwdriver, carefully unscrew the three #00 1 cm Phillips screws holding the two slide pieces together.
-
-
Dieser Schritt ist noch nicht übersetzt. Hilf mit, ihn zu übersetzen!
-
Lift both slide pieces off of the gun.
-
-
Dieser Schritt ist noch nicht übersetzt. Hilf mit, ihn zu übersetzen!
-
Remove the twelve #00 1 cm Phillips screws.
-
Rotate the gun so that the front is facing you to remove the final screw.
-
-
-
Dieser Schritt ist noch nicht übersetzt. Hilf mit, ihn zu übersetzen!
-
Lift the outside cover off of the gun. Only the side where you removed the screws will come off.
-
-
Dieser Schritt ist noch nicht übersetzt. Hilf mit, ihn zu übersetzen!
-
Remove the seven #00 1 cm Phillips screws that attach the inner mechanism to the back cover.
-
Remove the #00 1.2 cm Phillips screw located to the right of the white casing.
-
-
Dieser Schritt ist noch nicht übersetzt. Hilf mit, ihn zu übersetzen!
-
Wiggle the front cover out from under the white piece and lift up from the gun.
-
-
Dieser Schritt ist noch nicht übersetzt. Hilf mit, ihn zu übersetzen!
-
Disconnect the inner mechanism from the outer cover by lifting the inner mechanism towards you.
-
-
Dieser Schritt ist noch nicht übersetzt. Hilf mit, ihn zu übersetzen!
-
Flip over the inner mechanism.
-
Remove the two #00 1 cm Phillips screws that hold the trigger in place.
-
-
Dieser Schritt ist noch nicht übersetzt. Hilf mit, ihn zu übersetzen!
-
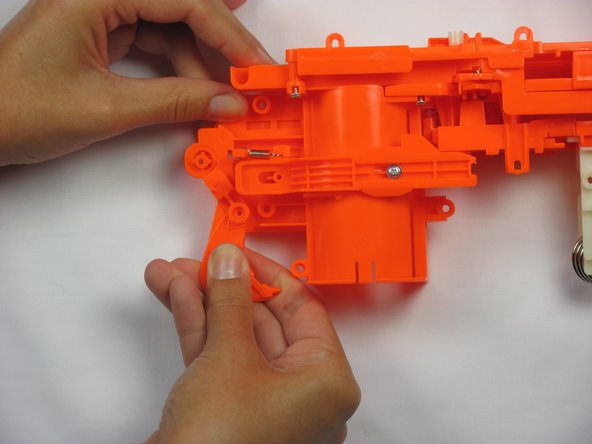
Slightly lift the area of the trigger that had the screw towards you, and rotate the trigger counter-clockwise.
-


Rückgängig: Ich habe diese Anleitung nicht absolviert.
5 weitere Nutzer:innen haben diese Anleitung absolviert.
Team

Cal Poly, Team 13-6, Forte Fall 2014 Mitglied von Cal Poly, Team 13-6, Forte Fall 2014
CPSU-FORTE-F14S13G6
5 Mitglieder
7 Anleitungen geschrieben