Diese Übersetzung enthält möglicherweise noch nicht die neuesten Änderungen der Original-Anleitung. Hilf mit, die Übersetzung zu aktualisieren oder sieh dir die Original-Anleitung an.
Einleitung
When replacing the base motherboard, removal from the wall is necessary and power to the thermostat must be turned off. The tools required are the blue opening tools, spudger, and a #0 Phillips screwdriver.
Was du brauchst
-
-
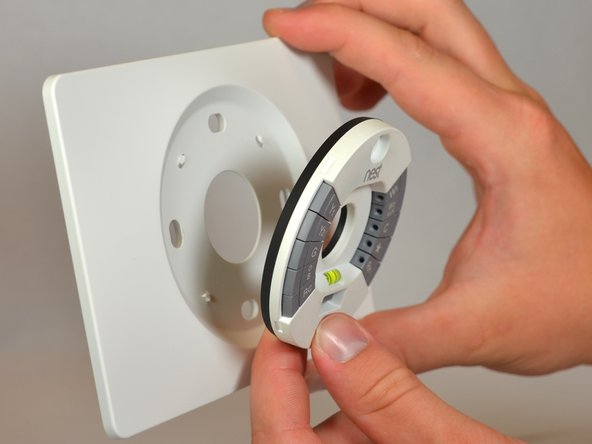
Fassen Sie den äußeren Metallring des Displays mit Ihren Fingern und ziehen Sie ihn direkt von der Wand weg, wobei Sie den Sockel zurücklassen.
-
-
-
Trennen Sie alle Drähte von den grauen Federkraftsteckern. Dies kann mit den Fingern erfolgen.
HOW do you disconnect the wires? I can't get them out!
Same here. It is like the springs are in a stuck position
I also can not dis-engage the wires. Feels like the springs are frozen closed.
Yes, the button on the end of the wires is stuck in the down position. Tried pushing with my fingers and several smaller tools- they appear to be frozen in the down position.
-
-
-
Entfernen Sie die beiden 40 mm Schrauben von dem/der Sockel/Basis des Thermostats mit einem Kreuzschlitzschraubendreher (Phillips #0).
-
-
-
-
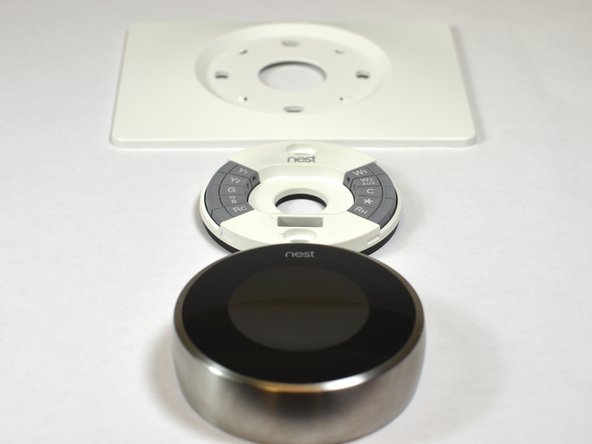
Lösen Sie den/die Sockel/Basis mit einem Öffnungswerkzeug aus Kunststoff von der Verkleidungsplatte (falls verwendet).
-
-
-
Drehen Sie den/die Sockel/Basis um.
-
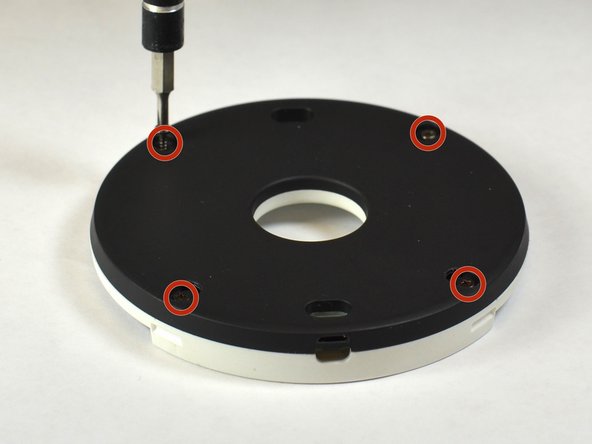
Entfernen Sie die vier 6 mm Schrauben von der Rückseite des/der Sockels/Basis mit einem Kreuzschlitzschraubendreher (Phillips #0).
-
-
-
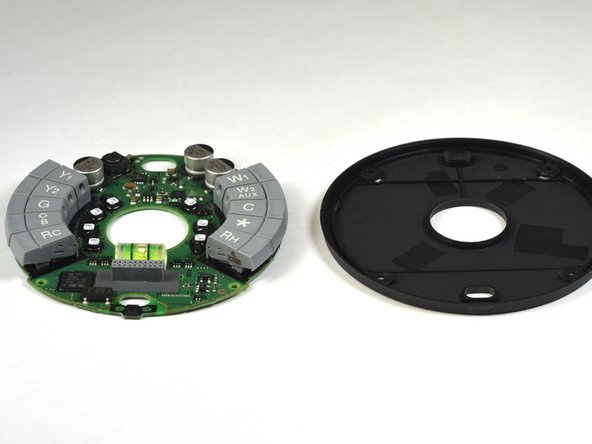
Öffnen Sie den/die Sockel/Basis mit einem Kunststoff-Öffnungswerkzeug von der Seite.
-
-
-
Hebeln Sie die Platine vorsichtig mit einem Plastik Werkzeug Heraus.
-


Befolgen Sie diese Anweisungen in umgekehrter Reihenfolge, um das Gerät wieder zusammenzubauen.
Befolgen Sie diese Anweisungen in umgekehrter Reihenfolge, um das Gerät wieder zusammenzubauen.
Rückgängig: Ich habe diese Anleitung nicht absolviert.
6 weitere Nutzer:innen haben diese Anleitung absolviert.
Besonderer Dank geht an diese Übersetzer:innen:
94%
Dario hilft uns, die Welt in Ordnung zu bringen! Wie kann ich mithelfen?
Hier starten ›

Team

USF Tampa, Team 11-5, Blackwell Fall 2014 Mitglied von USF Tampa, Team 11-5, Blackwell Fall 2014
USFT-BLACKWELL-F14S11G5
5 Mitglieder
12 Anleitungen geschrieben
8 Kommentare
Where can we purchase replacement parts?
i want the baseboard.. where i can buy? pls help...
I have no clue why people like their thermostats to the degree that they do.. I am both an A/c professional and an Engineer. They use what is called an SCR or silicon controlled rectifier for their switching instead of a tiny relay. An SCR is very sensitive to a spark or voltage spike. Yes the thermostat is pretty cool and has some nice features. It is advanced electronics but using SMC's or Surface Mounted Components?? . Maybe that would work well in a shielded component. But NOT in something that is connected to long external wires. The consumer bought warranty is only one year. I have seen too many issues in the field with their overpriced toys. Not having parts for this Chinese made thermostat? Priceless.
Hey Jon, I’m trying to repair my parent’s 2nd Gen Nest. It sends out “heat” and “cool” signal at the same time. Anyway I can replace a component on the motherboard?
Lizik -
Good post. Wish I had read before I got a Nest thermostat. What would you recommend as a good alternative? I hate when you can't replace simple components and parts cheaply and quickly. What the !&&*.