Einleitung
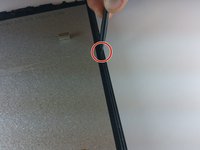
You need a thin tool to get the back cover off. If a plastic opening tool is not available, a guitar pick works just fine. Use caution when removing the back cover and inside parts.
Was du brauchst
-
-
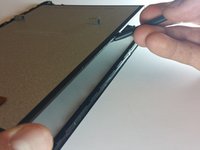
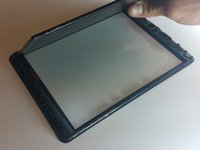
Use the plastic opening tool to remove the back cover. Carefully slide the tool between the front glass and back cover.
-
Slide the tool along the edge to work the back cover off.
-
-
-
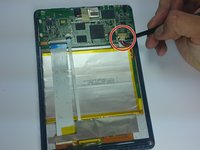
Remove the tape covering the motherboard.
-
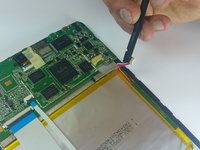
Remove the silver tape holding the white ribbon cables to the battery.
-
-
-
Use a spudger to carefully disconnect the battery connector from the motherboard.
Why the five wires when most batterys have 2-3. What do the five wires do. Thank you
-
-
In diesem Schritt verwendetes Werkzeug:Tweezers$4.99
-
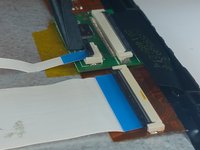
Use a spudger to lift up the black bar on the two ZIF connectors located above the battery.
-
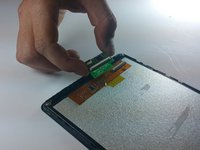
Pull the ribbon cables out of the connectors with tweezers or two fingers.
-
-
-
-
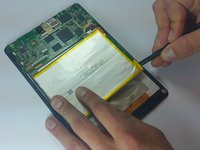
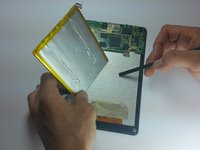
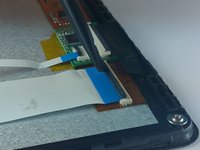
Using the flat end of a spudger, carefully work the spudger under the battery, lifting it off of the device.
Also some models have the battery glued down. You'll need to work on trying to pull up the glue work in a circle going around the edge of the battery it was tough you can damage your battery if you do not do this step carefully
What type of battery ? Watch battery?
-
-
In diesem Schritt verwendetes Werkzeug:Tweezers$4.99
-
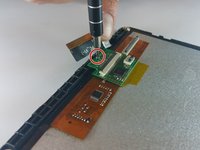
Use a spudger to lift up the black tabs on the three ZIF connectors.
-
Use ESD safe tweezers to pull the ribbon cables out of the three connectors.
-
-
-
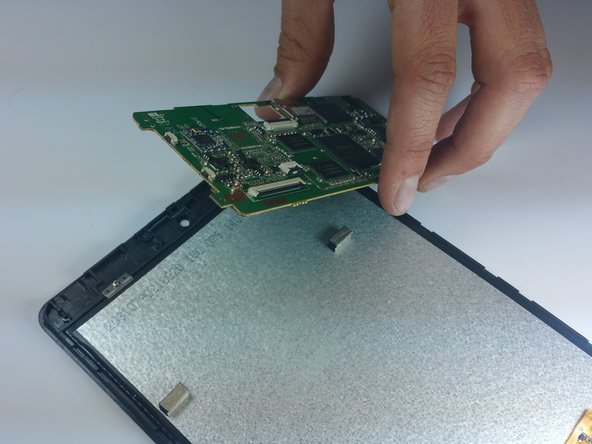
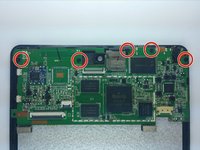
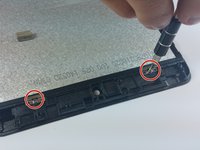
Remove the 5 black screws on the motherboard.
-
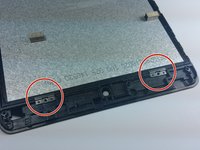
Carefully lift the motherboard off of the device and remove.
-
-
-
Remove the two screws that hold the brackets in place.
-
Remove the two silver brackets that hold the screen in place.
-
-
-
Remove the one silver screw on the small green circuit board at the bottom of the device.
-
Set aside the small circuit board for now.
-
-
-
With the device face down, use a spudger to lift the screen off of the glass from the right side.
-


To reassemble your device, follow these instructions in reverse order.
To reassemble your device, follow these instructions in reverse order.
Rückgängig: Ich habe diese Anleitung nicht absolviert.
21 weitere Personen haben diese Anleitung absolviert.

Team

Colorado Springs, Team 5-1, Panko Spring 2015 Mitglied von Colorado Springs, Team 5-1, Panko Spring 2015
UCCS-PANKO-S15S5G1
3 Mitglieder
10 Anleitungen geschrieben
Did this tablet have a speaker soldered onto the mainboard? I'm working on a Nextbook 8 NX785QC8G as well, and the first thing I saw was that there's a speaker held together with three screws and a bit of adhesive to the back cover and its cables are soldered onto the motherboard. I don't believe that I ruined them, but they do look a little loose.
Eliza Salazar - Antwort
The first Nextbook 8 model NX785QC8G tablet I bought, was from Walmart sometime mid summer 2014 AND it was running Jelly Bean. Battery lasted maybe 5 1/2 months; didn't realize tablet had 1 year warranty if I registered tablet with copy of receipt and have it fixed.
So, bought another Nextbook NX785QC8Gu several months later; this one came out running KitKat. I registered online and copied my receipt, which was uploaded to them. Still have had several problems with battery...ie.turning off before completely discharged, not charging in a reliable steady manner,and more. The Li-ion battery(what I thought it was), being 4,000 mAh, should be more than enough to last quite a long time....No web surfing, d.loading or game playing...just YouTube video watching. Can this battery be changed out? The first nextbook the battery quit in, I took it apart - the battery was glued & the speaker wires were attached just as you described.
stephanieethall - Antwort
Start on the side opposite the Power and Volume controls. And try not to push the Power and Volume controls on whatever surface you’re using to stabilize/hold the tablet during removal of the back cover. Otherwise you will turn the tablet ON, or get it into DNX Mode.
Tim Tillotson - Antwort